Continuing from part one where I discussed the reasons for wanting to upgrade the brakes and the disassembly process we’ll now go over the parts of the kit and the installation of it.
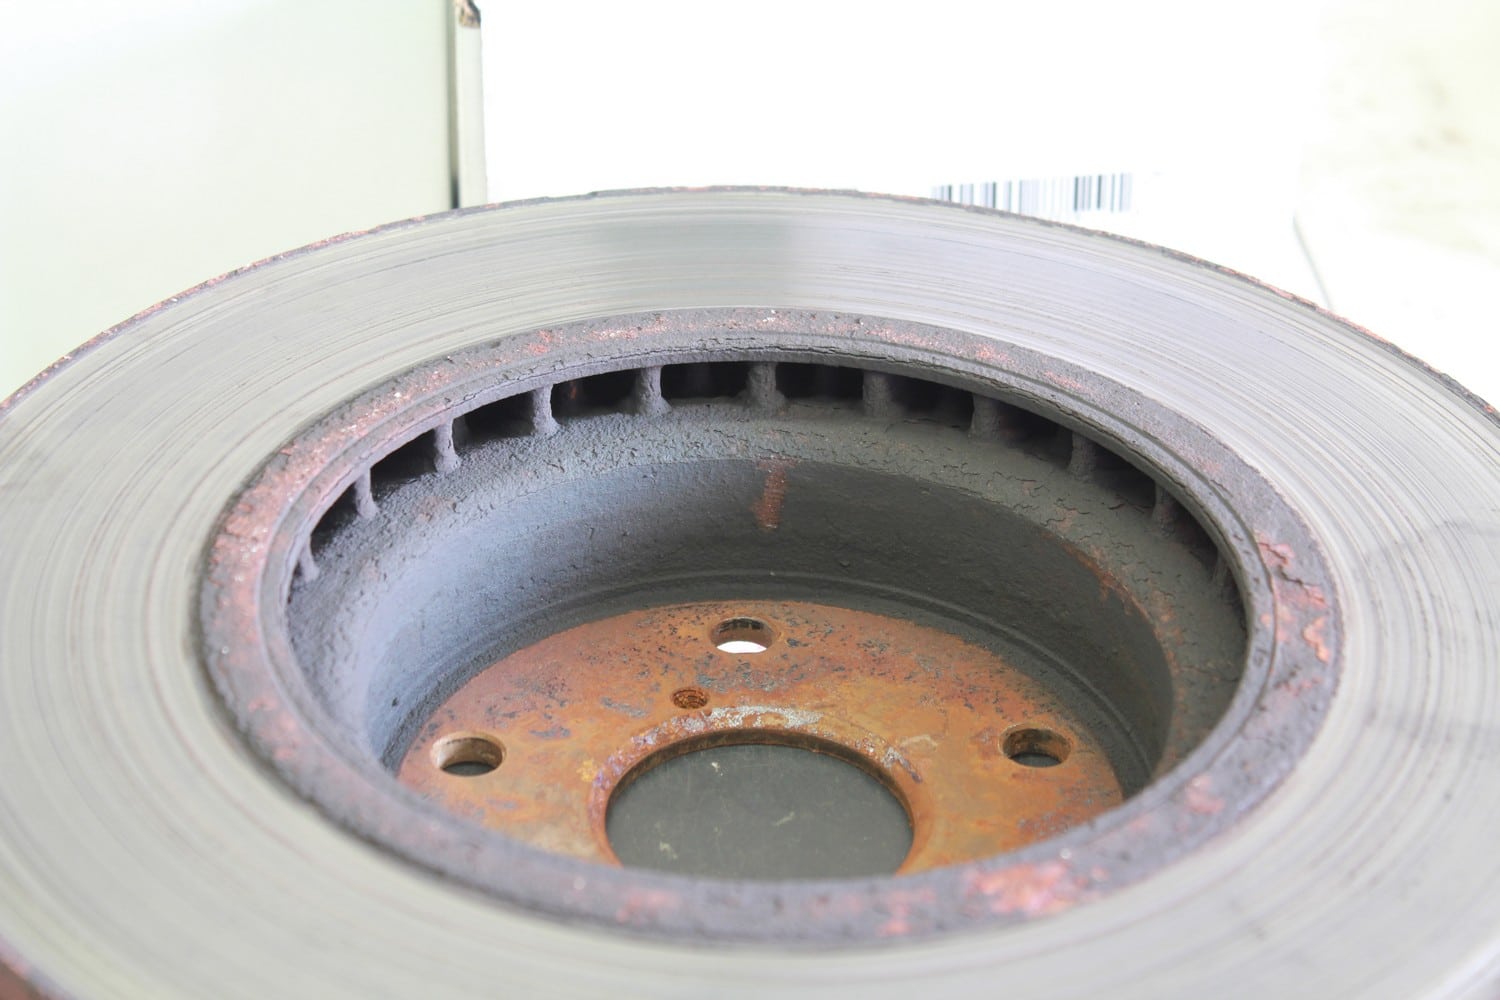
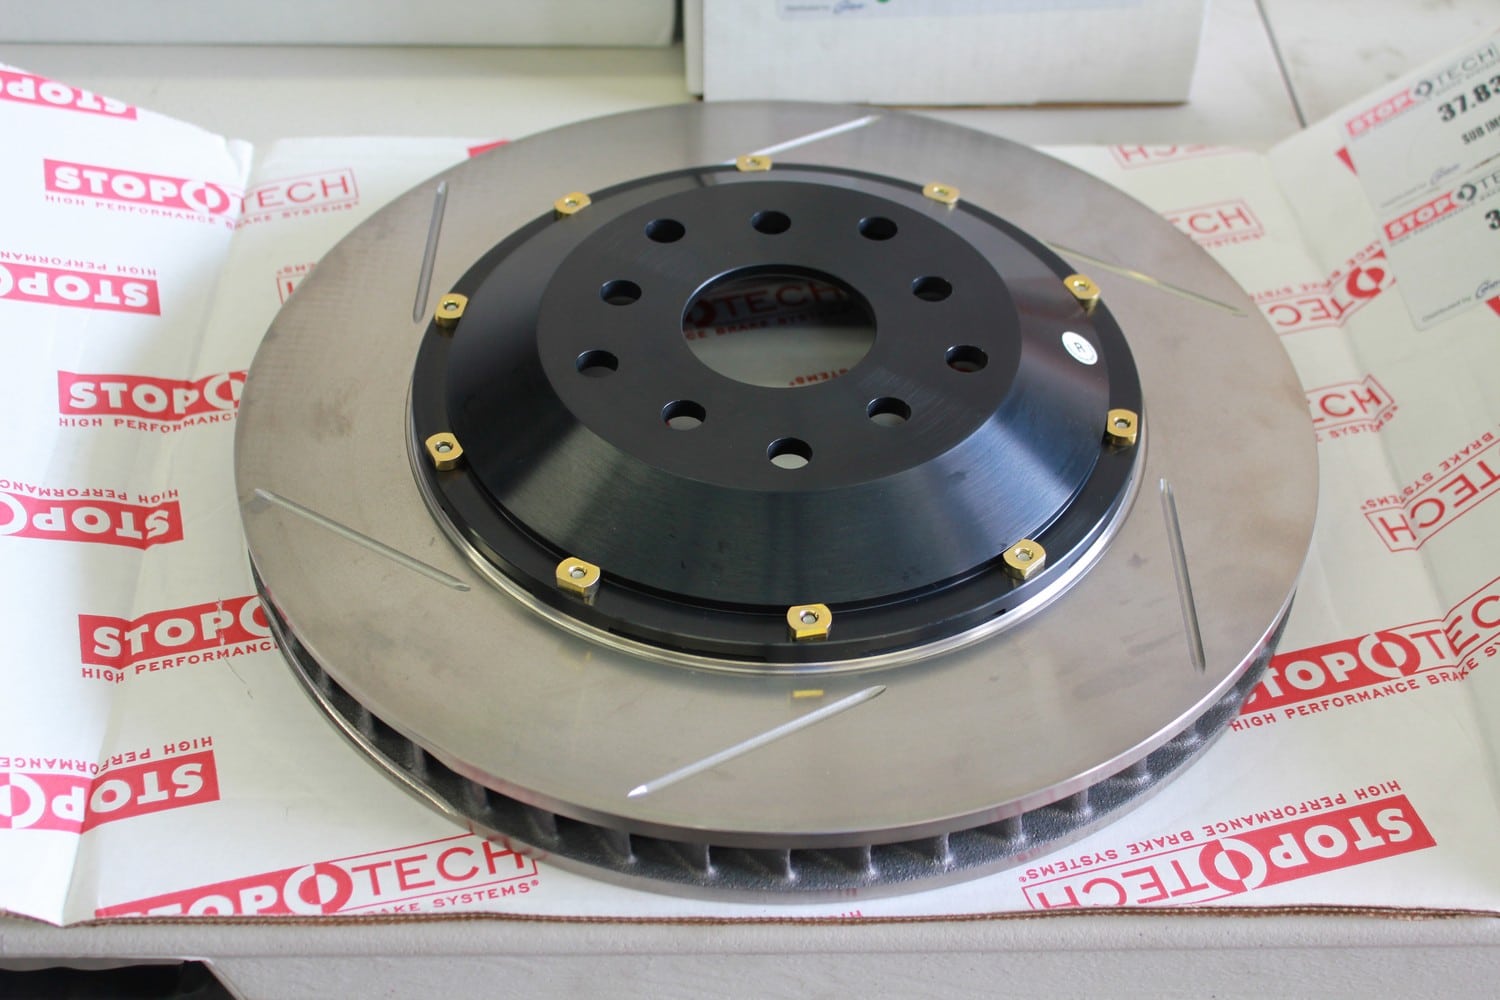
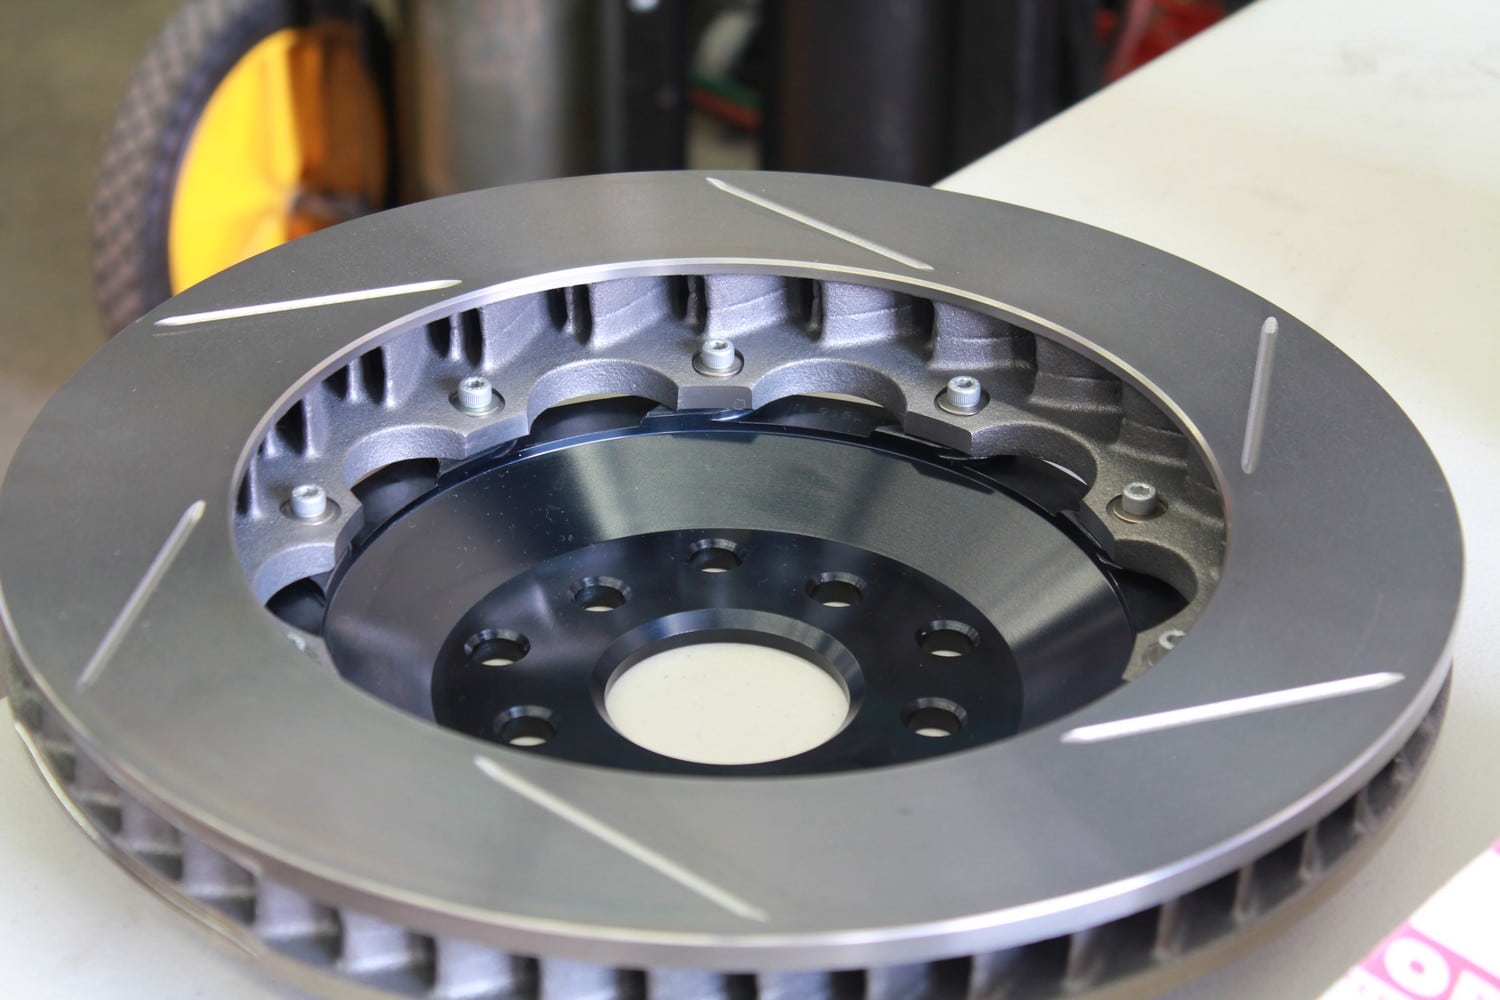
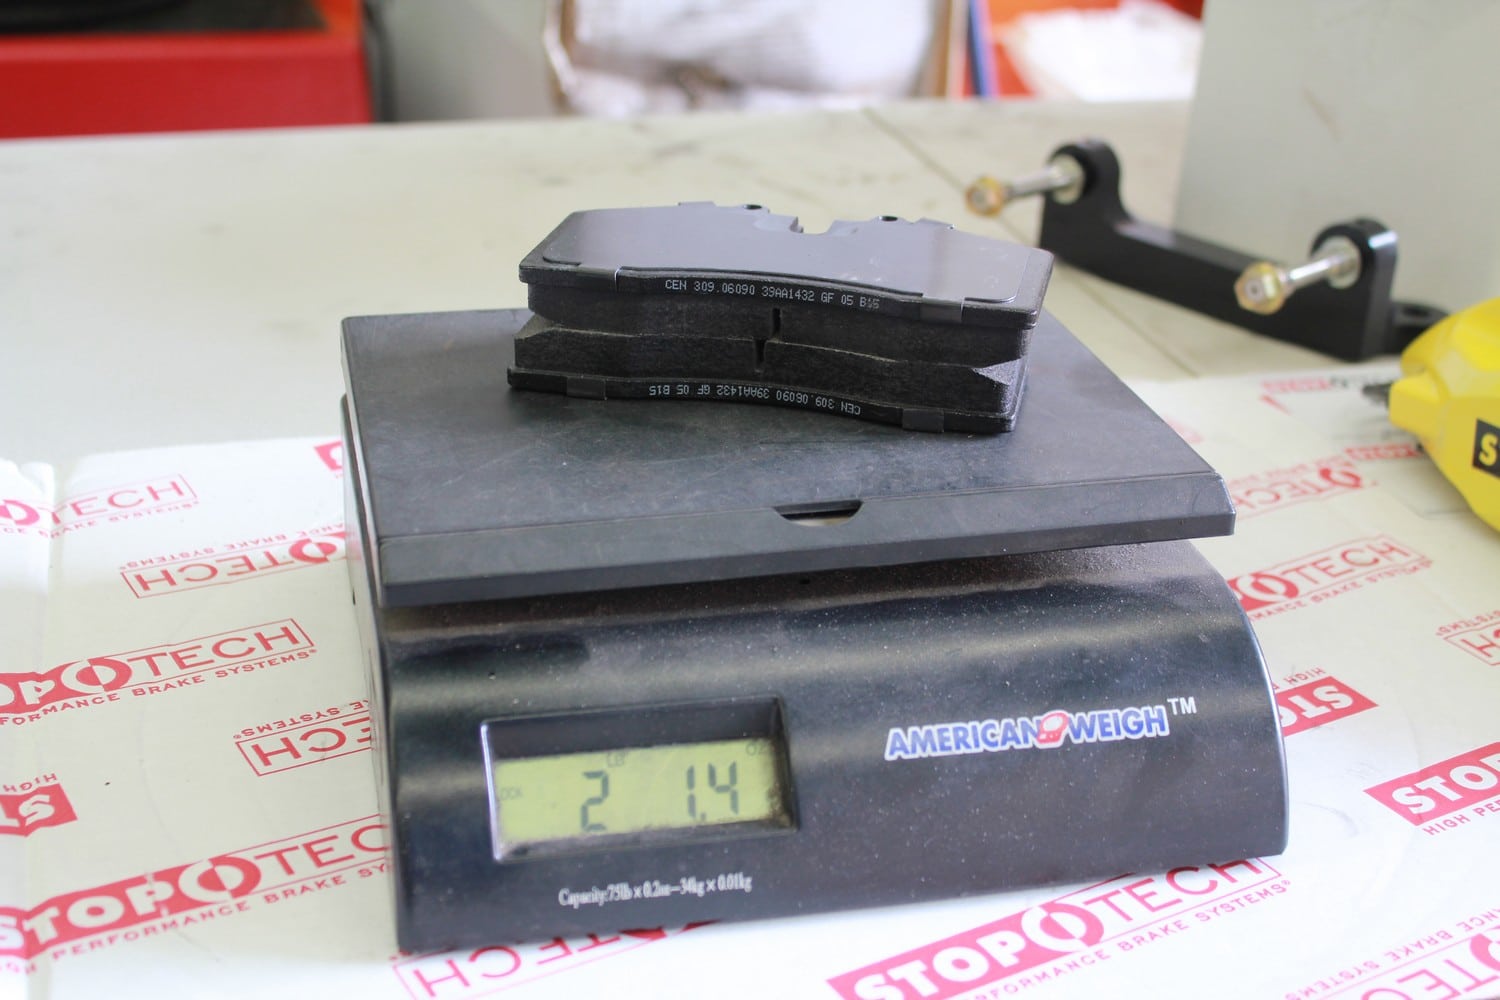
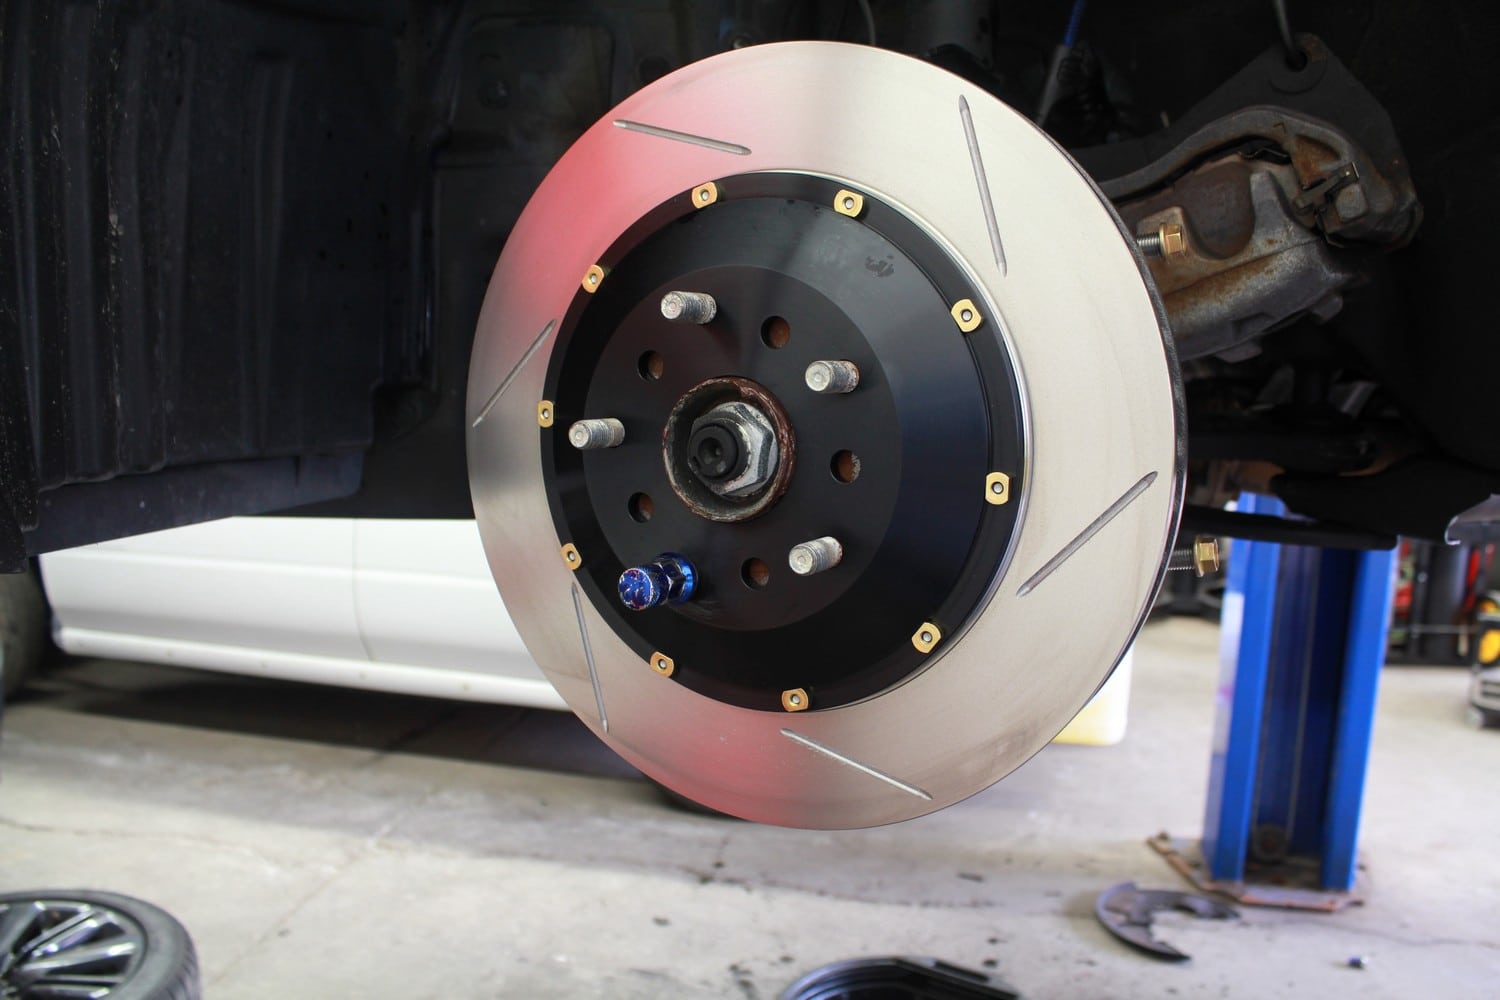
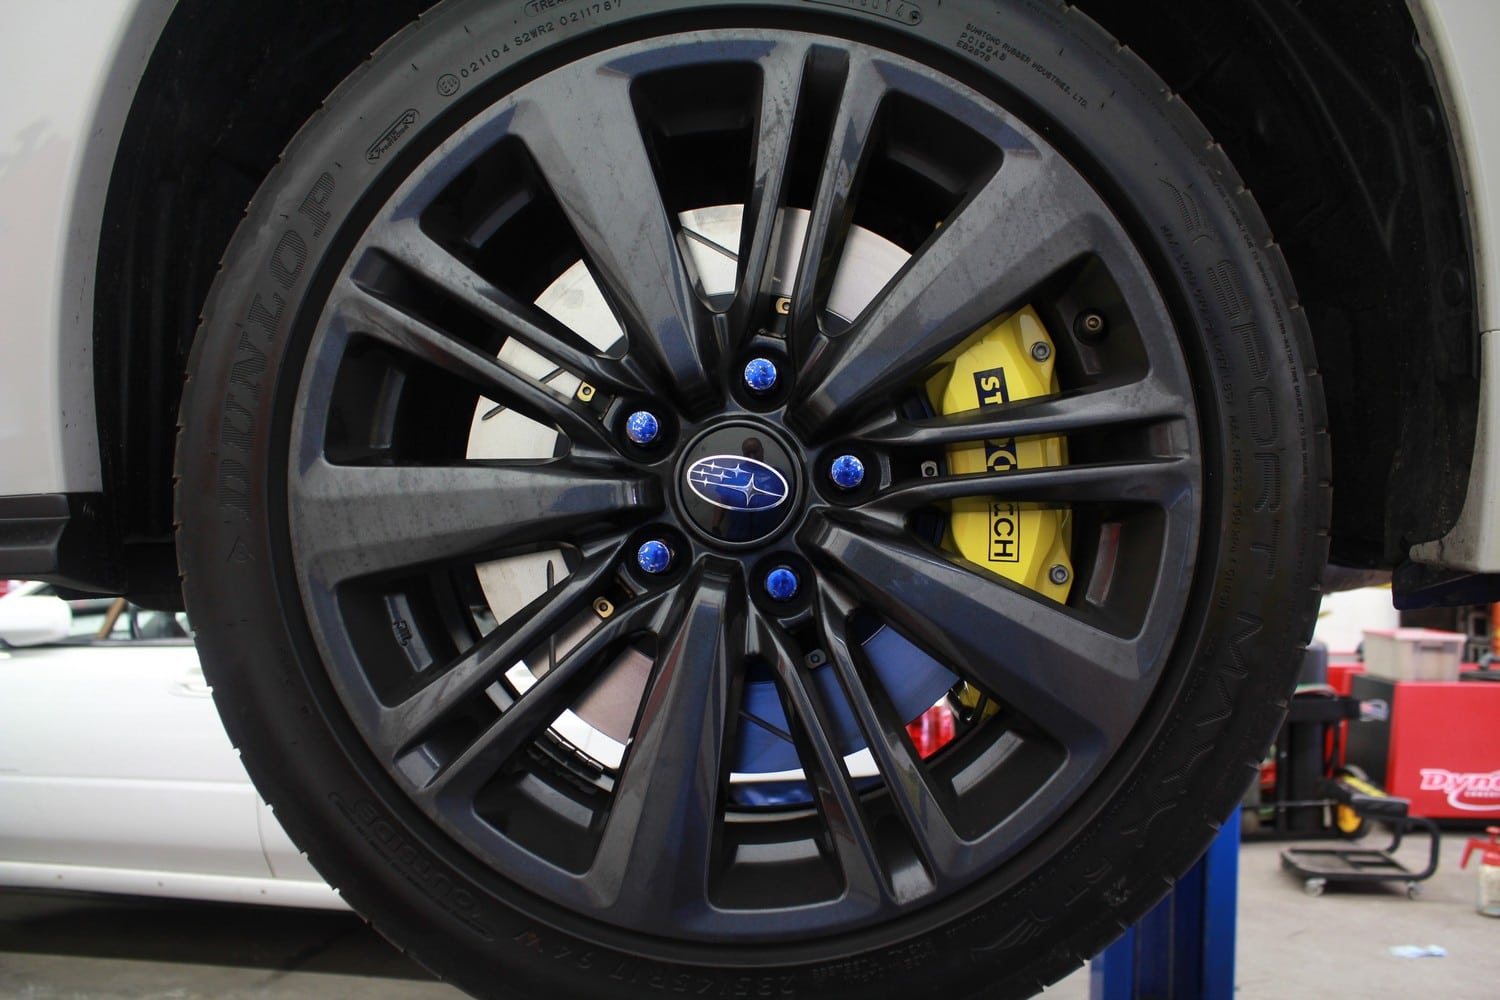
First we’ll start off with the 2-piece front Aero Rotors which measure in at 332mm wide and 32mm thick. For those unfamiliar with 2-piece rotors the advantage of these is being able to remove weight and better heat shedding. The outer disc is made of Steel like a normal brake rotor would be but the hat section is CNC machined out of aluminum. This might not sound like a big deal but in this instance you will see that we not only have bigger rotors but they are also 4lbs lighter per corner. The WRX rotor weighs in at 21lbs 5.6oz while the StopTech 2-Piece rotor weighs only 17lbs 4.4oz .The factory WRX rotors are 316mm x 30mm which is not bad for a stock size rotor but they are quite a bit heavier. You can also see that the casting for the StopTech rotor is much nicer with better cooling vane design.
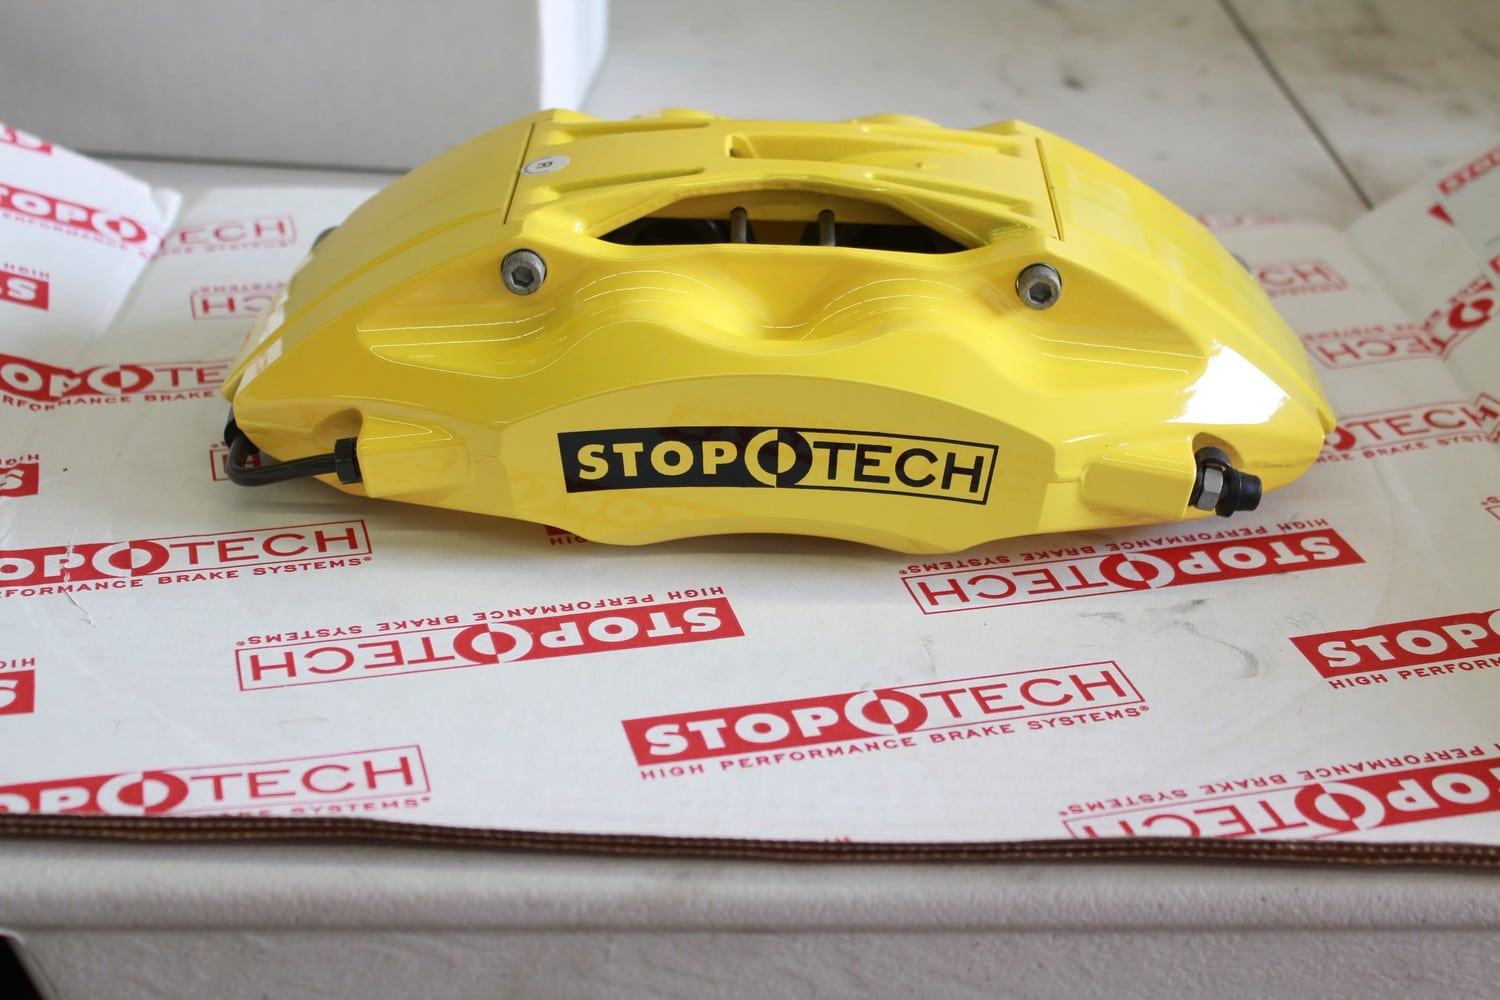
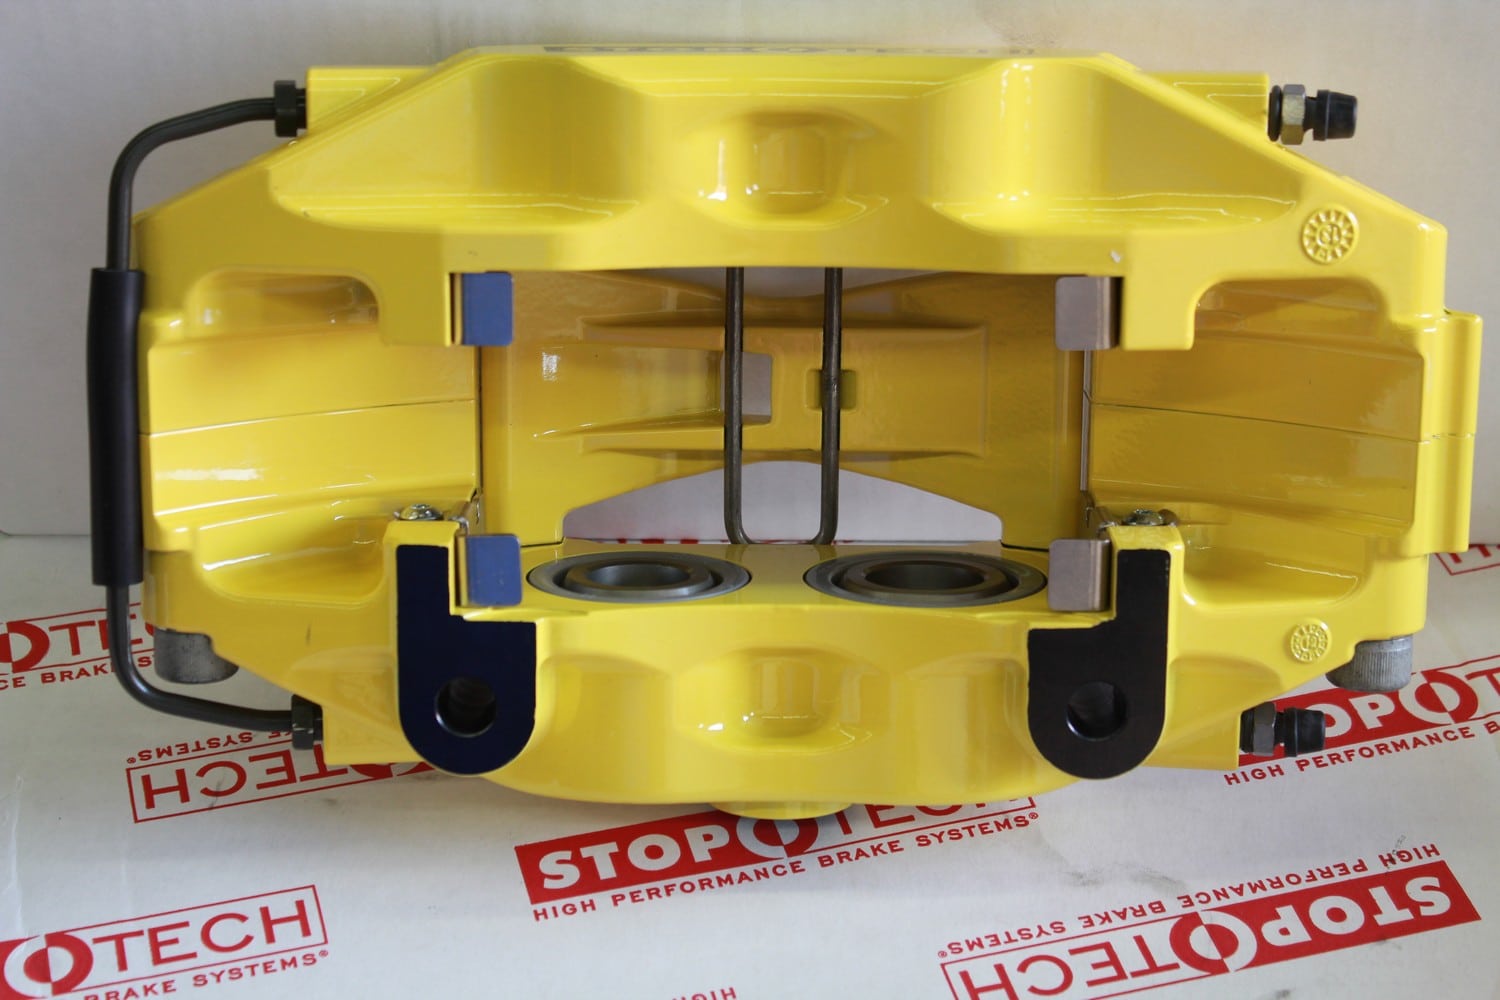
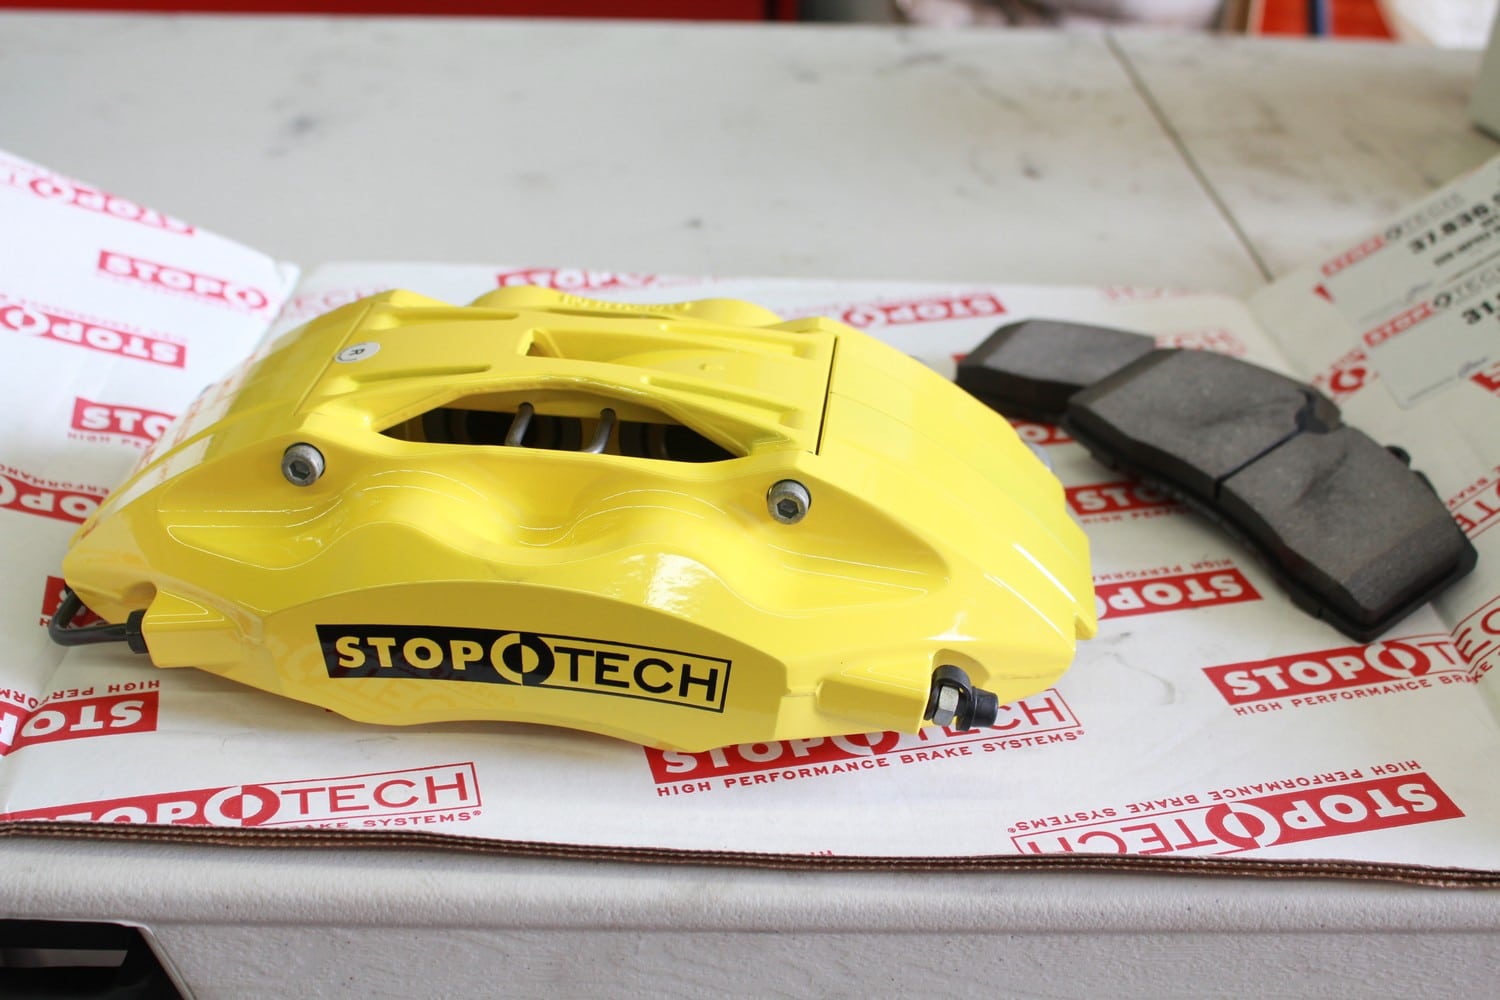
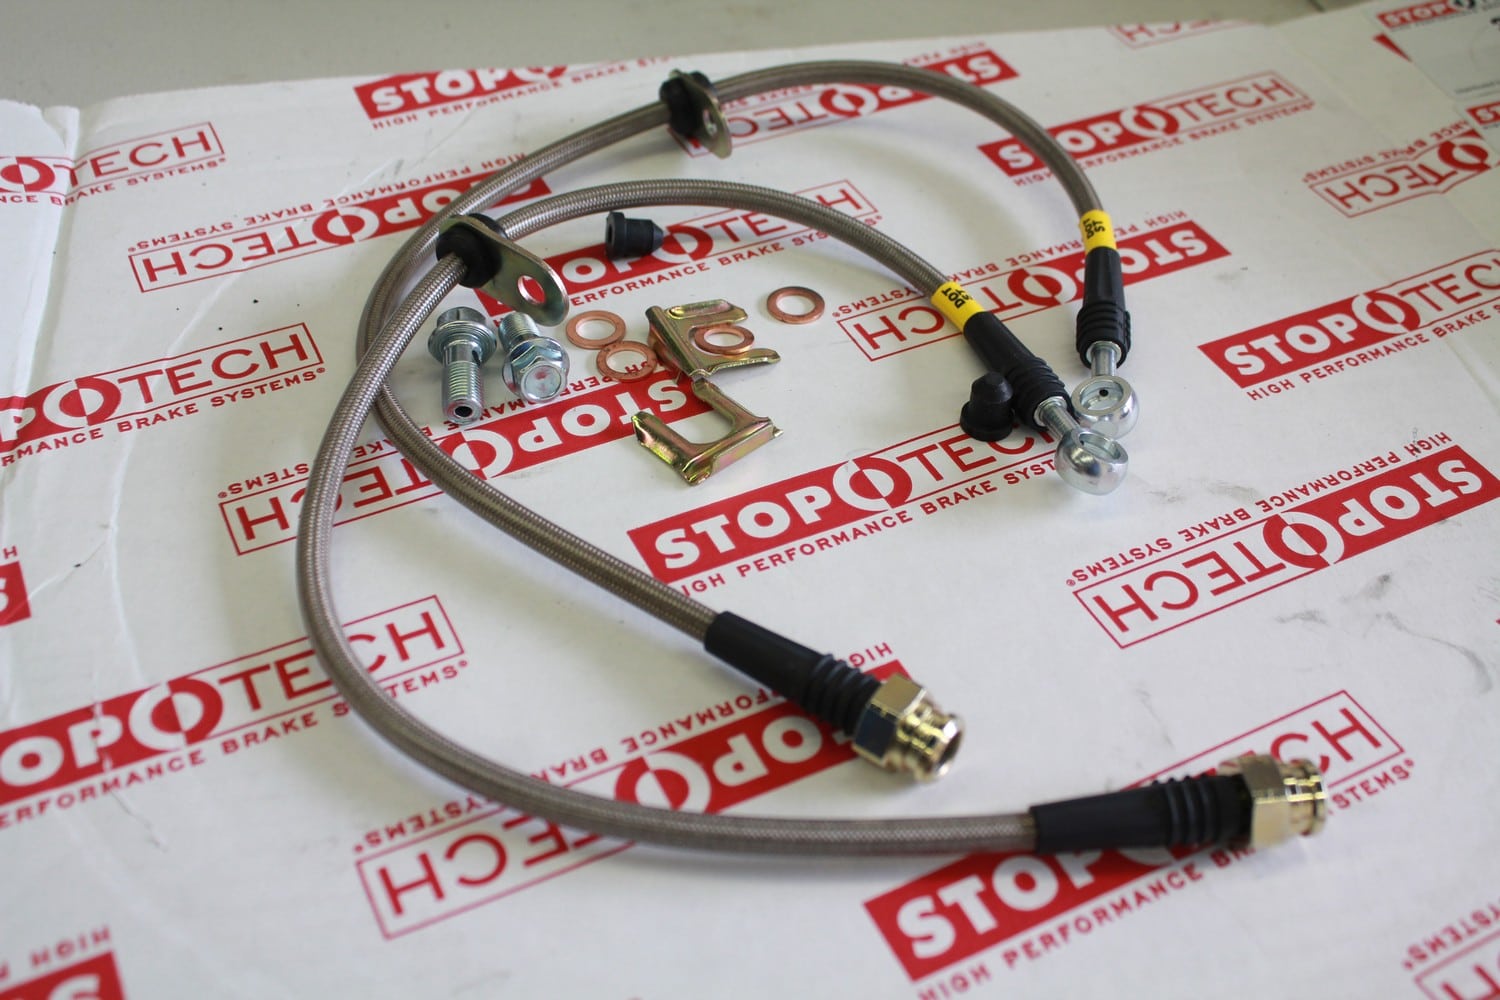
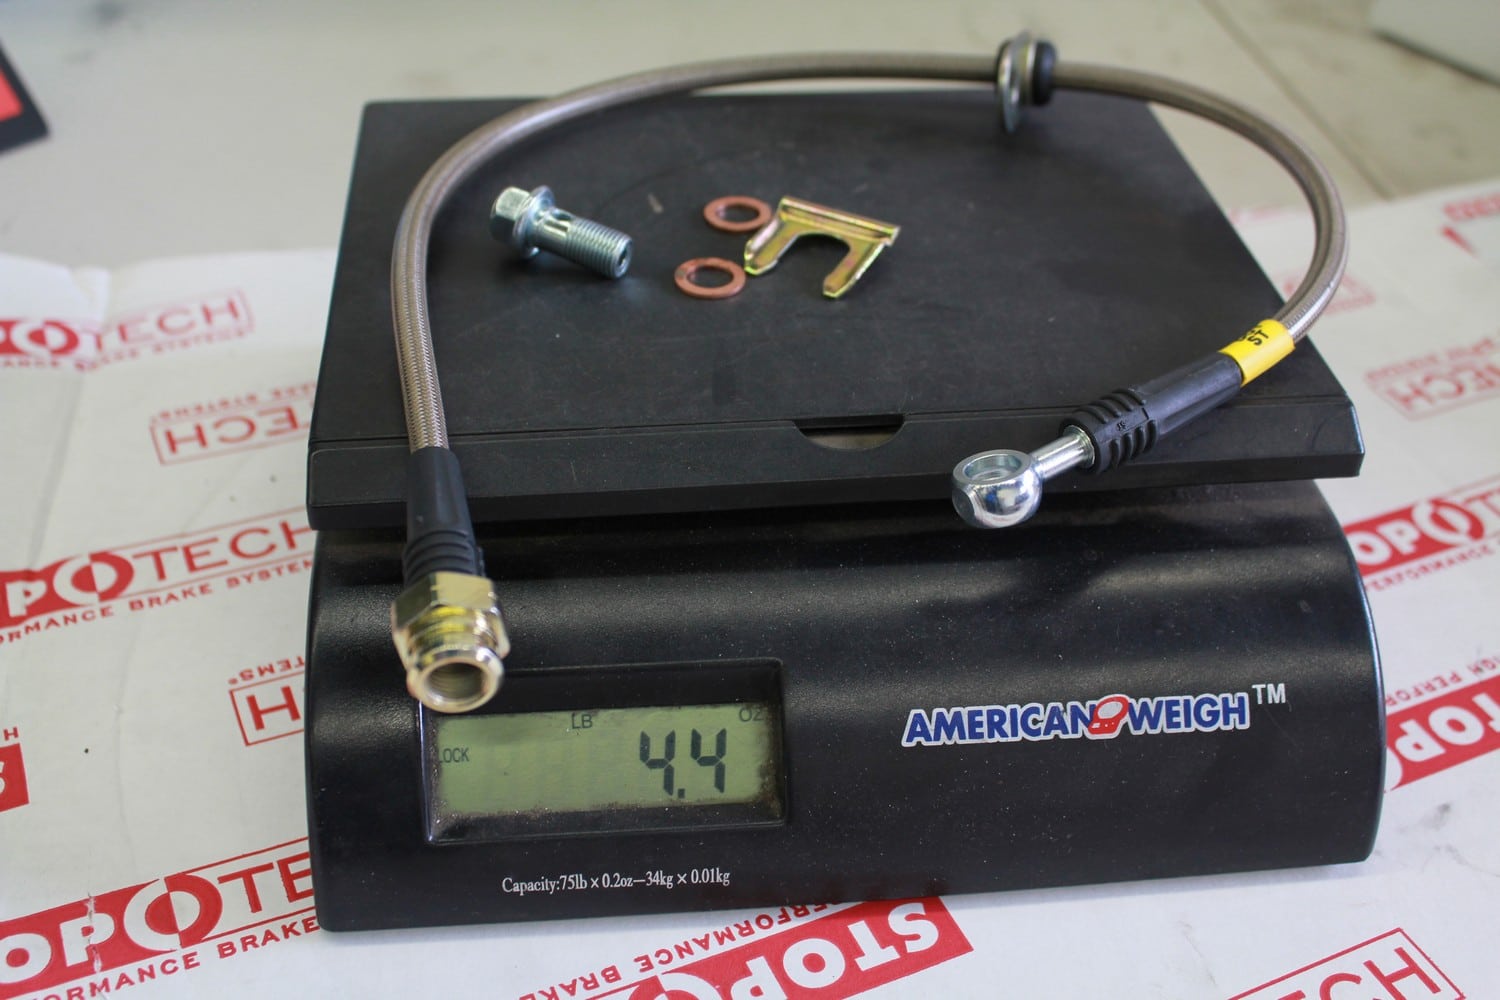
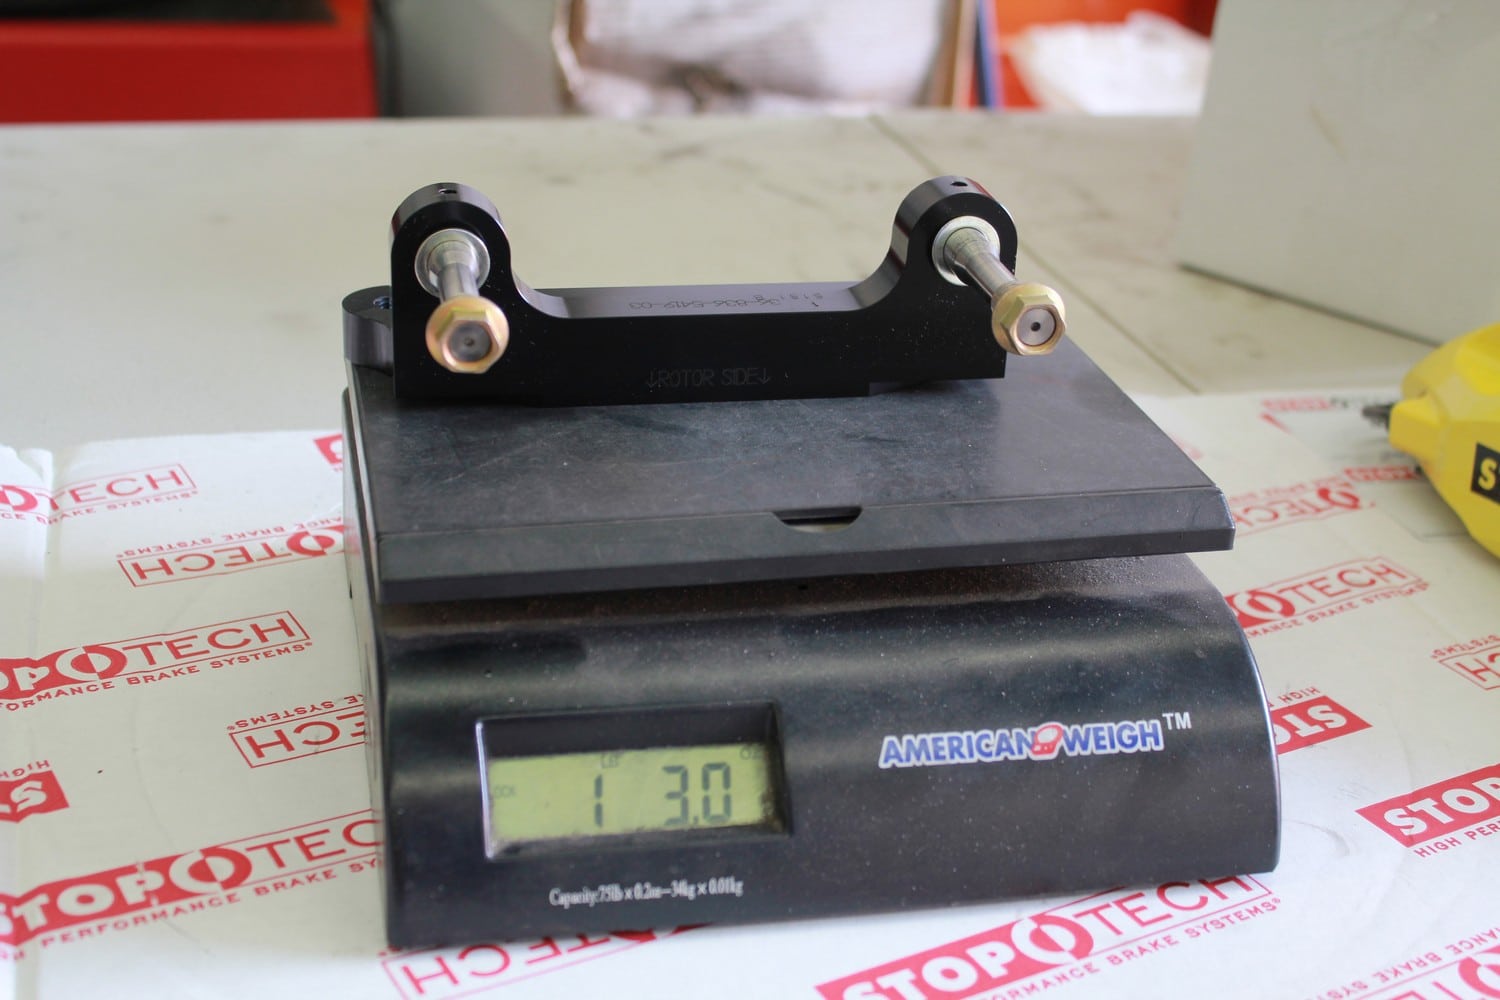
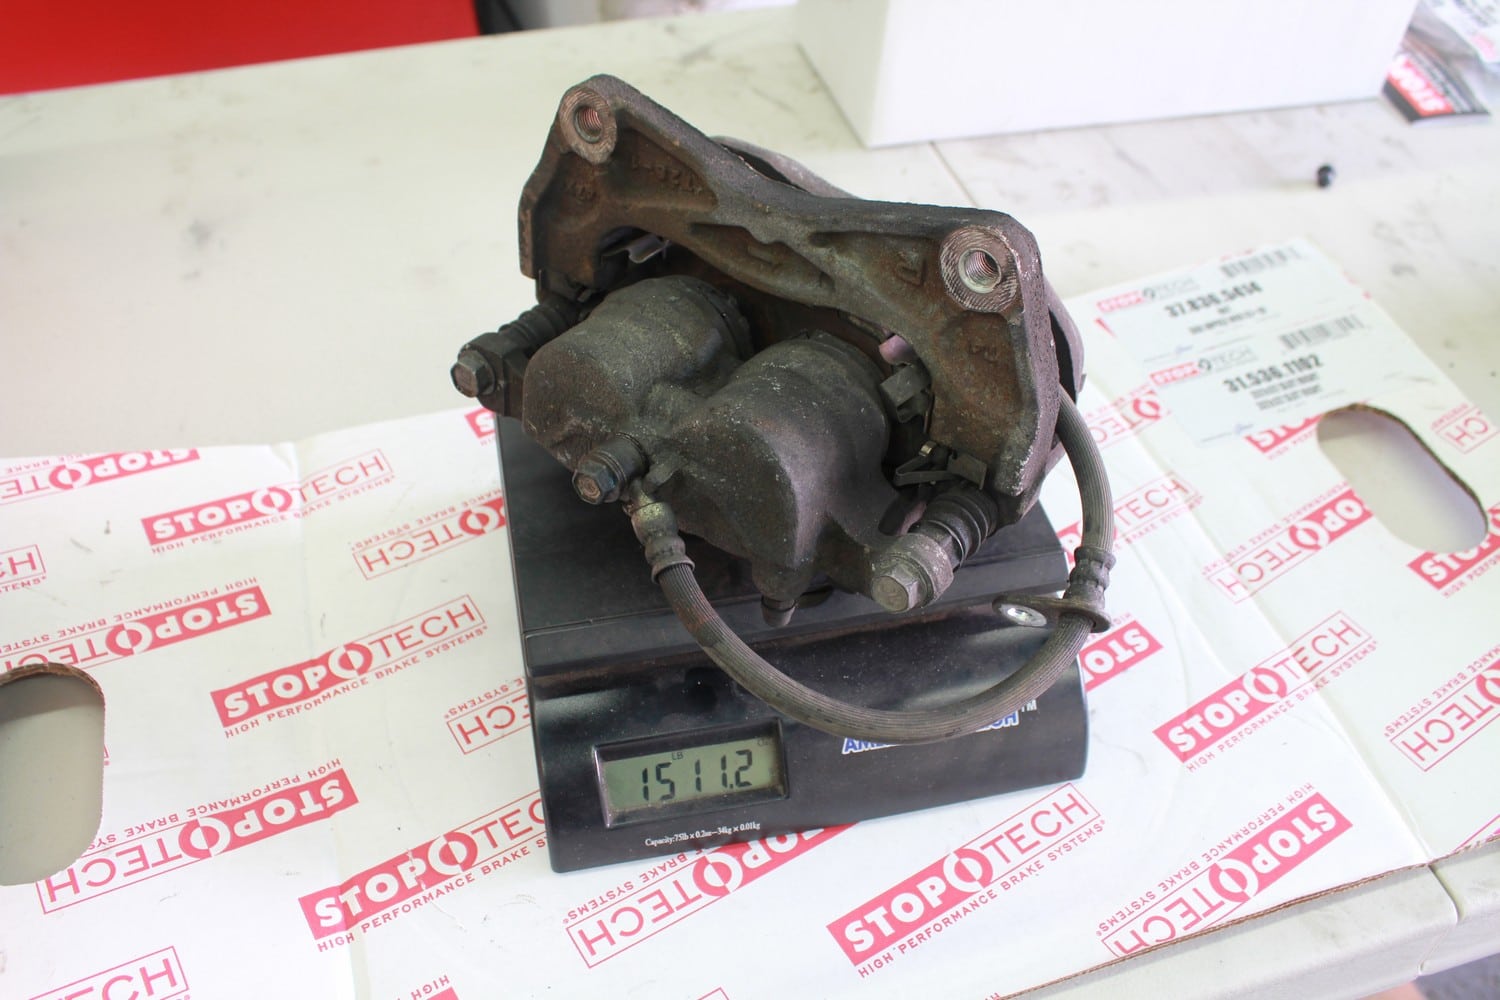
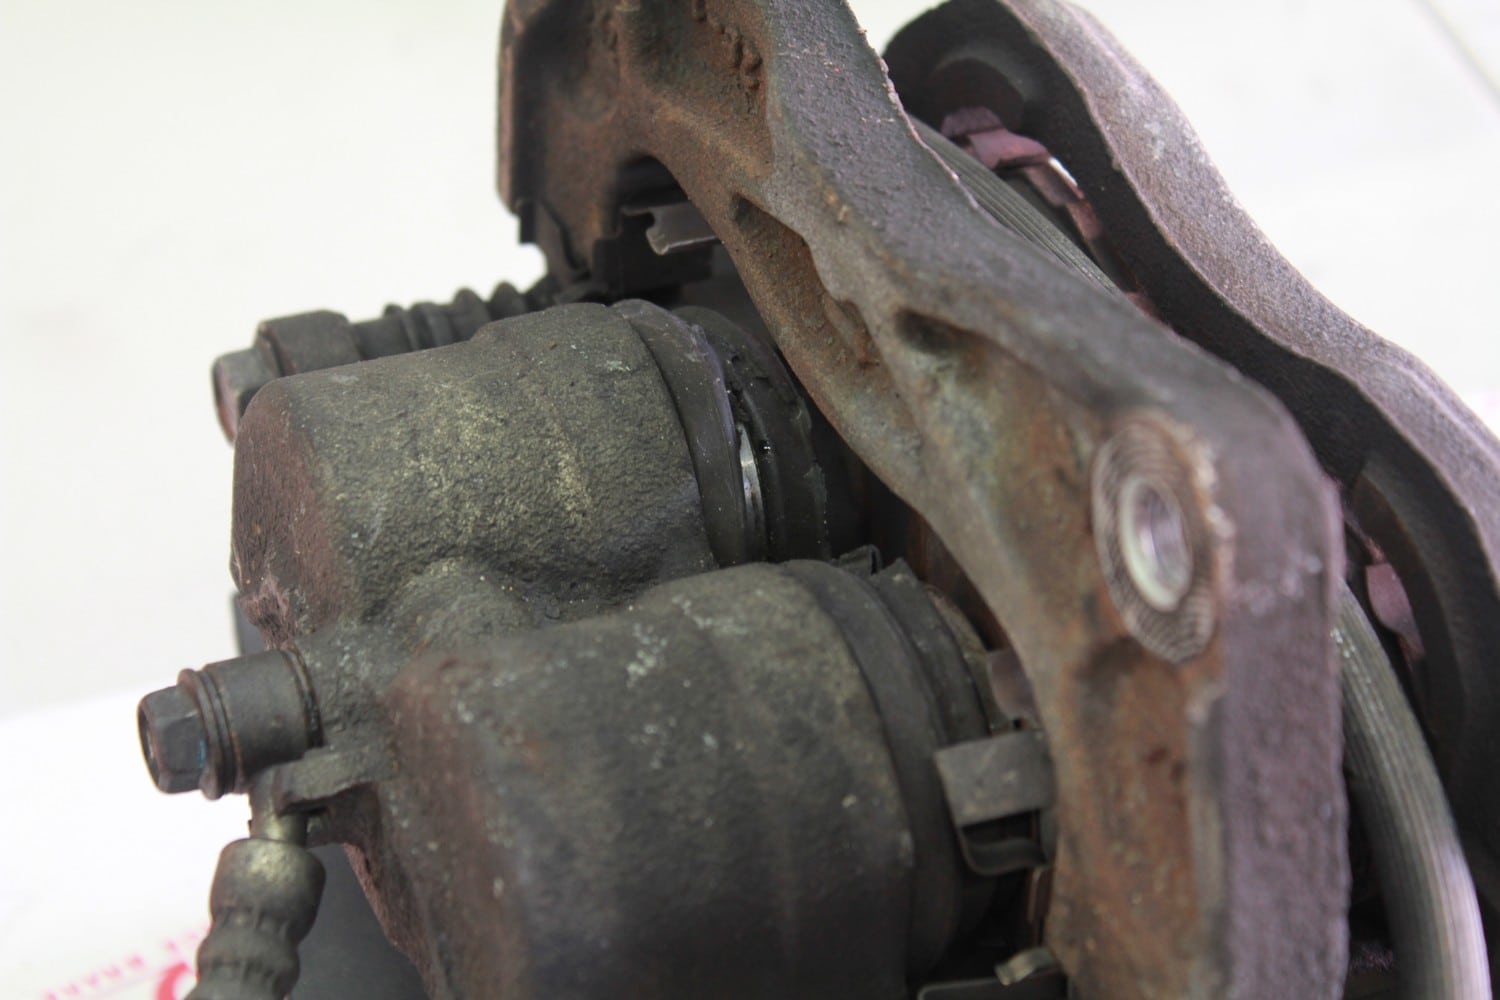
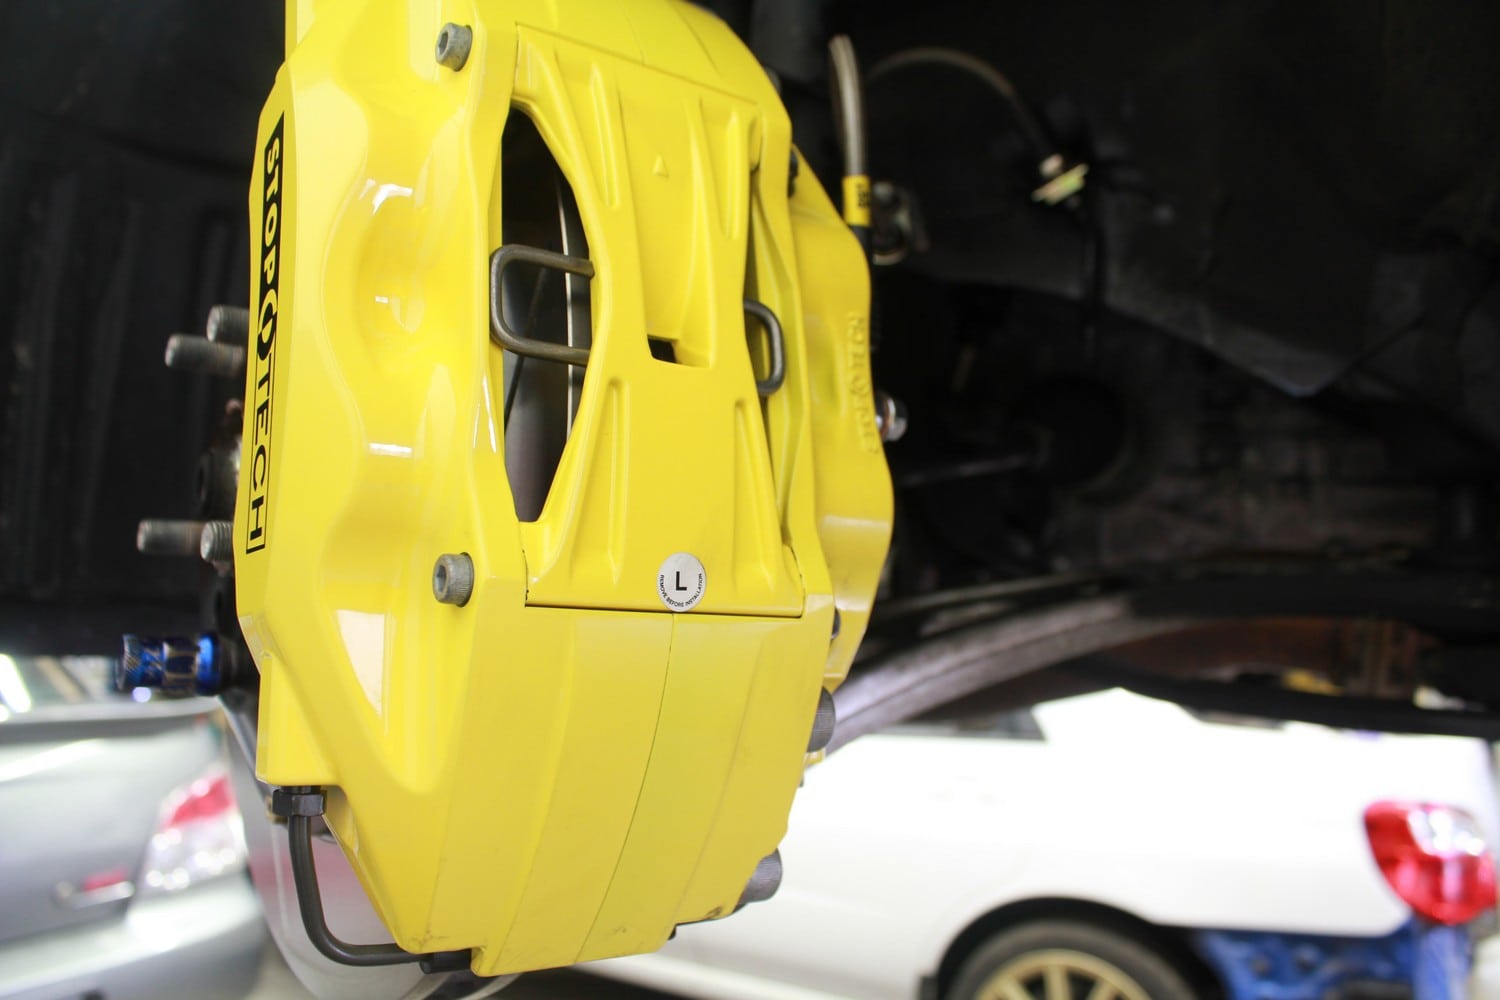
Next up we have the beautiful forged StopTech caliper which I decided to get in Yellow to add a splash of colour to the car. These are just a work of art and the details on them are amazing. One of the biggest differences between doing an STi brake swap and going with an aftermarket big brake kit is that most big brake kits are radial mounted which improves rigidity of the caliper when braking. You can see the mounting bracket and the radially mounted studs on it. You will also see the StopTech street performance pads which we’re using for the time being to test the improvement out of the box of these kits. We will get dedicated track pads in the future. The ST-40 caliper in this kit features 4 pistons, 2 on either side of the caliper providing a much more uniform braking force on the rotor. In contrast, the factory WRX caliper is a 2-piston sliding caliper which has a lot of flex in the design and does not provide a firm pedal feel. Even though the StopTech caliper is much larger in size it still manages to be significantly lighter in weight. We weighed the pieces individually and the StopTech Caliper, Bracket, Pads and Braided Brake Line come up to a total of 11lbs 2.9oz per side. The factory caliper, bracket, pads and brake line weighs in at a hefty 15lbs 11.2oz which means you’re saving another 4.5lbs per corner while getting a significantly better caliper. As mentioned the kit includes stainless braided brake lines which have a few advantages. One of the biggest being that the stainless braided lines will have less expansion or swelling when you depress the brake pedal. This in turn translates to a firmer and more consistent brake pedal. SS Braided lines are also more resistant to tearing due to debris which can be a common issue on track.

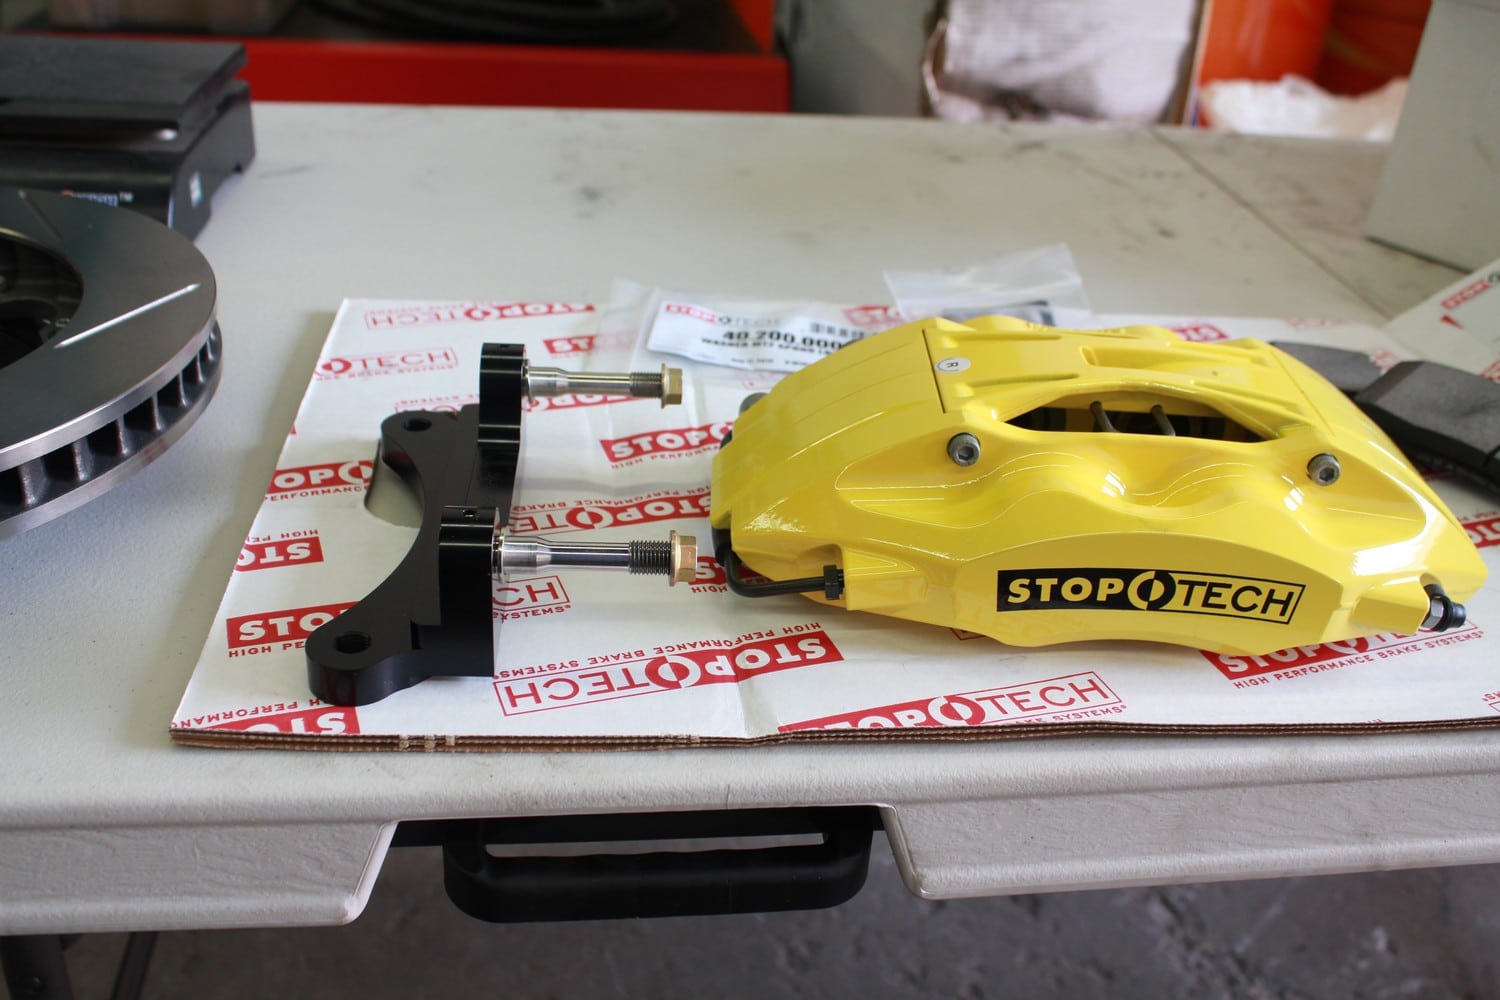
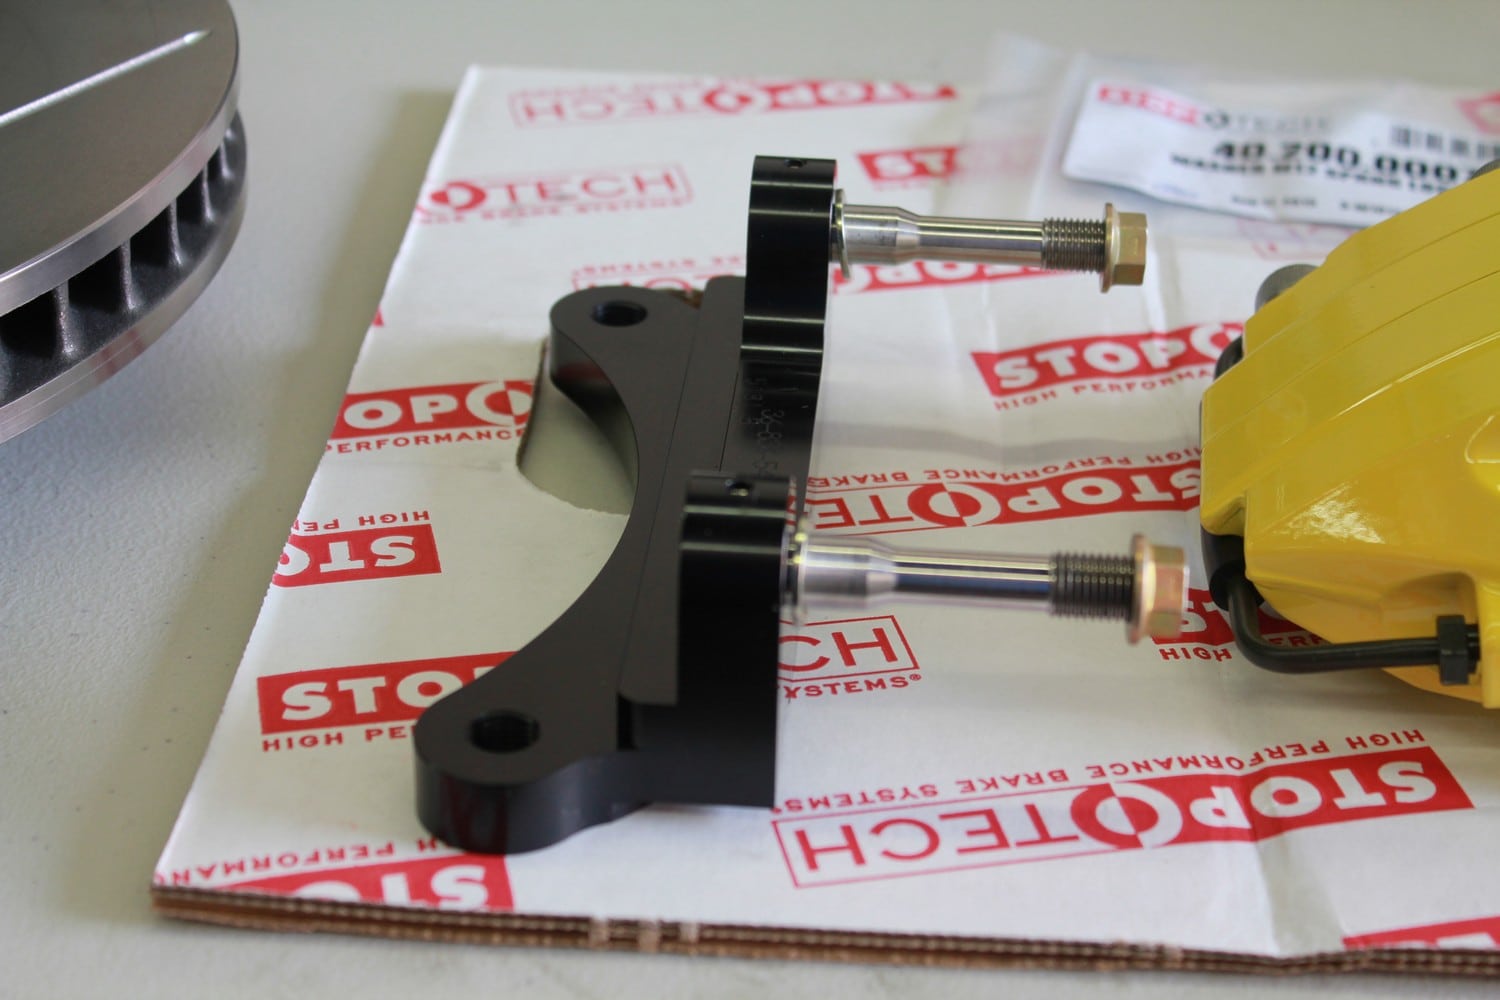
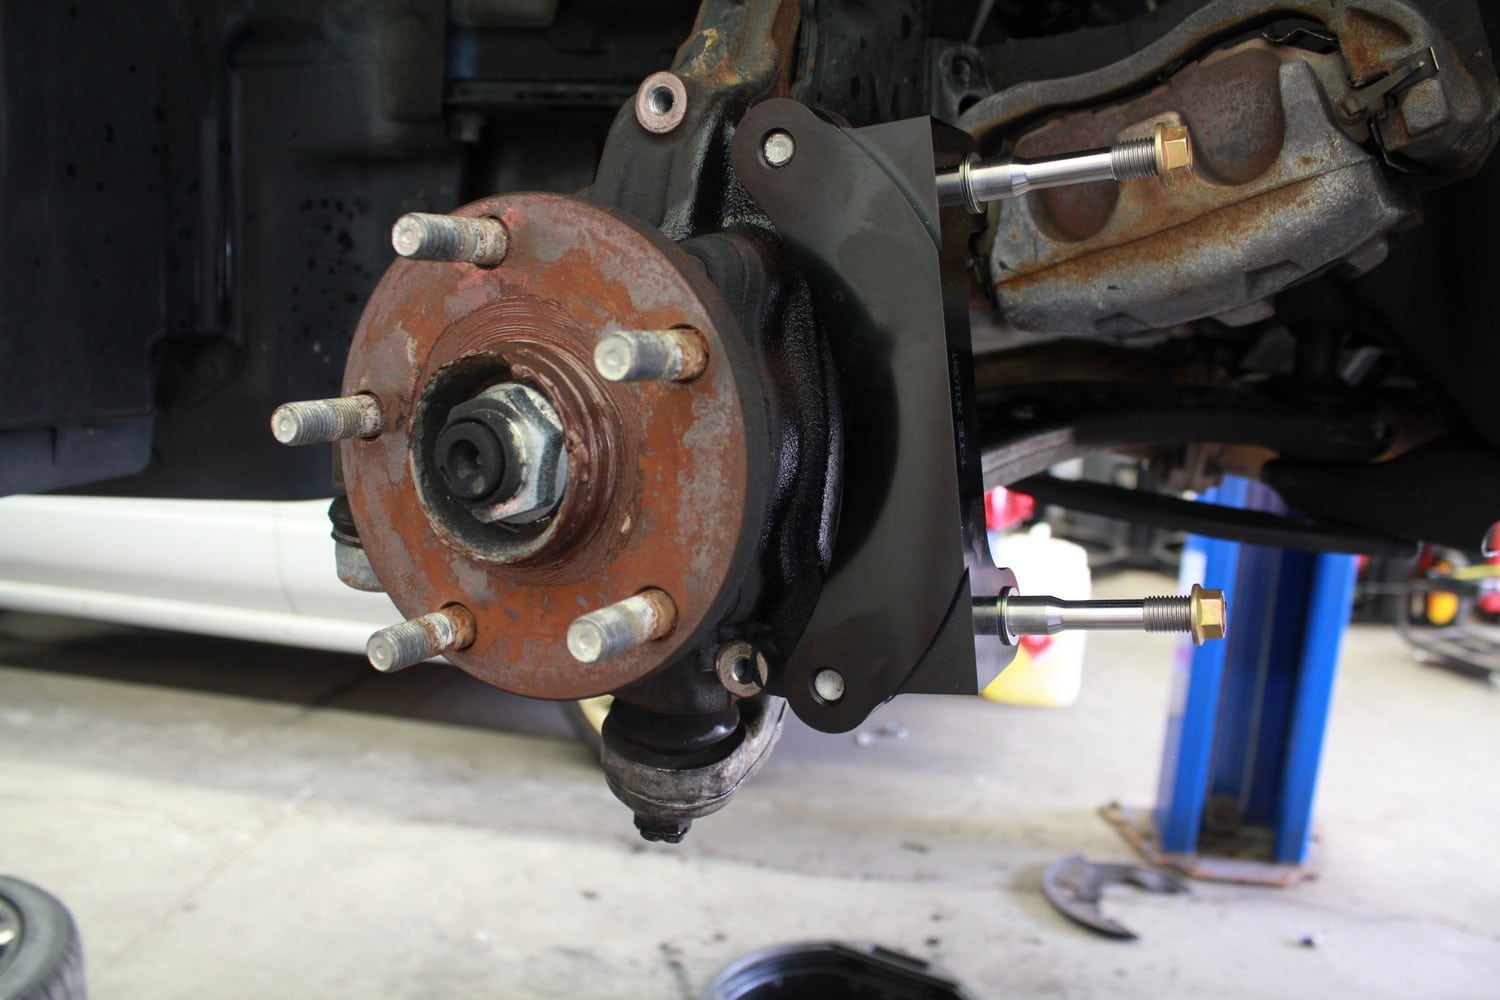
Now that we’ve looked at the components included in the kit we can get to the installation of them. The first step is going to be bolting the caliper bracket to the knuckle using the supplied hardware and torquing to spec. Then you can clean up the hub face and apply a little anti-seize to the hub center and fit the new 2-piece rotor assembly. Again you can use a lug nut to hold the rotor against the hub surface which will make installing the caliper easier. All of the components are marked for left or right so there’s no guess work when fitting things up to the right side. Before fitting the caliper it’s a good idea to take a shop rag and spray it with brake cleaner and wipe down both faces of the rotor surface to remove any oil and contaminants which are put on the surface to fight corrosion.
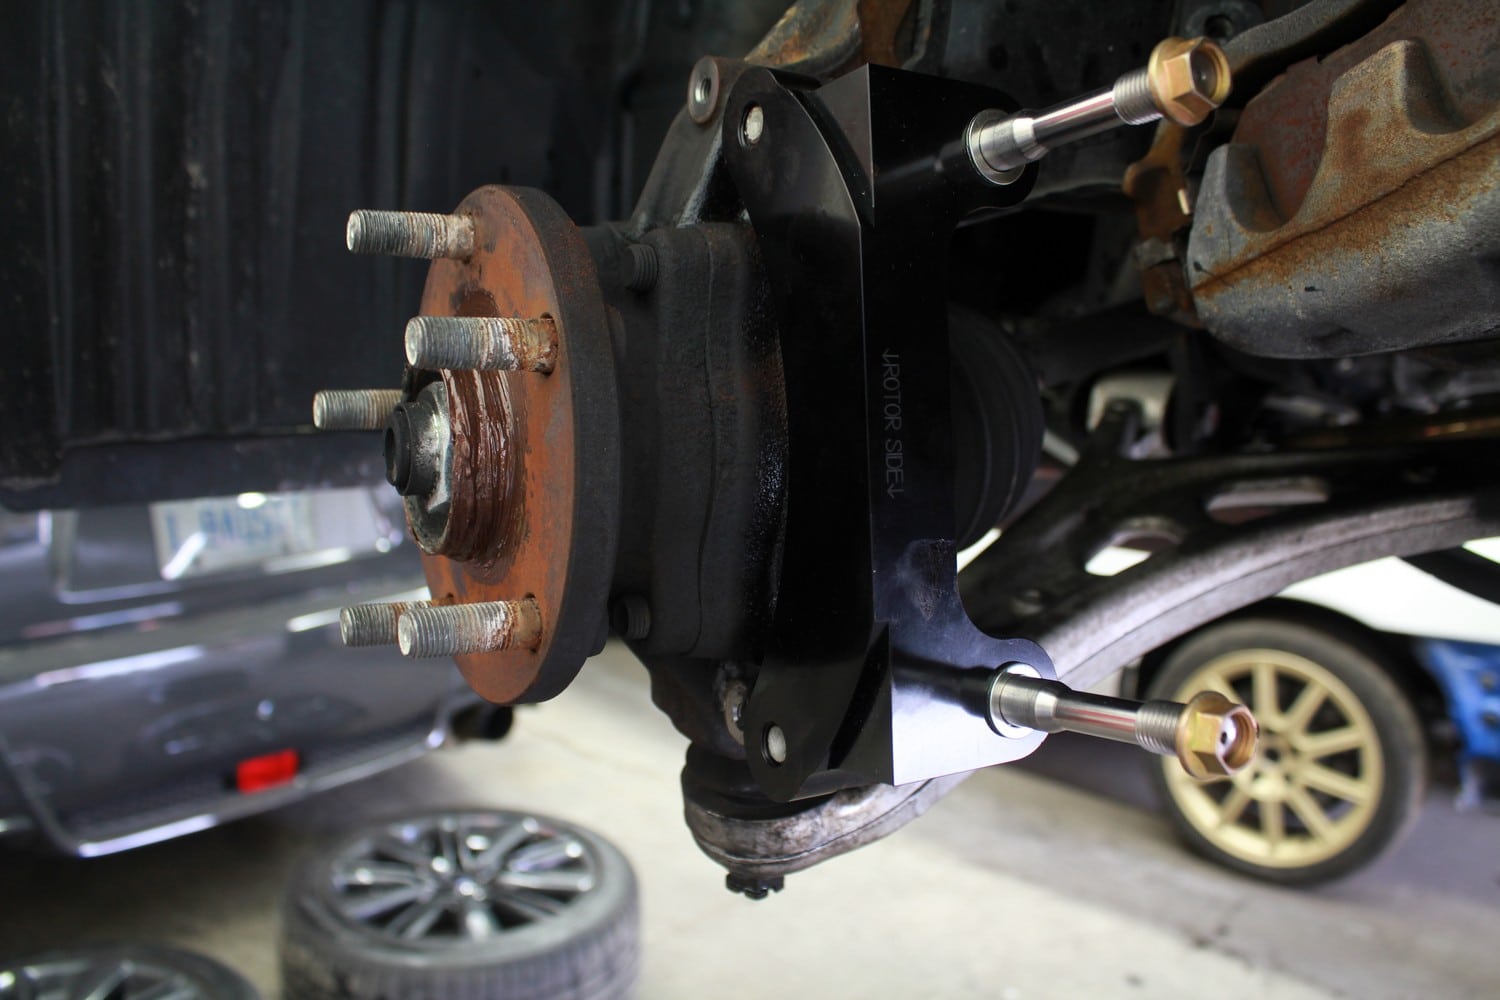
Next step is to put the caliper in place onto the mounting bracket. The caliper easily slides into place and you can snug up the nuts for the caliper. I would recommend installing the new pads before doing the final torquing of the nuts so the caliper is perfectly centered on the rotor. The pads go in easily by removing to bolts holding the caliper bridge to the caliper and sliding them in place. Replace the bridge and tighten up the bolts and you’re set. You will have to get one bolt in first and then press the opposite end of the bridge down while installing the second bolt into the bridge as the fit is very tight since the bridge is actually there to stiffen the caliper itself. Next you’ll want to install the new stainless braided brake lines. It’s usually easiest to install the line to the factory hard line on the fender and then install it to the caliper side with the supplied banjo bolt and copper washers. Try to make sure the line is not twisted and then you can install the mid-point connection to the strut bracket. With this done you’re ready to fill the reservoir with your favuorite brake fluid and bleed the system. Always start from the inside bleeder and then move to the outer last. I like to bleed each bleeder twice to ensure all the bubbles are out of the system.
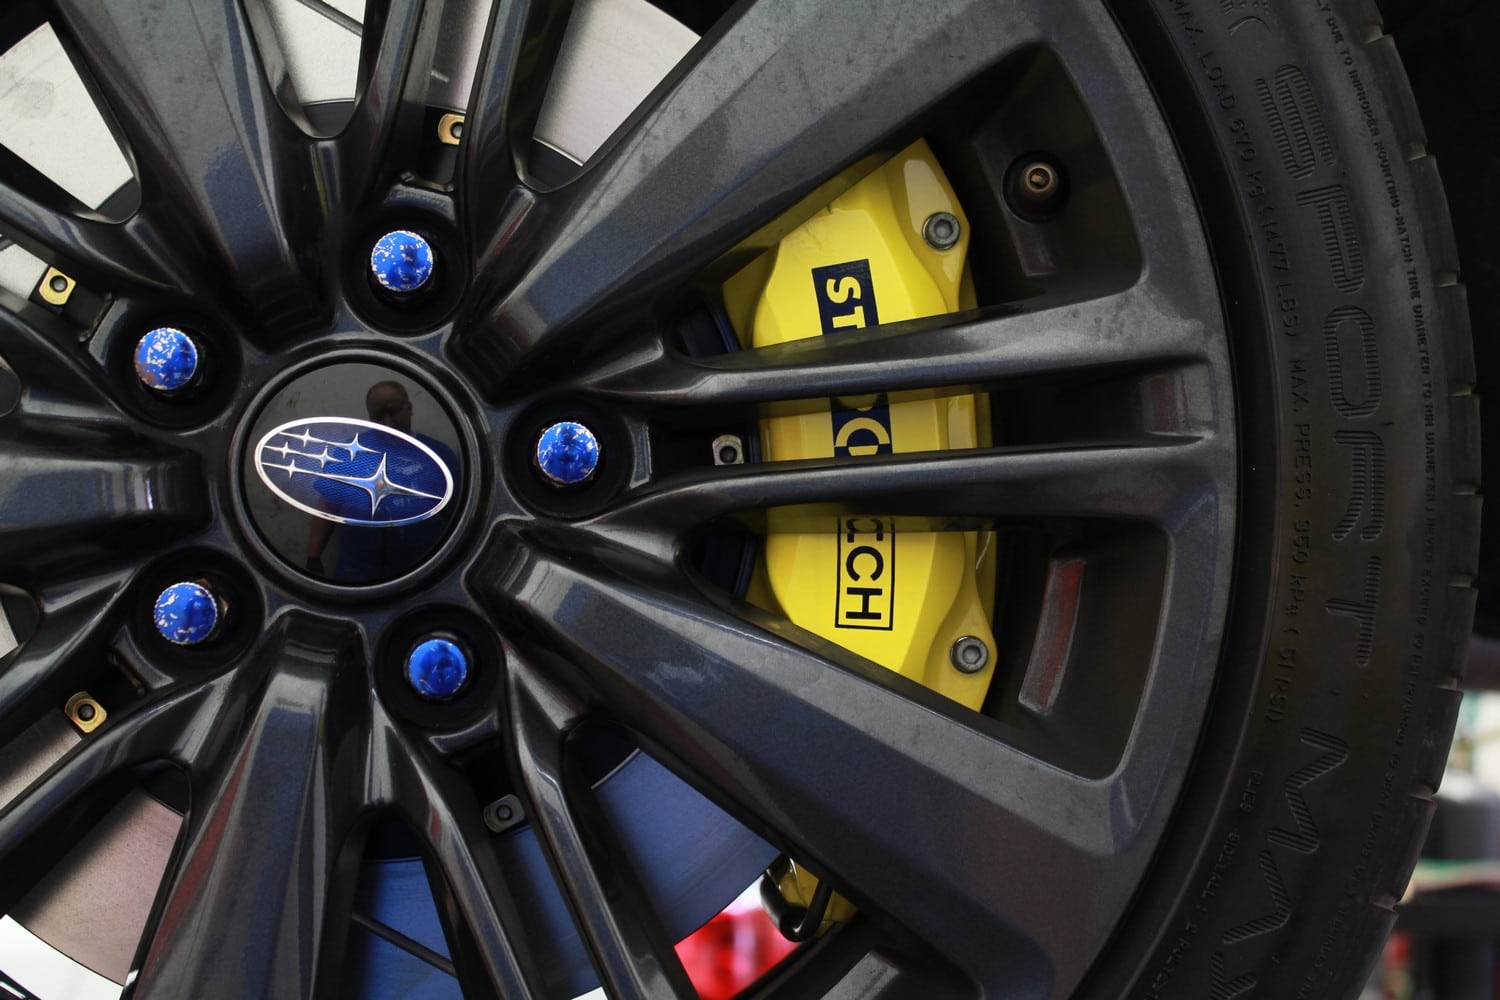
So what I’m sure my fellow 2015+ WRX owners are wondering is how do the brakes fit. My testing with the templates told me the brakes should easily clear the track wheels I use which are 17×9 +40 Team Dynamics Pro Race 1.2. The stock WRX wheels were very close so we weren’t 100% sure if it would work. What we found was 2 very minor things which would allow the stock wheels to clear. The first was a 3mm spacer was needed to give adequate clearance from the spokes to the caliper face. This is very minor and does not require longer studs or anything like that. The second snag is that the stock wheels have a very small inner barrel of the rim which puts wheel weights very close to the calipers. In my case the weights were installed right in-line with the caliper and would make contact with the top of the caliper. We removed the weights and moved them in-board a few inches to clear the calipers and all is good. I think they look great and the tight clearance helps with that. So if you want to fit a set of big brakes like these to your 2015+ WRX we know exactly what’s needed to make it work now!
With the wheel fitment sorted out I could take the car out and bed the pads in a little and get a feel for the new brakes. This concludes the second part and I will be writing the third and final part shortly with driving impressions.
Thanks to these companies that are helping with this Project
COBB Tuning – COBB AccessPORT and COBB Cat-Back
Mad Graphics – Full Vehicle Vinyl Wrap and Side Graphics
Grimmspeed – License Plate Relocation Kit
Turn In Concepts – Shifter Bearing and TGV Deletes
Killer B Motorsports – J-Pipe
OnPoint Dyno – Dyno Tuning and Testing
Uni-Body Collision – Paint Work (Emblems, Lip, Trunk Spoiler)
StopTech – Front Big Brake Kit

laszlo.toth
Looks very good guys, thanks for the education.