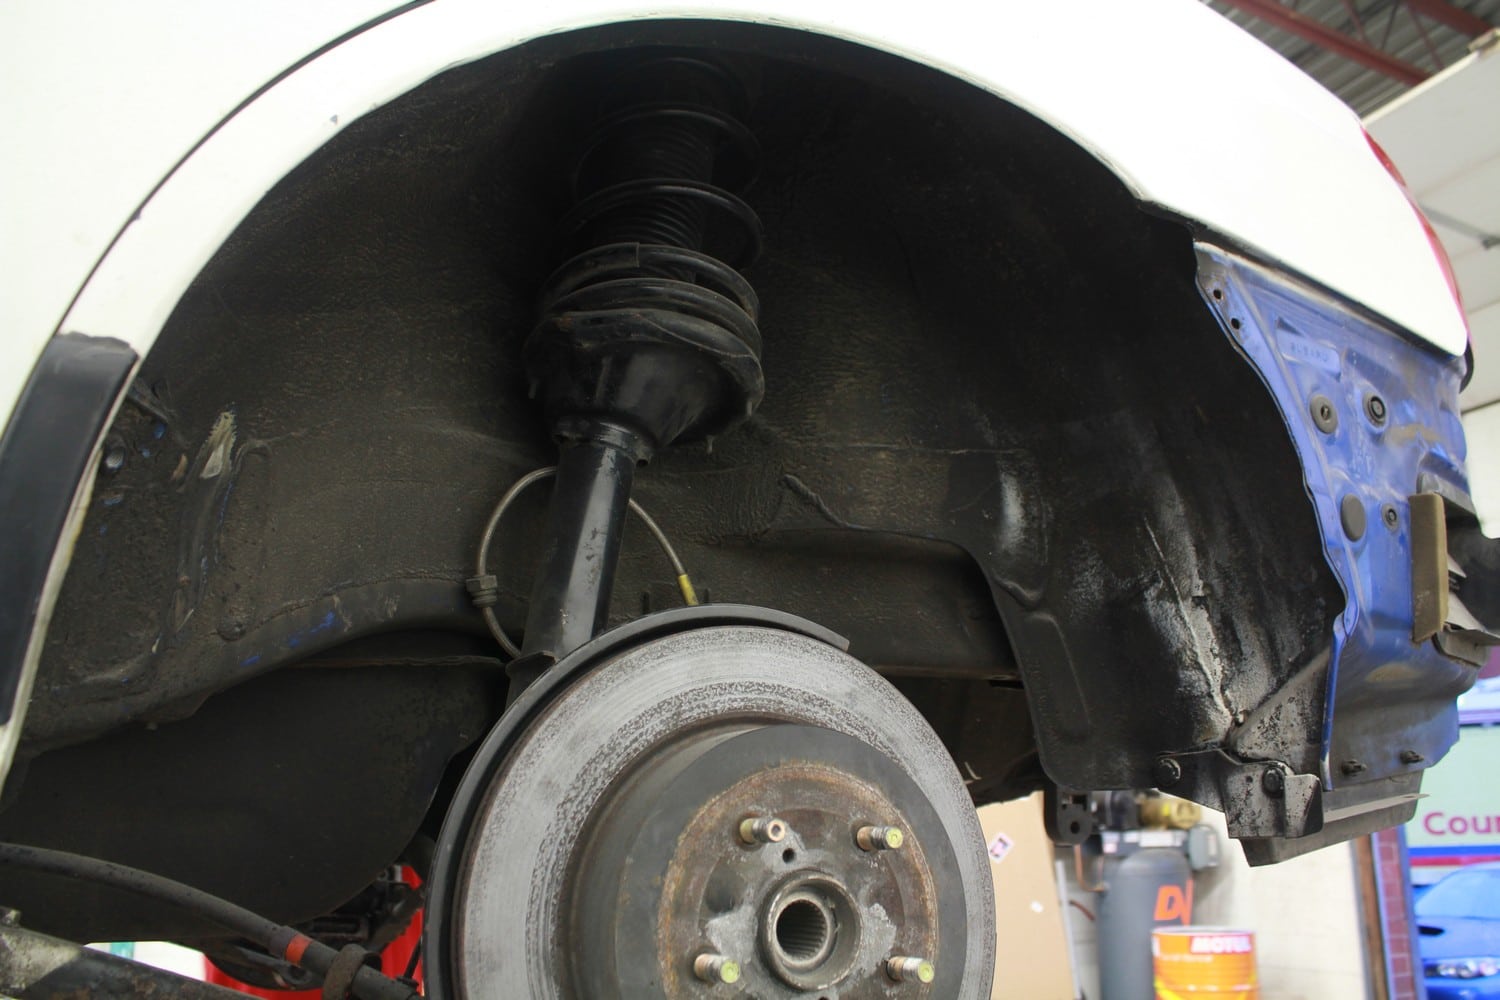
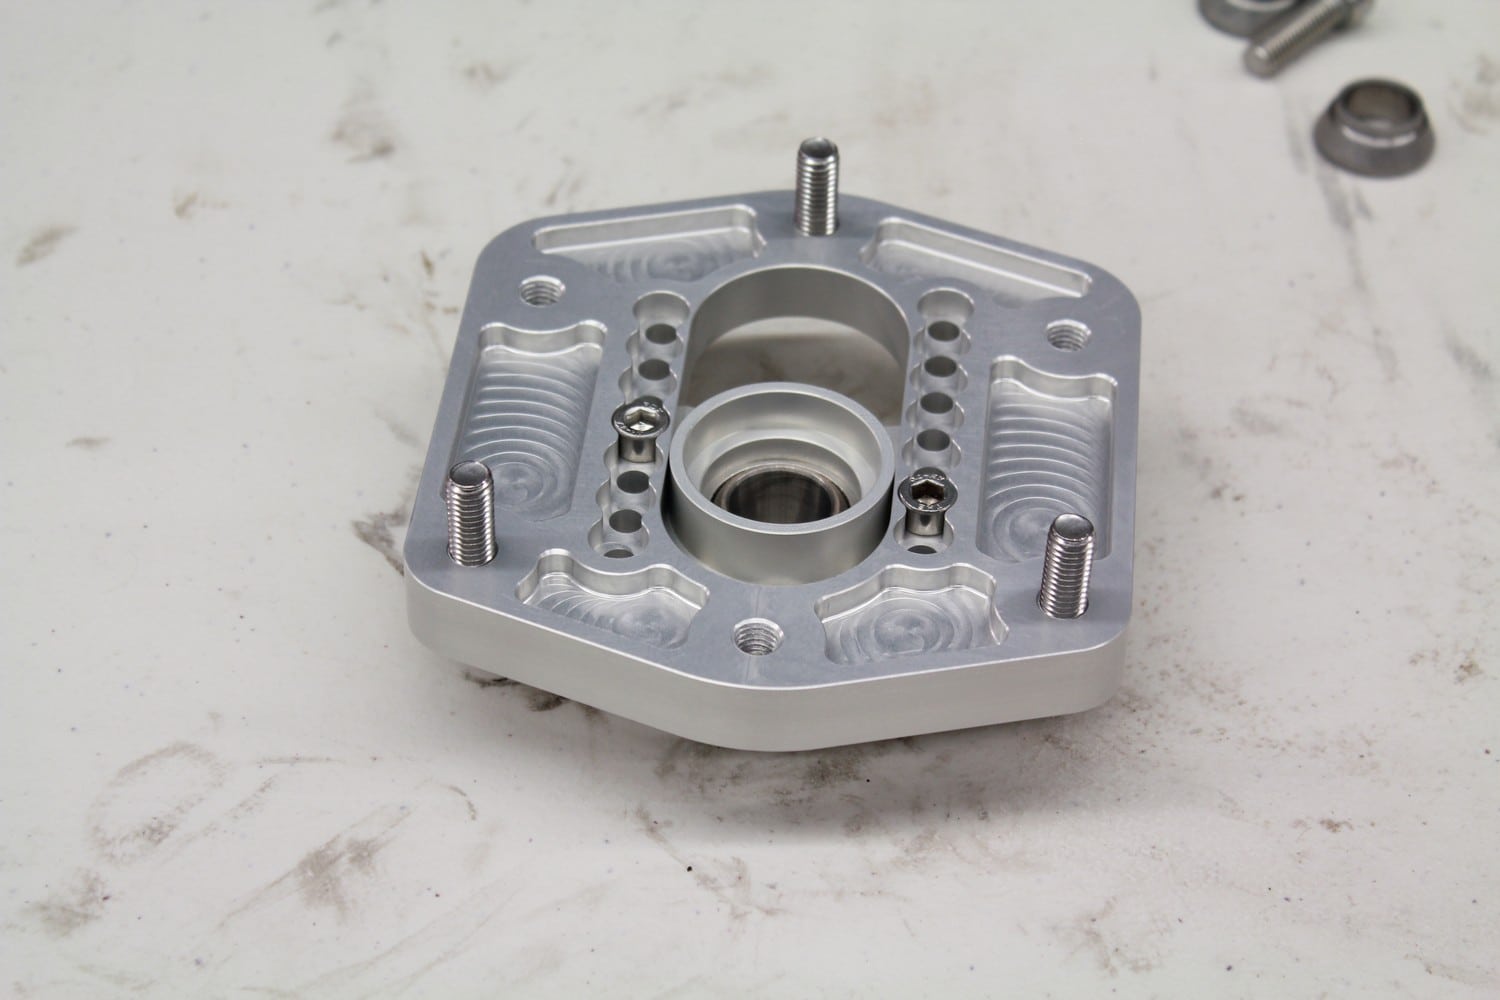
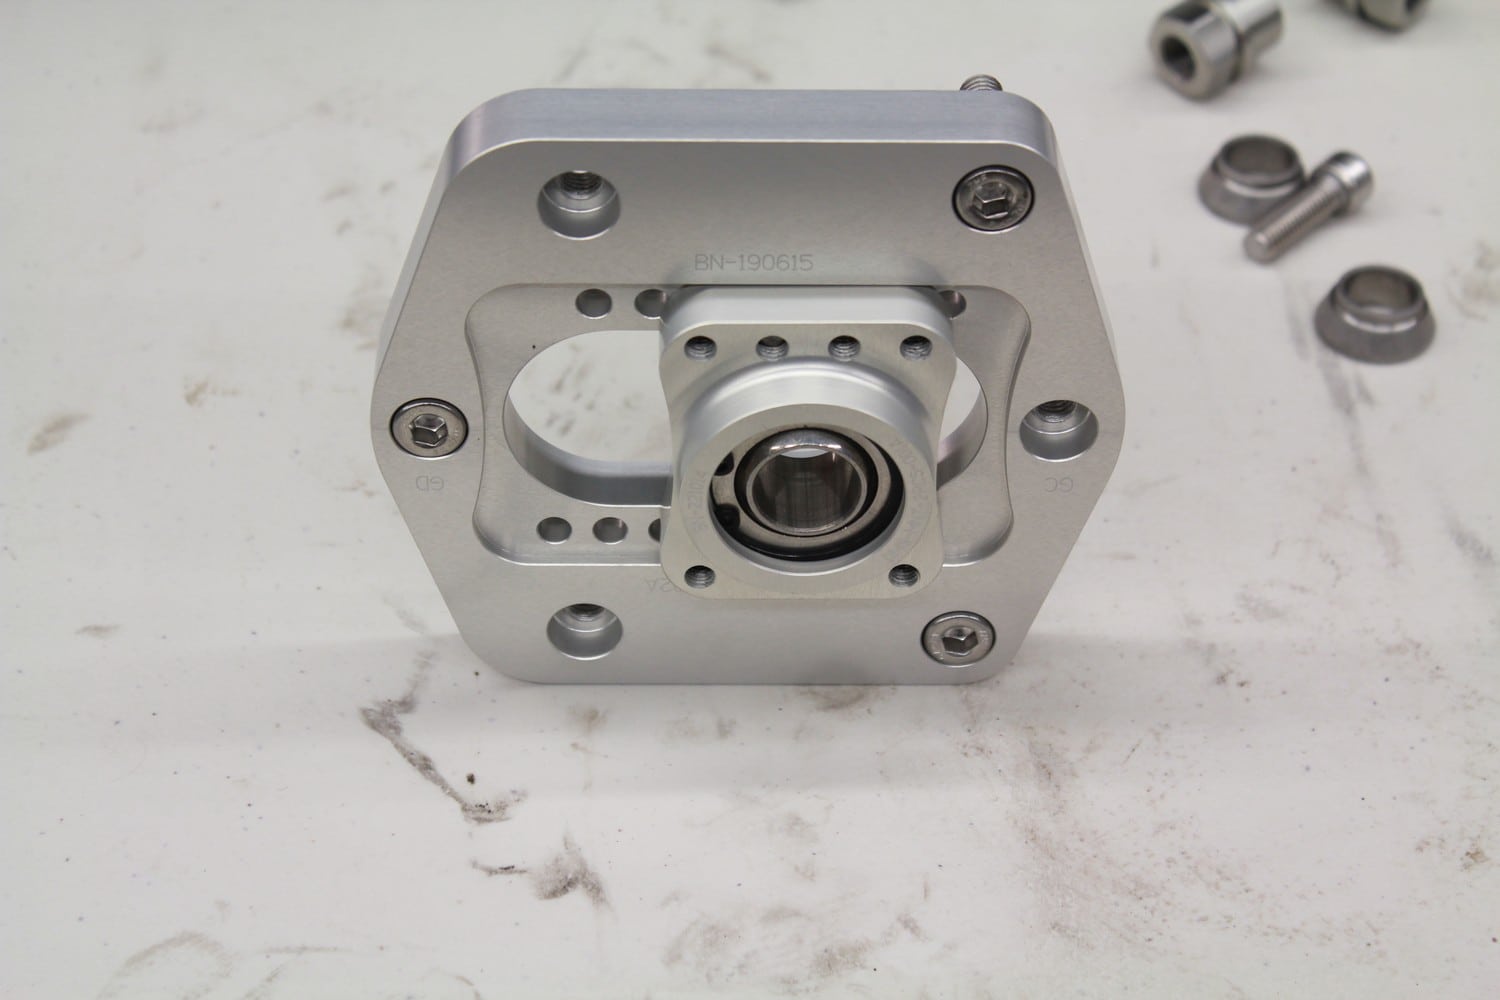
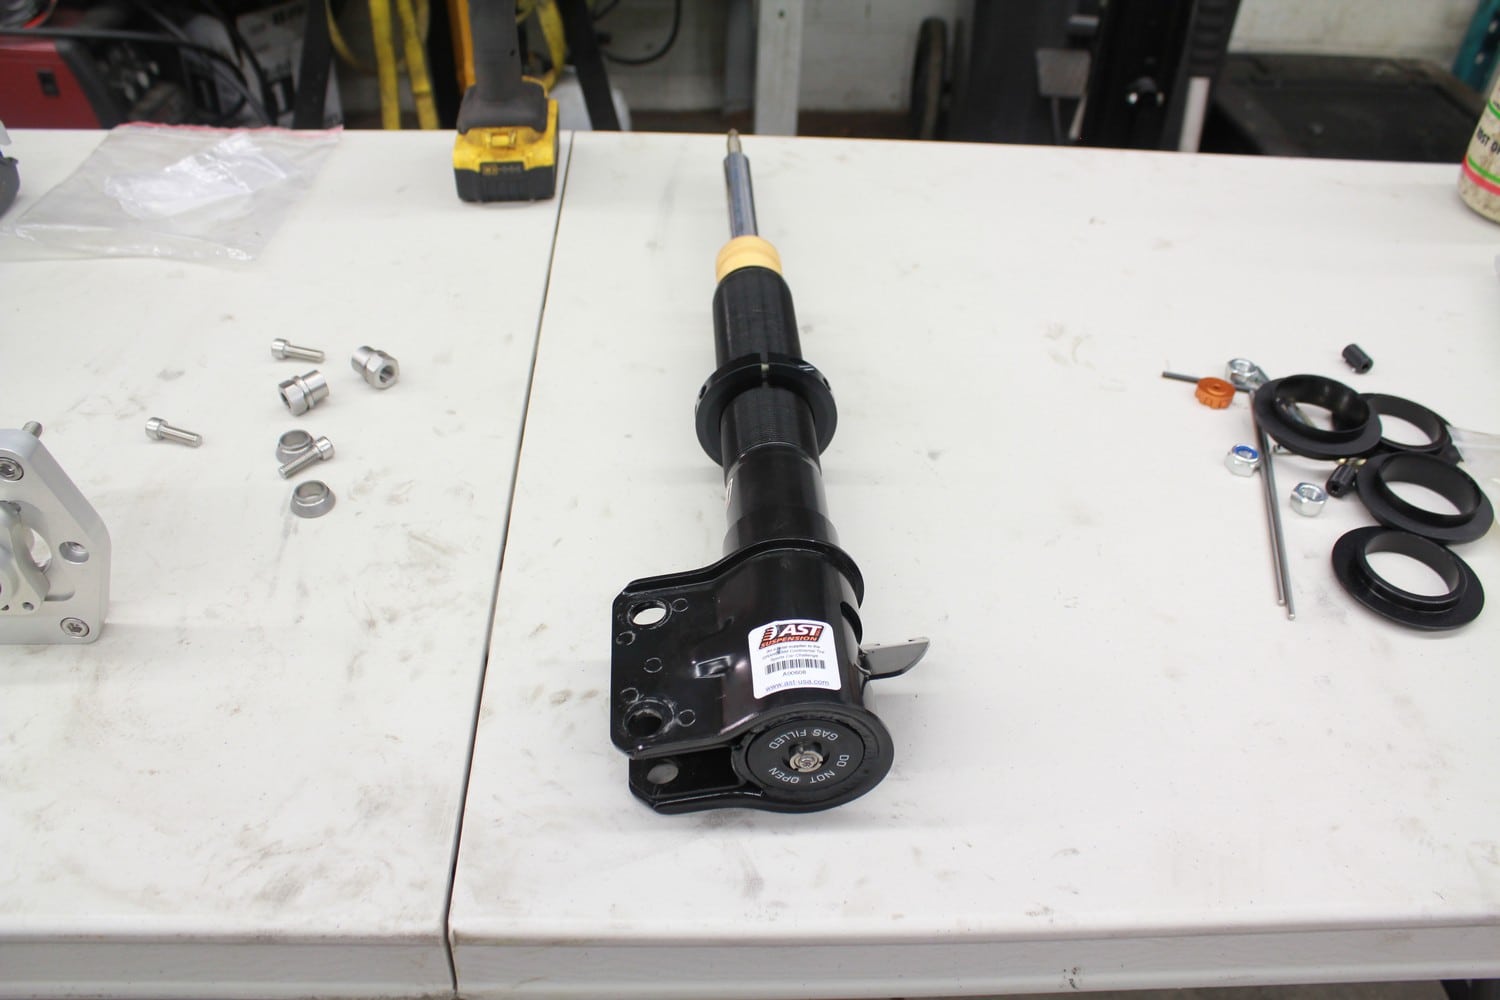
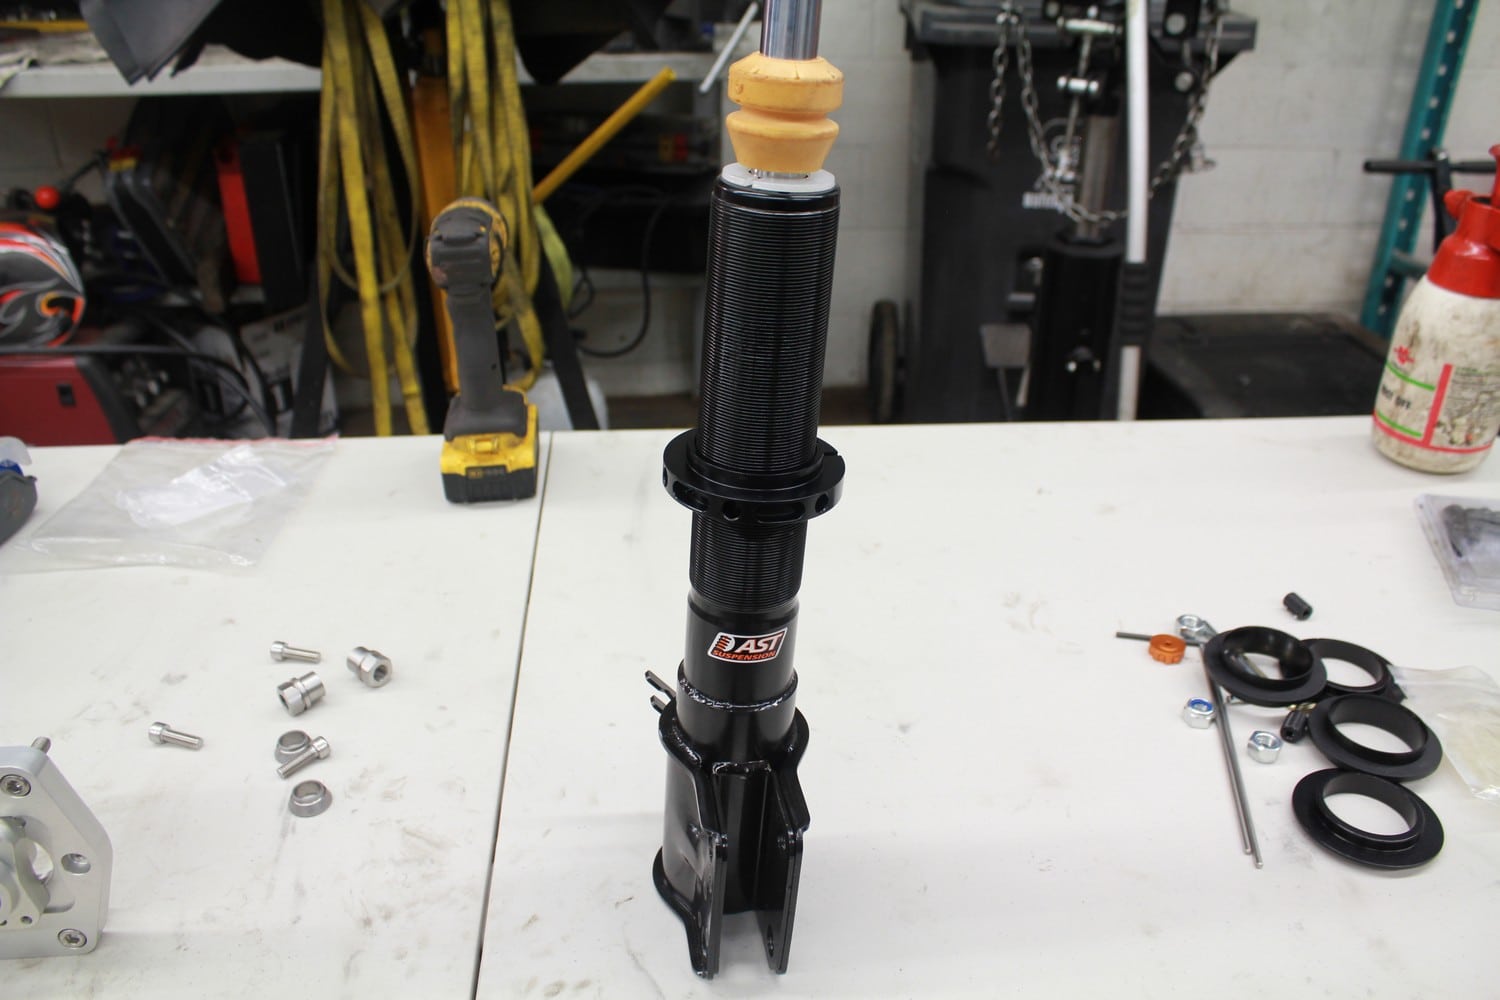
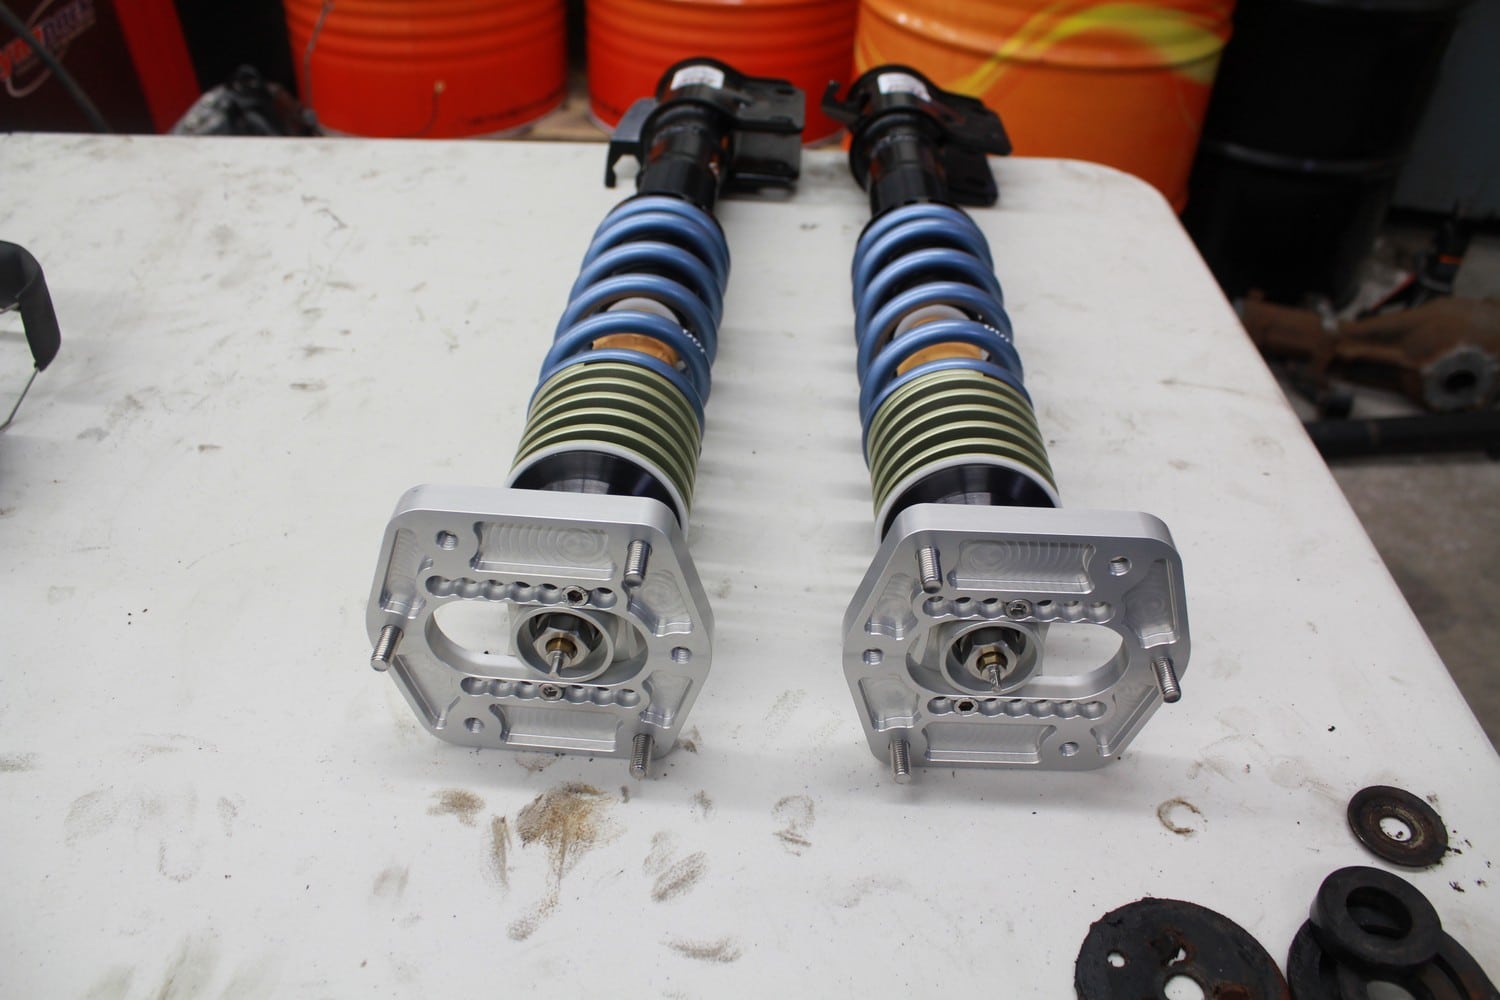
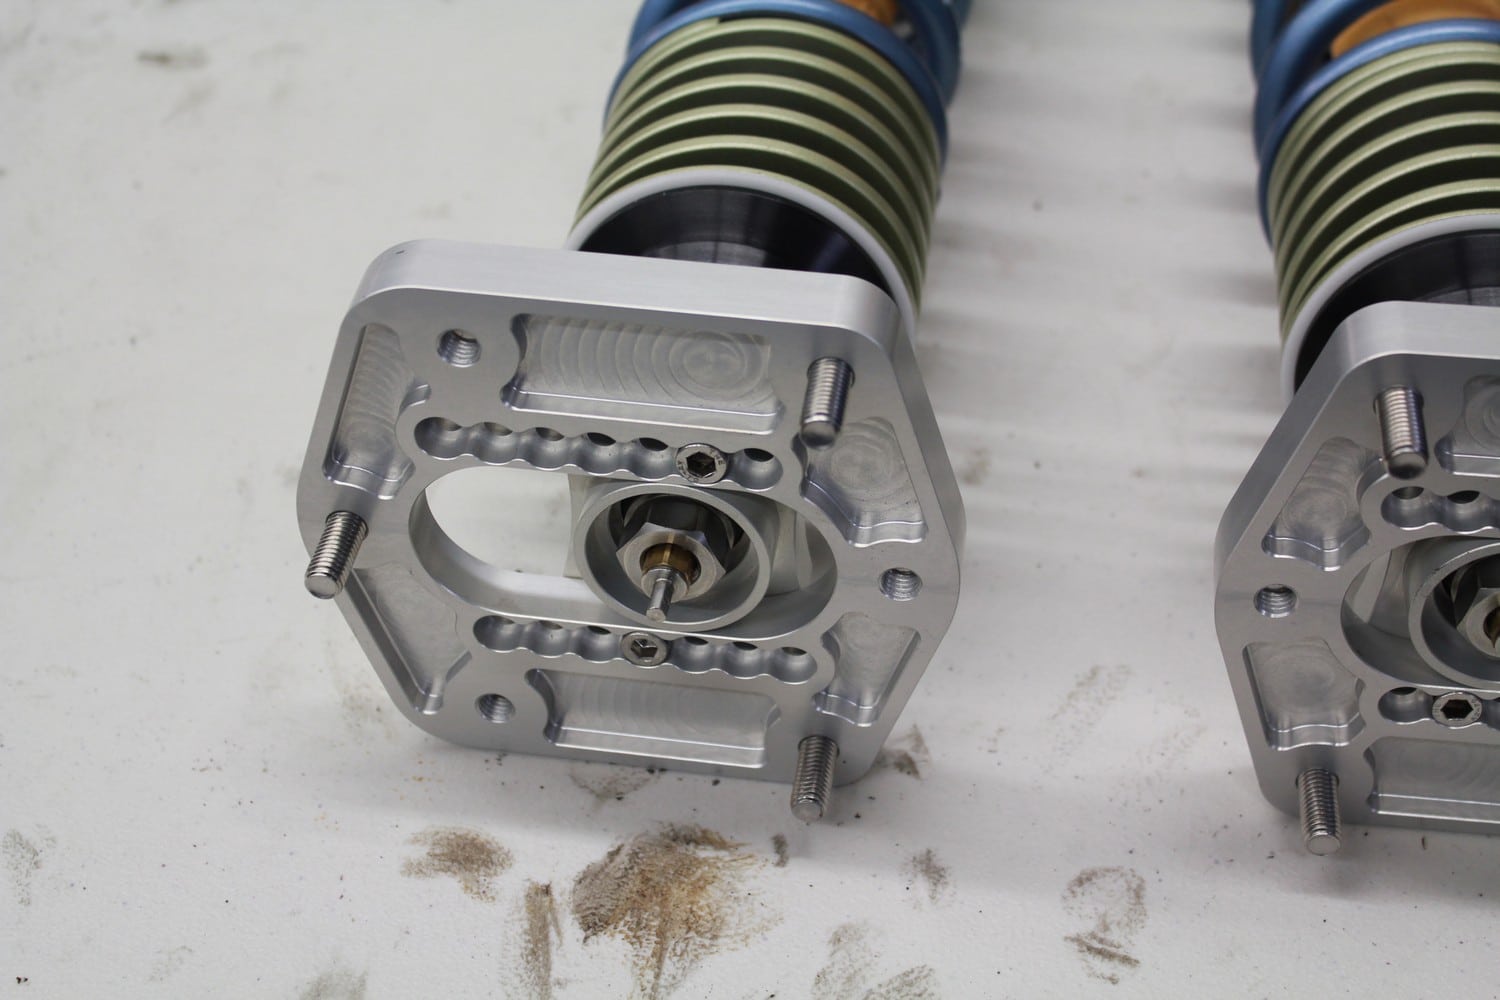
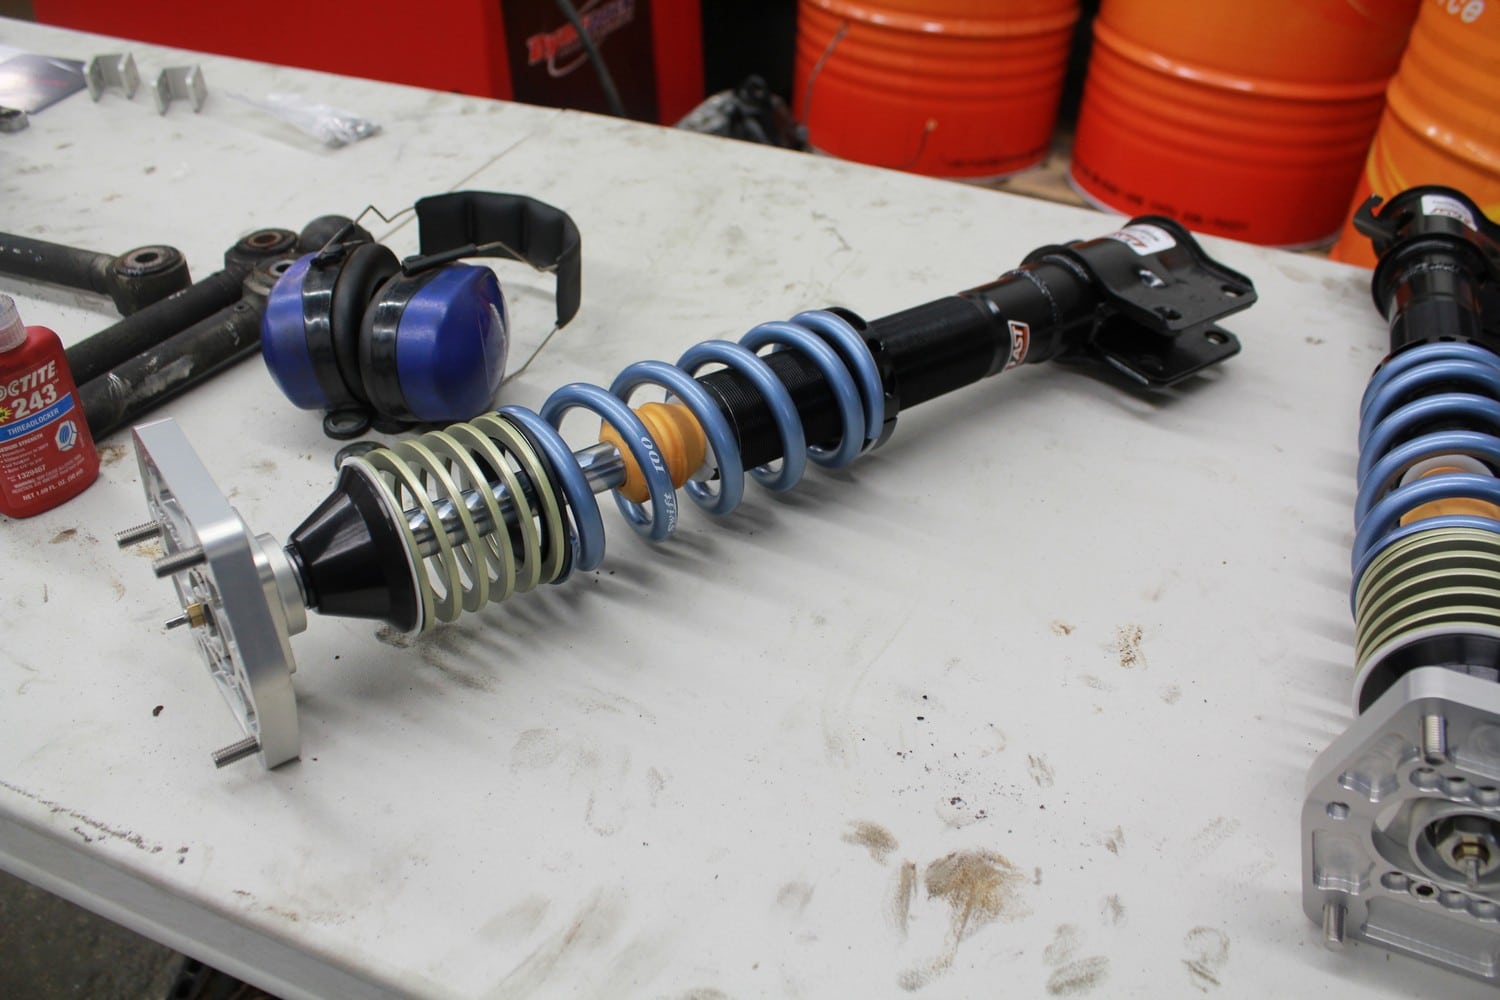
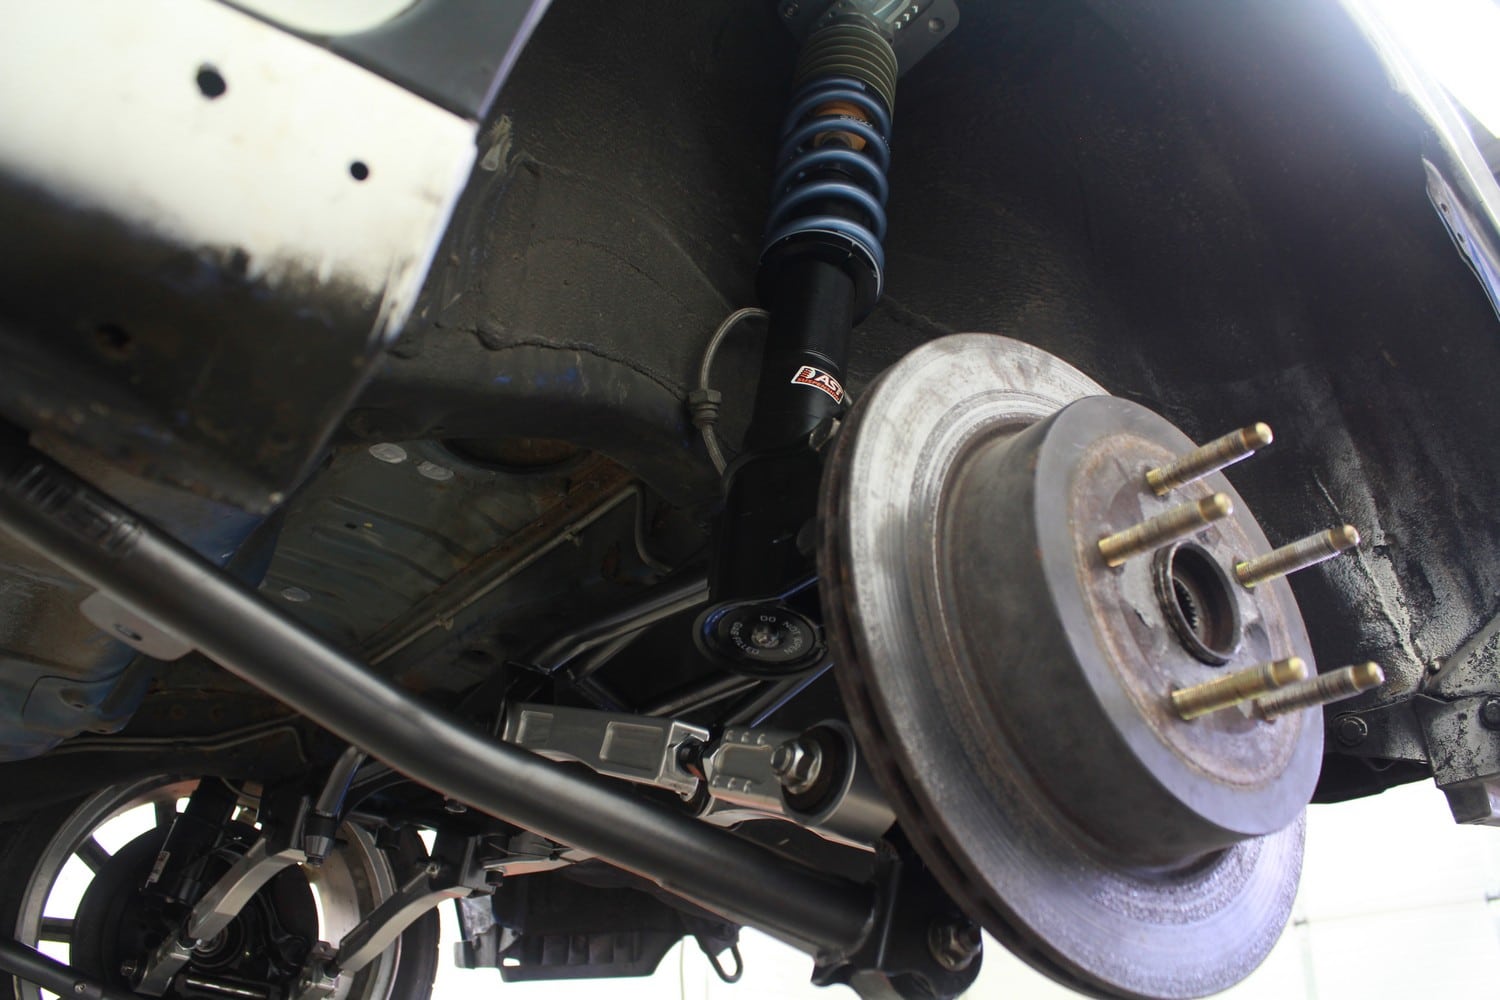
So yes I know it’s been far too without an update, things have been so busy around the shop and I haven’t been able to dedicate myself to updating this. When we left off last we finished installing the front suspension and now we’ll go over the rear suspension which features even more sweet parts. Obviously the coilovers on the rear are going to be the same AST 4150’s that are on the front, the rears are paired up with Swift Coilover springs and helper springs. For top mounts we again turned to MooreSport for a set of their motorsports adjustable top mounts which will give us camber adjustment at the top of the suspension system. These plates are built with the same materials and attention to detail as the rest of their products and feature the same adjustment system for consistent settings without slippage…no one likes slippage right?

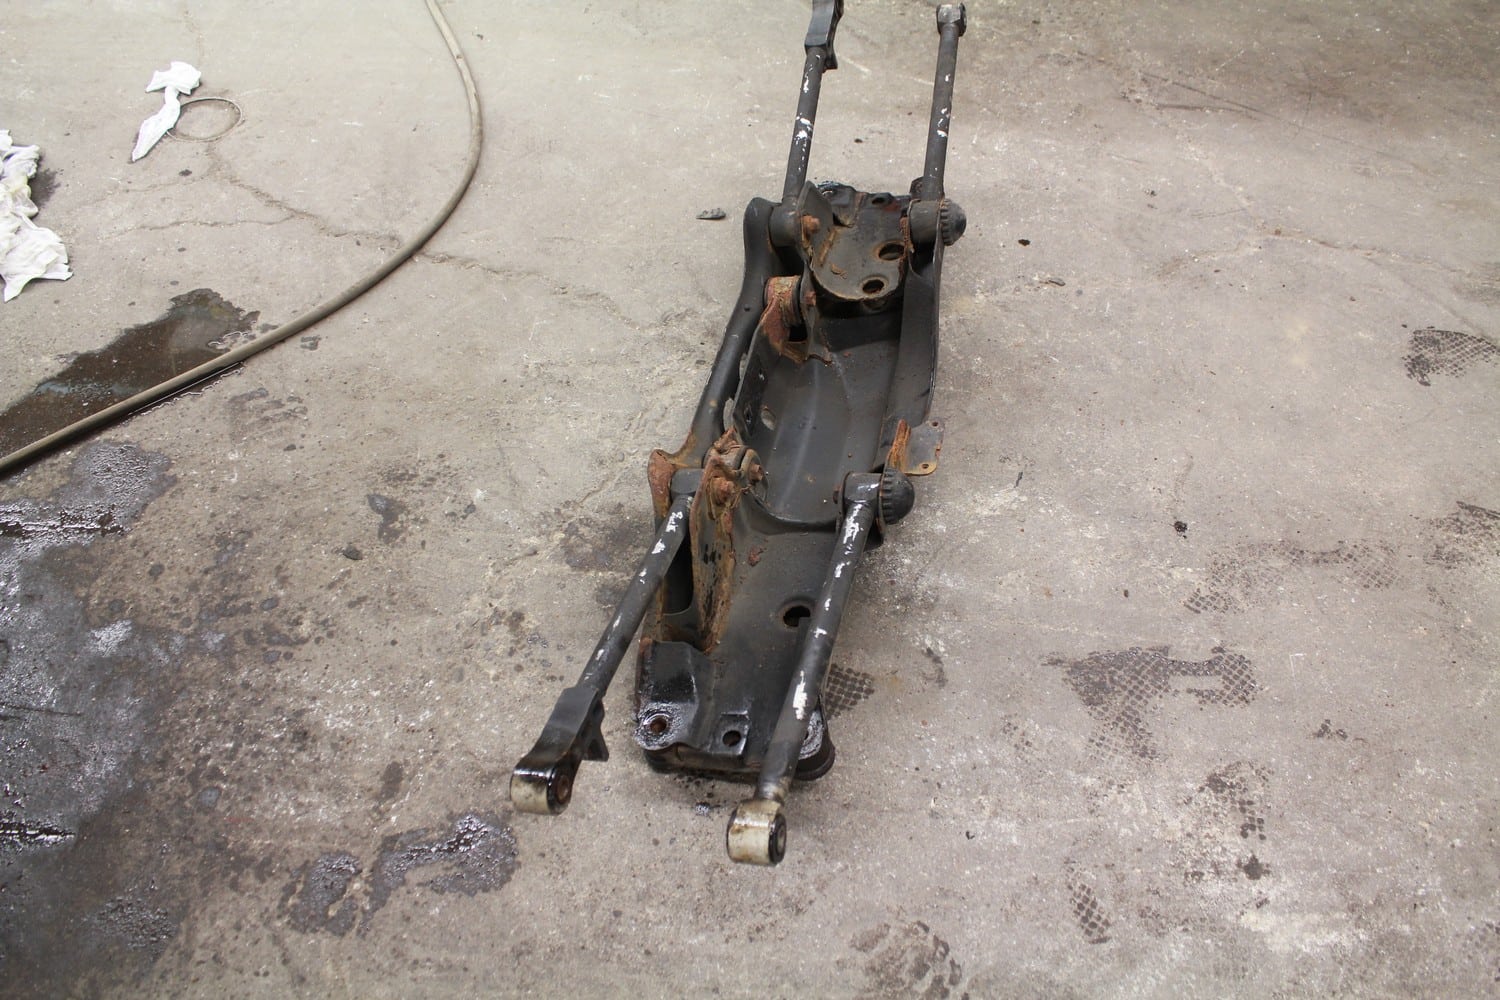
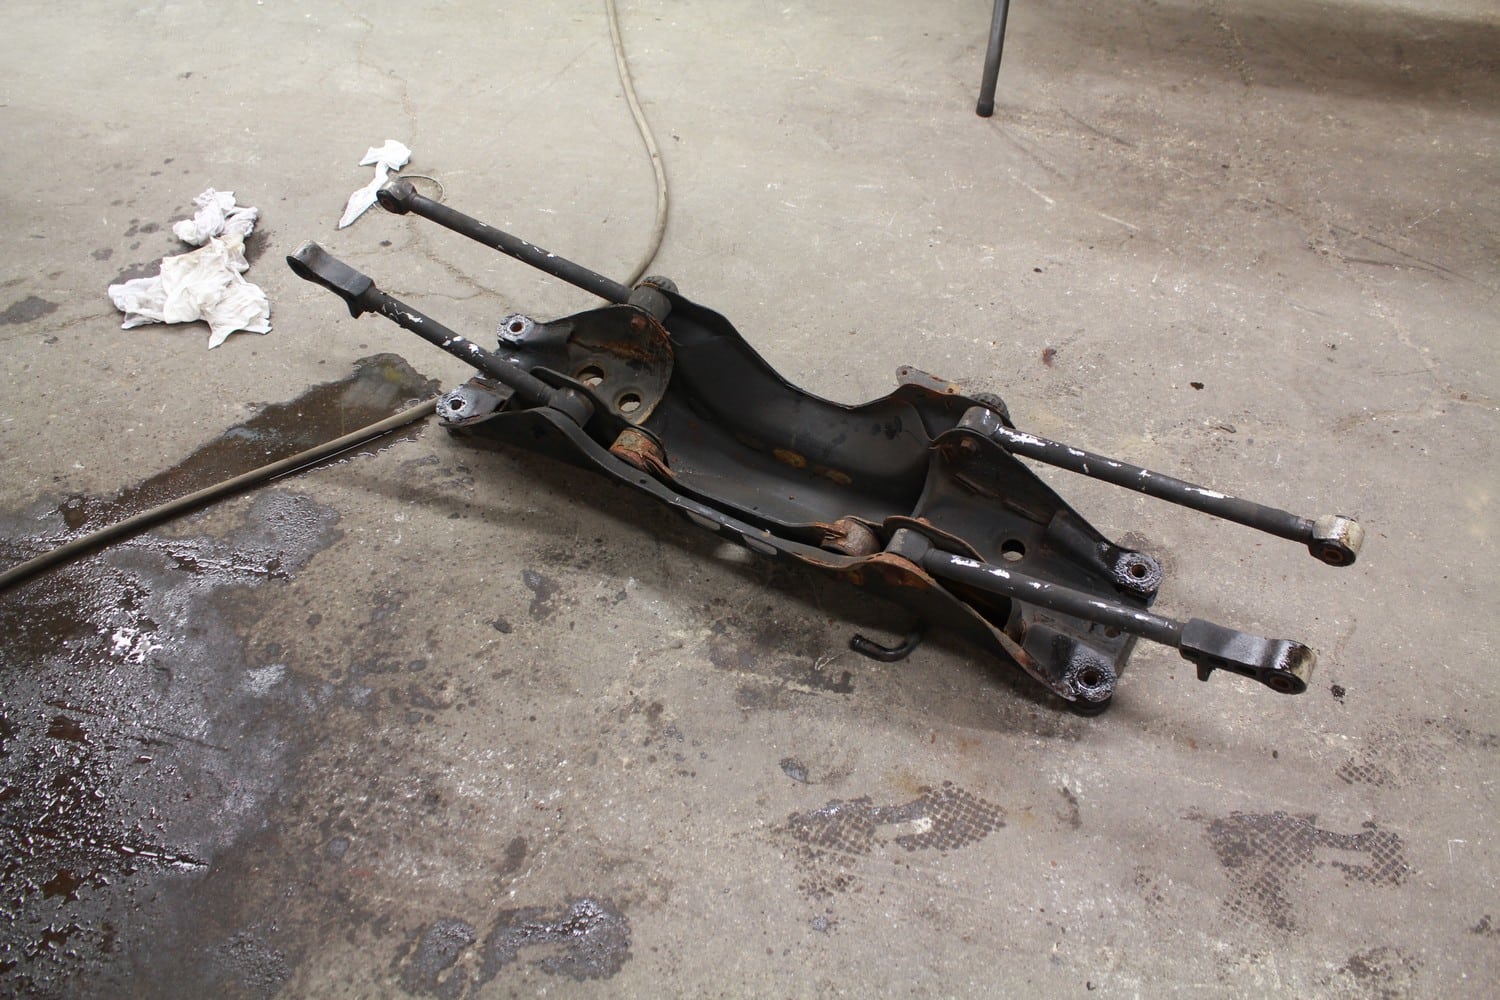
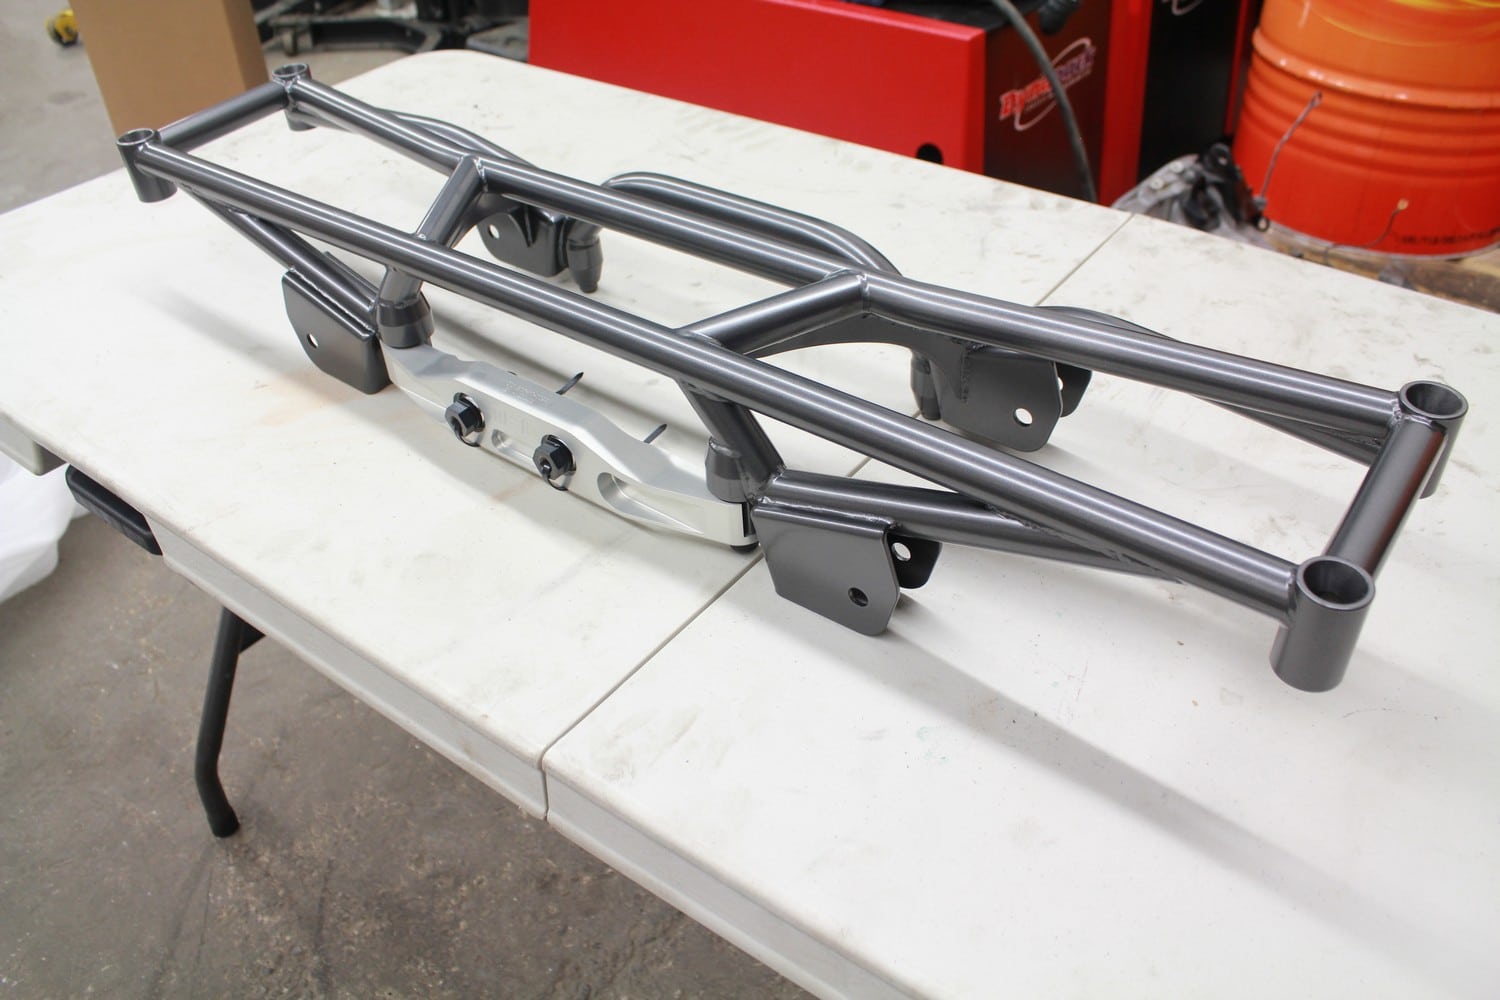
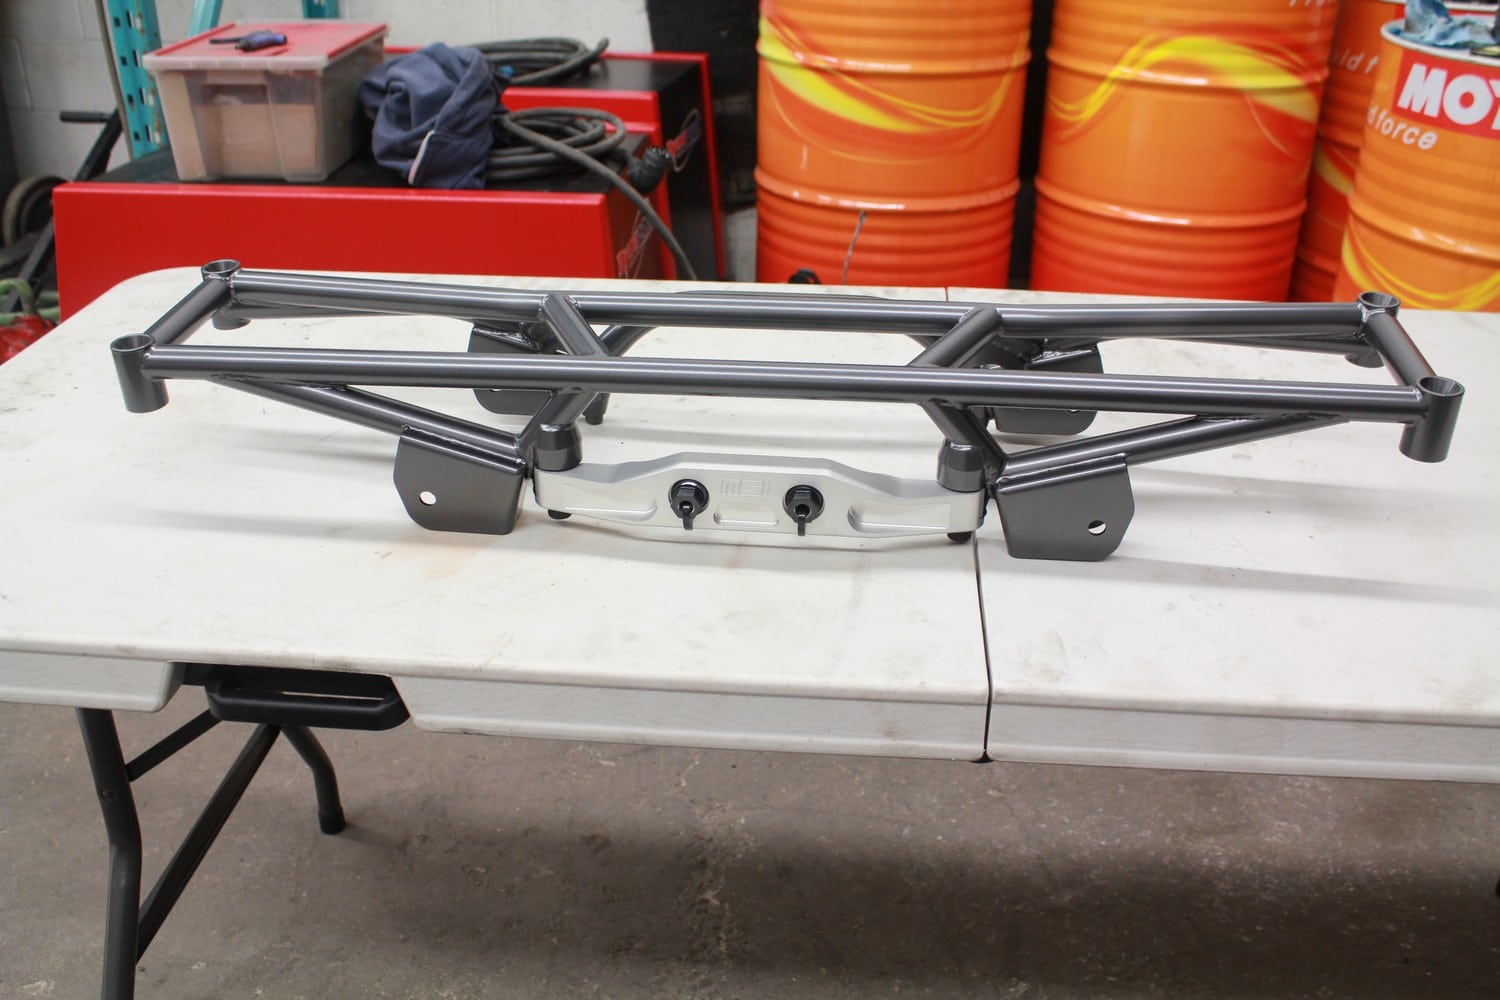
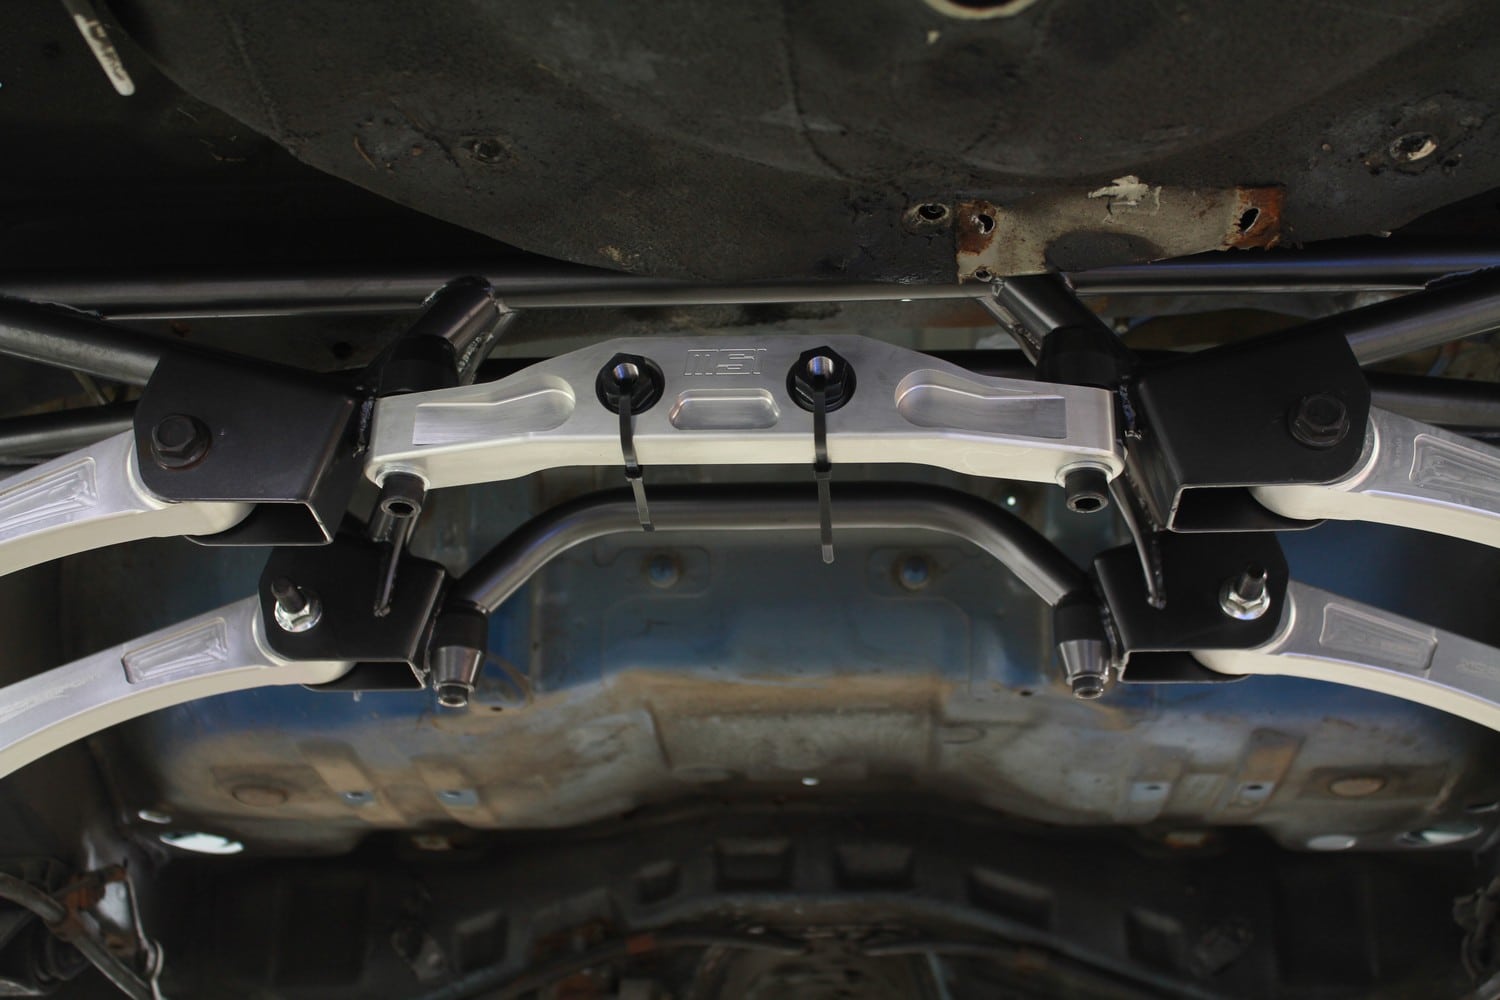
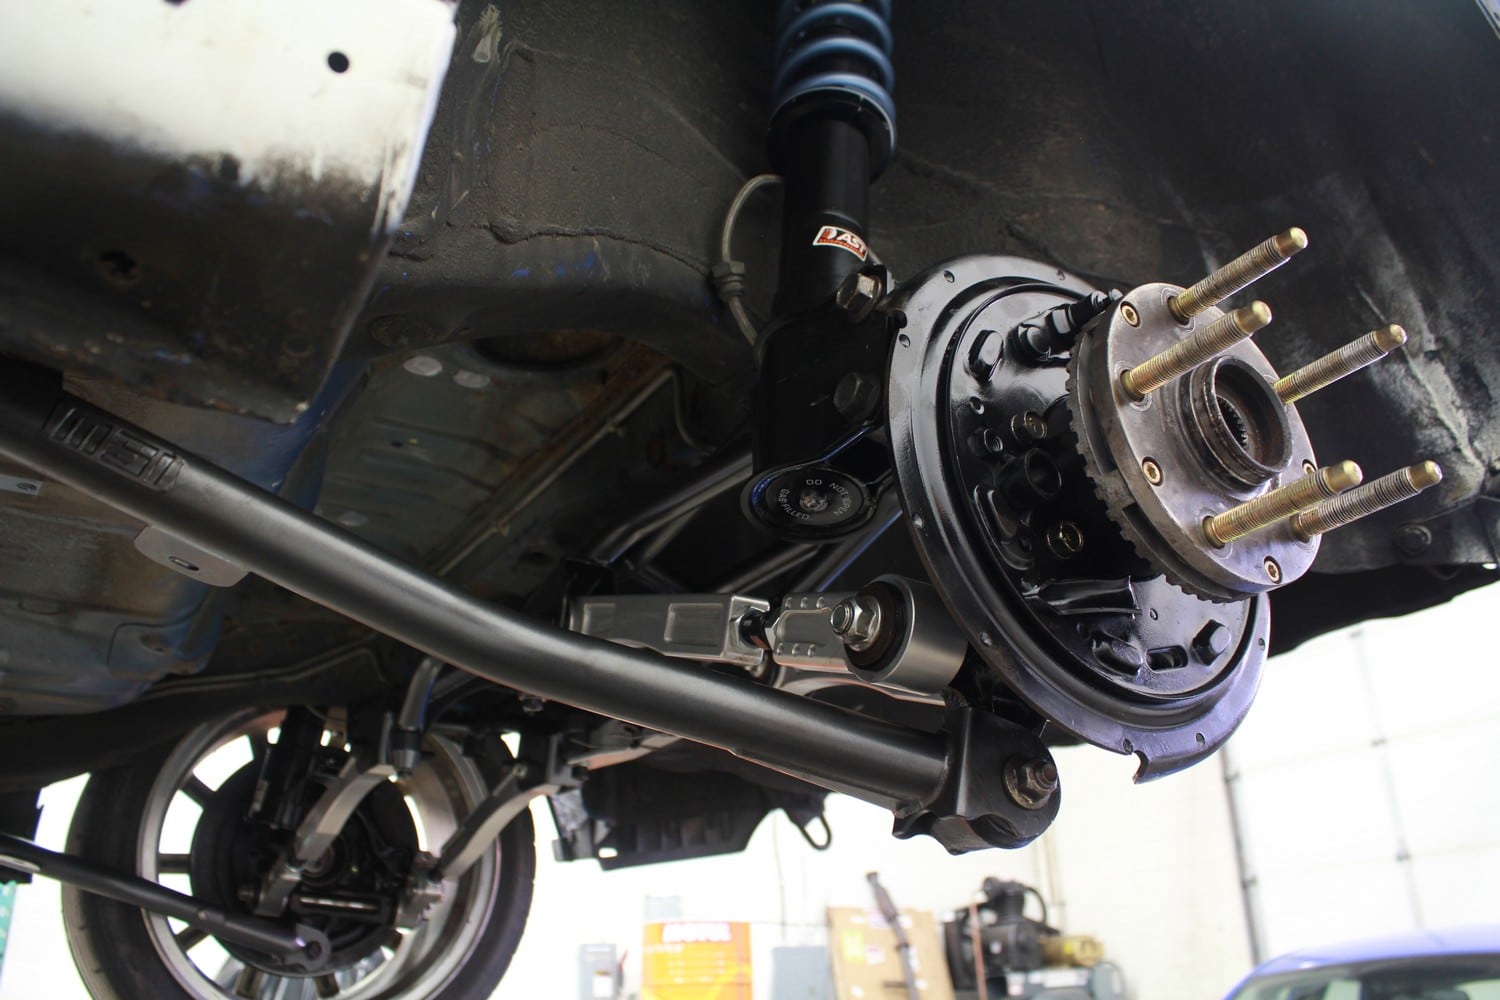
The next step was to remove the stock rear subframe on the car in preparation for the beautifully made MooreSport Competition rear subframe. The stock subframe is made of stamped steel that is welded together in areas and leaves a lot to be desired in terms of weight and rigidity. With the stock subframe removed we test fit the competition frame and I had completely forgotten that the stock fuel tank has to be clearanced on some applications with the competition version. Not wanting to simply bang a couple dents in the tank I opted to remove the OEM tank. As a typical gearhead any excuse to purchase more parts is the answer so at this moment I decided a fuel cell was to be ordered for the car. As you can see the new subframe is a work of art but it also has a ton of features built-in. For starters this is the 2″ correction version which has corrected the mounting locations of the lateral links for vehicles that are lowered up to 2 inches over stock. This is very important in maintaining the proper geometry when the car is lowered significantly. The design has been optimized for rigidity while still dropping almost 50% of the weight when compared to the OEM subframe. You’ll also see the beautifully CNC machined aluminum rear diff mount which allows you to easily drop the rear diff straight down instead of having to manipulate it into place with the factory mounting. The competition version eliminates the factory toe adjustment which is unreliable. With the tank removed we proceeded to mount the subframe up to the car which fit perfectly without any adjustment needed due to the precision in the assembly process that MooreSport takes.
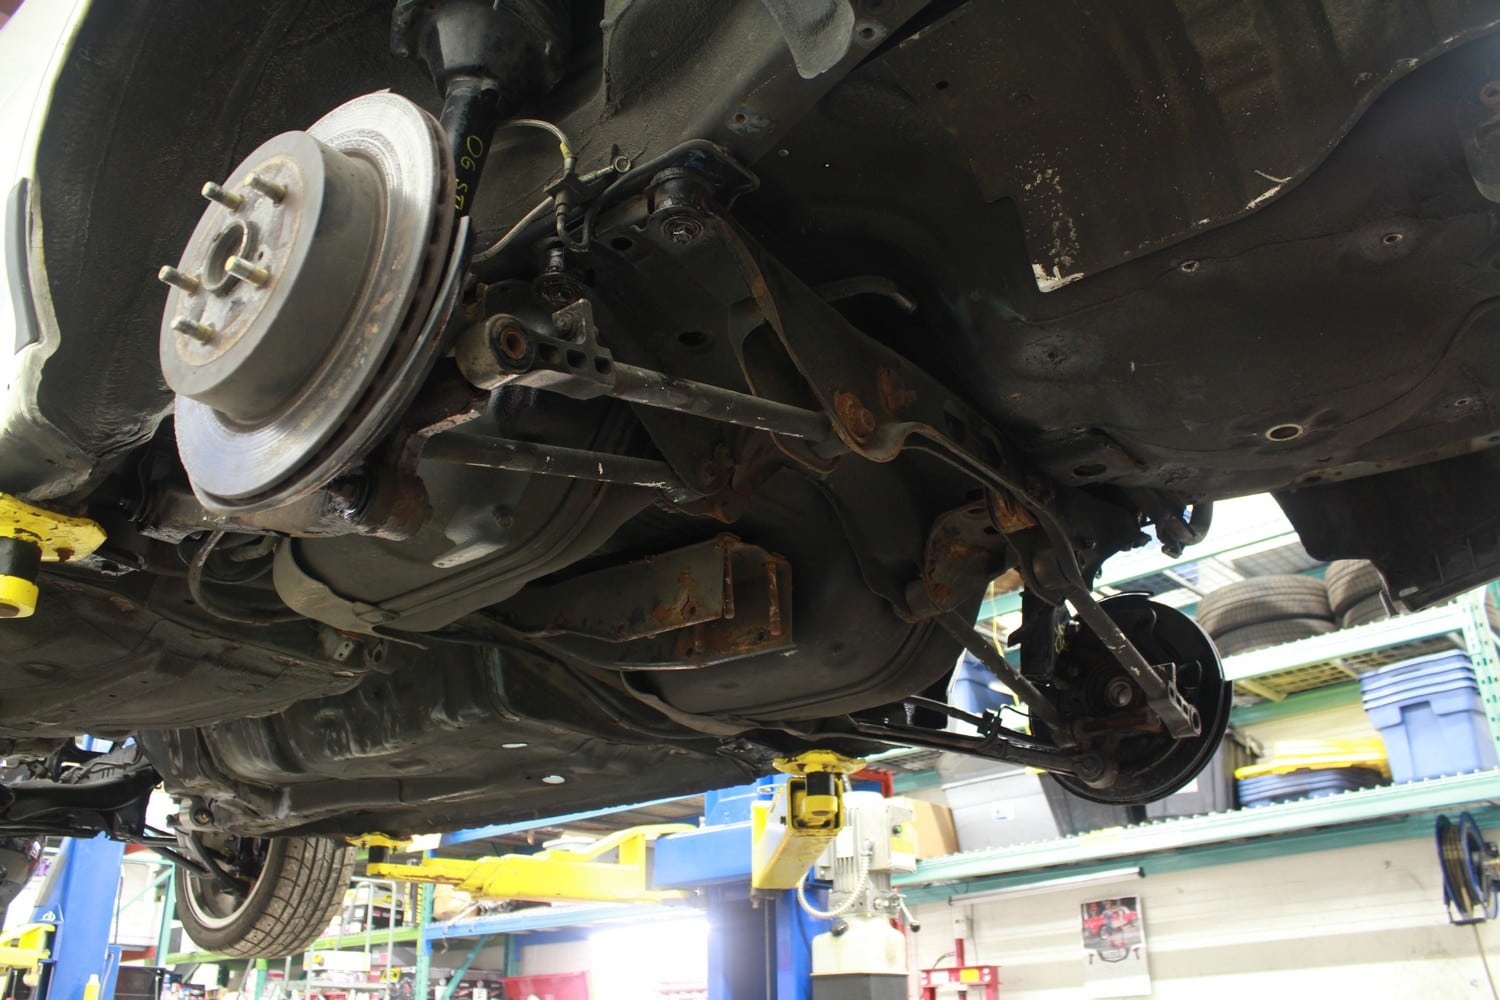
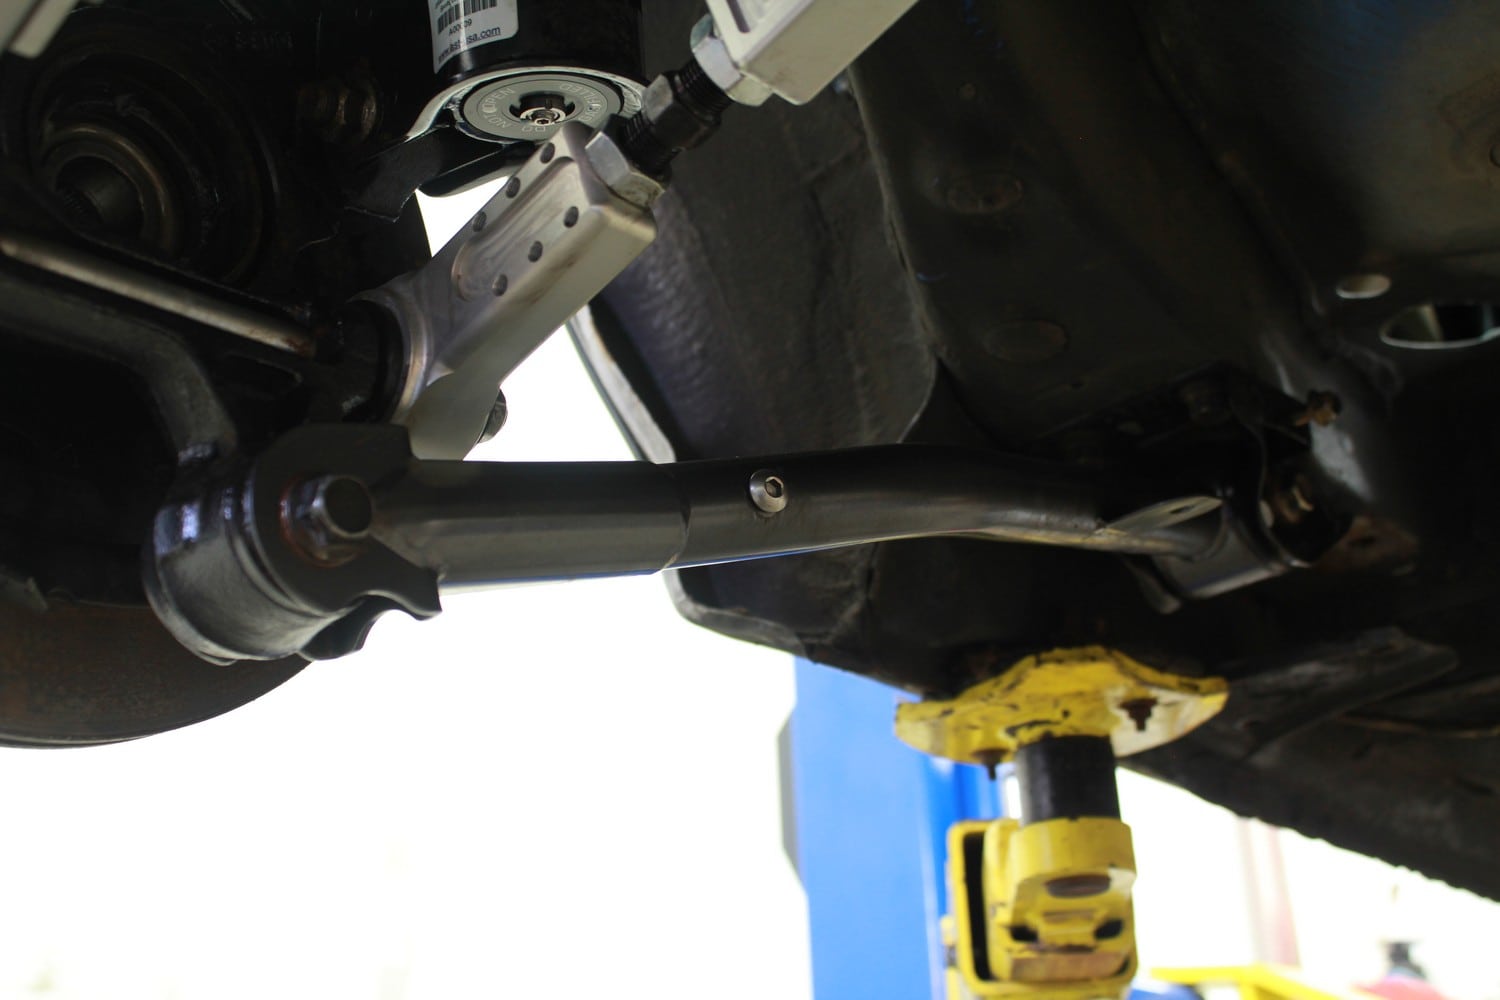
With the subframe in place the next parts needed were the lateral links. Because we eliminated the factory toe adjustment with the subframe the lateral links provide us with this adjustment with a much greater range as well as in a more consistent and secure manner. The billet aluminum lateral link kit not only provides us a huge amount of toe adjustment but also even more camber adjustment. Combined with the adjustable top mounts we can achieve some pretty crazy negative camber if we need it. Both adjustments are done with threaded adjusters that push or pull the ends depending on the direction turned and then use a locking nut to secure them in place so they don’t move once adjusted. While in most cases I’d go with bearings over bushings, I decided to stick with the bushings for the lateral links for the time being. These will still greatly reduce any slop in the suspension and are the same bushings that we offer from Turn In Concepts that can be installed on your stock lateral links.
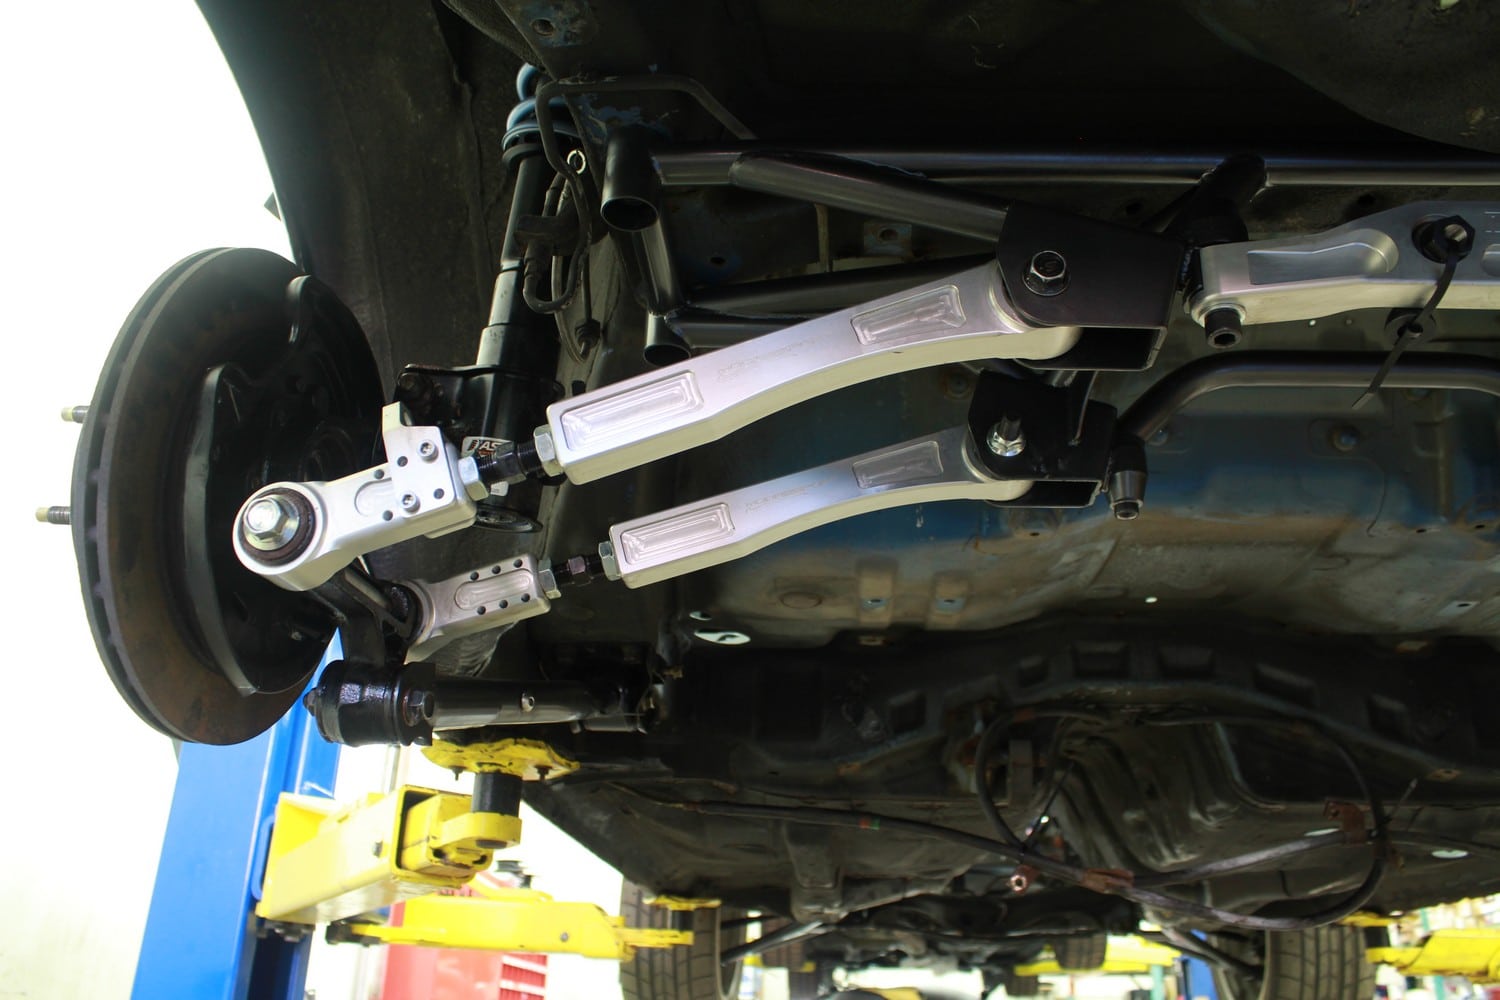
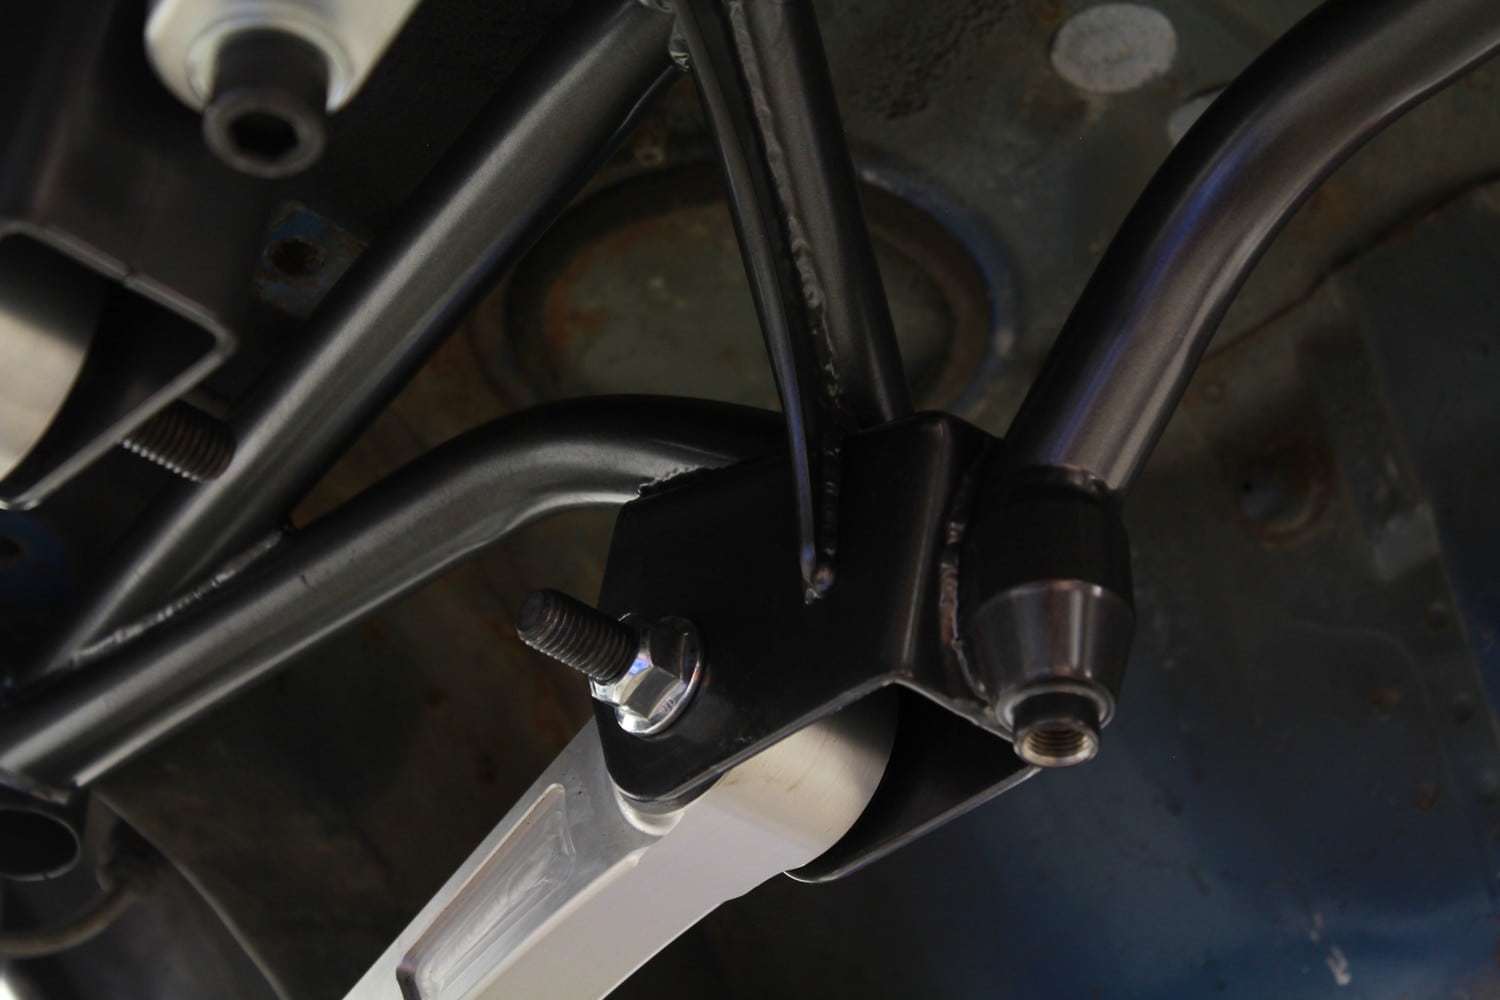
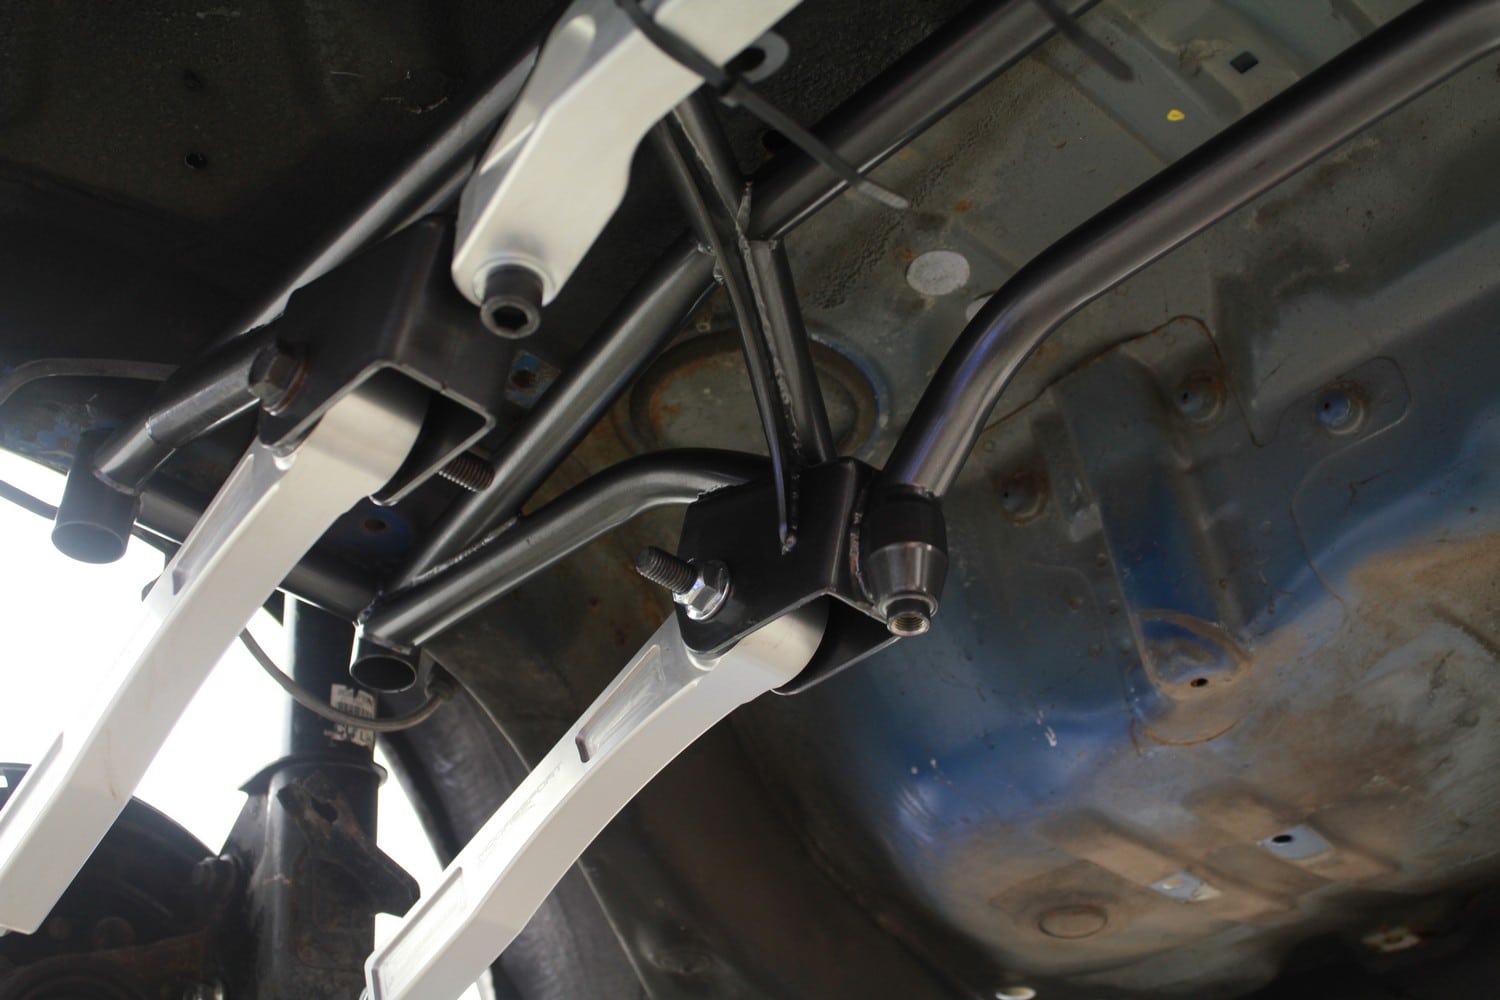
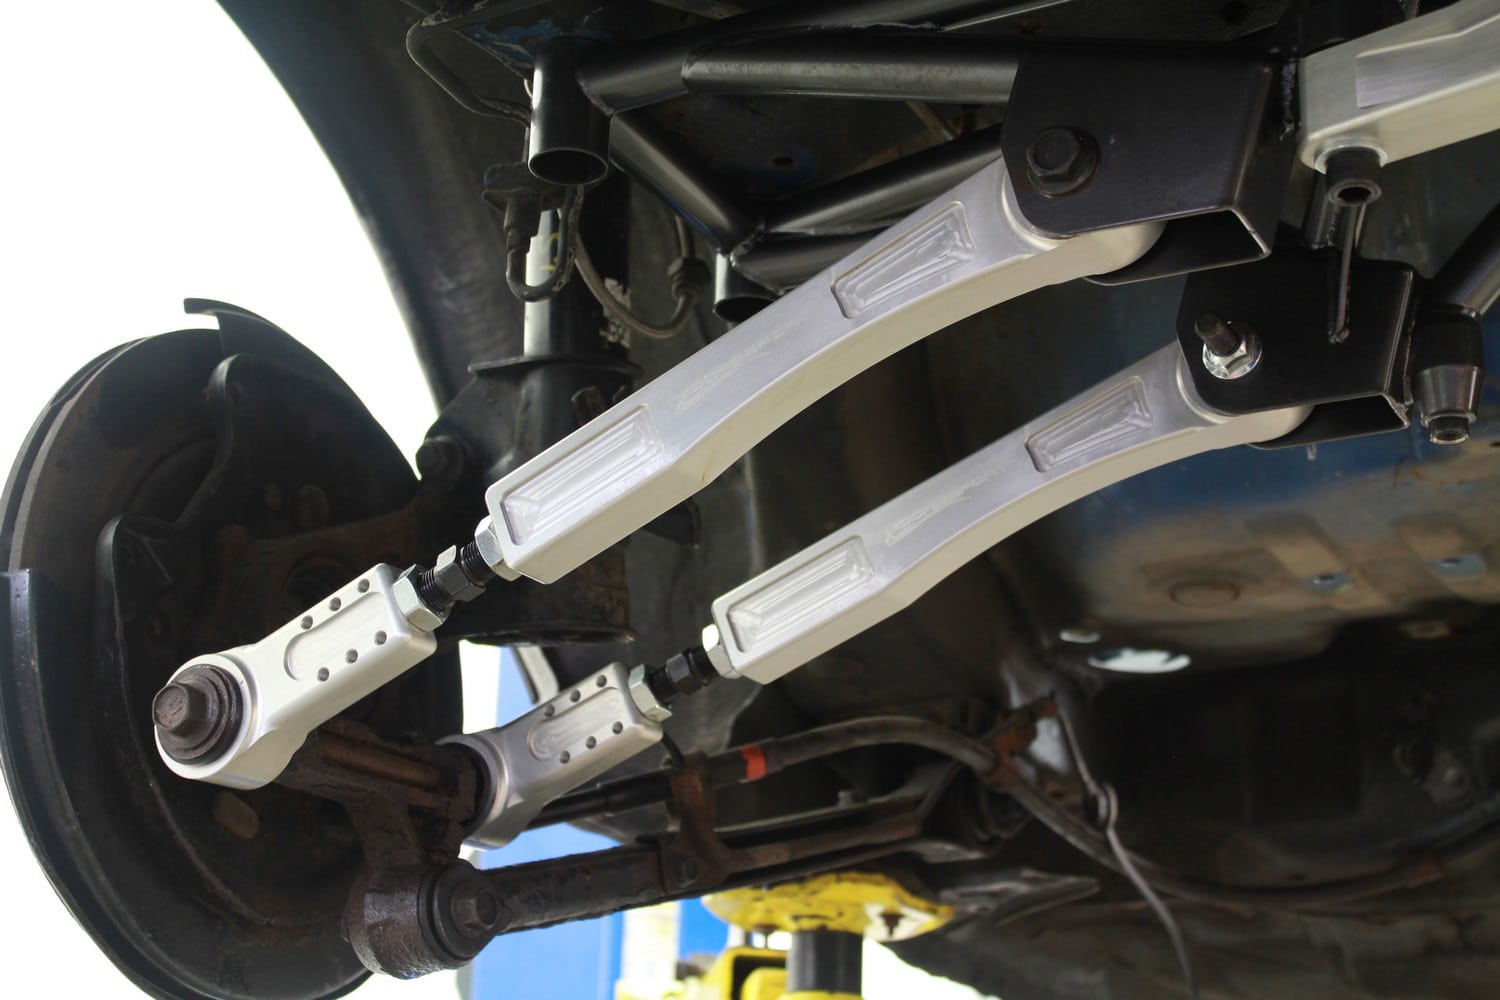
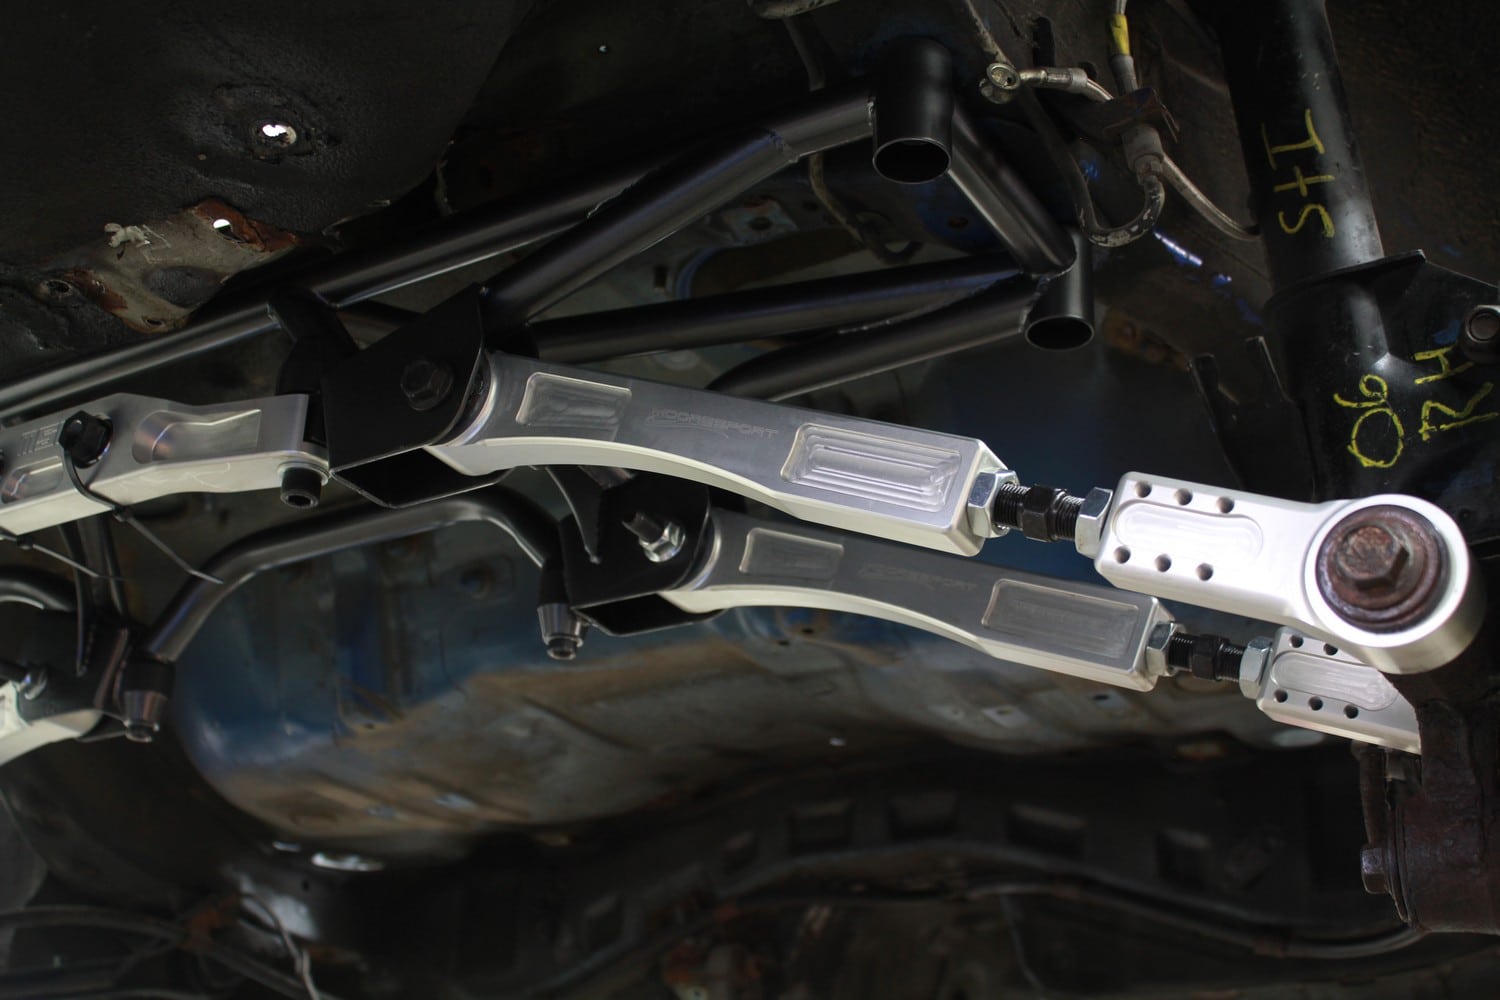
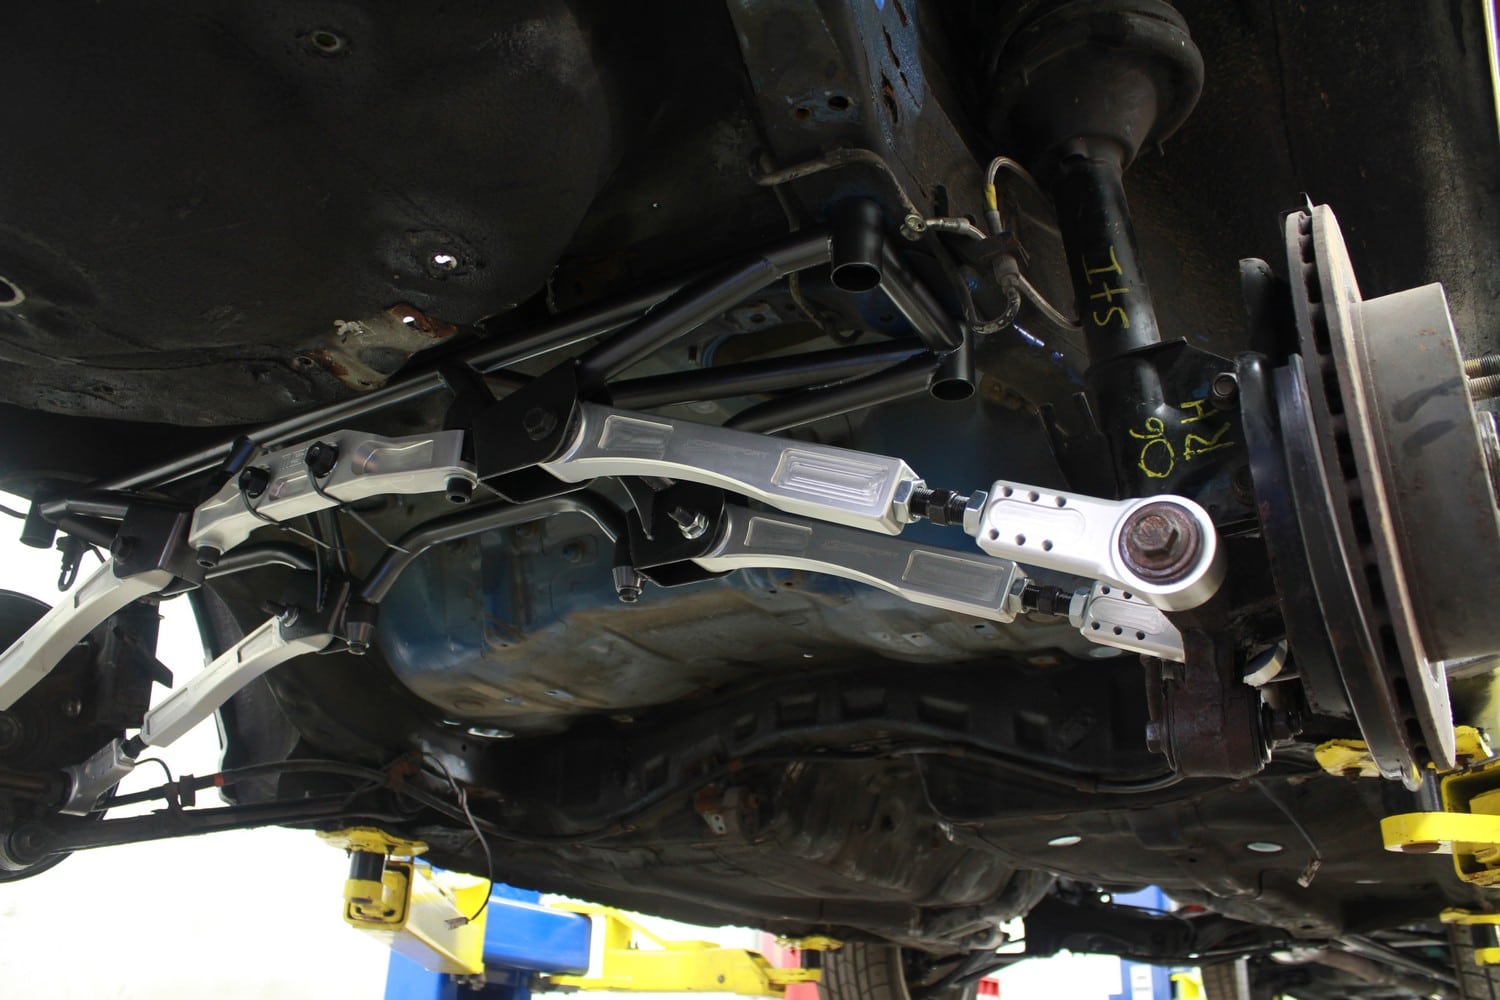
Finally the last parts for the rear suspension were the knuckles and the trailing arms. We disassembled one of the pairs of knuckles we had and removed all the e-brake components, cleaned them up and painted them black so they will look a little nicer. We also replaced the bearings as well so we know everything is fresh for when the car drives for the first time. After installing the rebuilt knuckles we proceeded to install the trailing arms. These again are from MooreSport and are also designed for a lowering correction of 2 inches which combined with the subframe should give us a pretty good basis to start playing with alignment settings. The MSI trailing arms are lighter and stronger then the OEM pieces as well which is always nice. In this instance we used the Turn In concepts forward and rear trailing arm bushings which are a great upgrade and will suit the cars needs for the near future. I may switch out for a spherical bearing in both locations down the road but I wanted to stick with the bushings on the rear end.
With everything installed we were able to put the car back on the ground and prepare for the next step which is the upgraded brakes.
————————–THE MOD LIST————————-
Suspension
- Mooresport N12 Front Lower Control Arms – Mooresport
- Mooresport Motorsports DSS Kit – Mooresport
- Whiteline KCA313 Roll-Center/Bump Steer Kit – Whiteline
- AST 4150 Series 1-Way Dampening Coilover – AST-USA
- Swift Coilover Springs – Swift Springs
- Swift Helper Springs – Swift Springs
- Mooresport Street Front Camber Plates – Mooresport
- Mooresport Motorsports Rear Camber Plates – MooreSport
- Mooresport Circuit Version Rear Subframe – MooreSport
- Mooresport Billet Rear Lateral Links with Bushings – MooreSport
- Mooresport Rear Trailing Arms 2″ Correction – MooreSport
Wheels & Tires
- ARP Extended Wheel Studs
- Powdercoated Front Knuckles – Stripping Technologies
Interior
- Removed Full Interior, Sound Deadening, HVAC System
- Custom Gold Painted Roll Cage with White Interior – Uni-Body Collision
- Engine Bay Painted Low Gloss Black – Uni-Body Collision
Safety
- Stitch/Seam Welded Chassis – Rally/Race Developments
- Full Roll Cage – Rally/Race Developments
- Welded in Seat Mounts – Rally/Race Developments
————————–Sponsors & Supporters————————-
Rally/Race Developments
Uni-Body Collision
Mooresport (MSI)
AST-USA
Swift Springs
Whiteline Performance
Stripping Technologies

Laszlo Toth
Looks exceedingly stiff and strong. MSI gear has lovely workmanship.