If you’ve been following the progress I’ve had with the 2015 WRX you’ll know that the stock 2-Piston Front and 1-Piston Rear Sliding Calipers were one of the areas I felt were the weakest when using the car on track. Because of this I upgraded the fronts to a StopTech ST-40 4-piston solid forged caliper last year which made a huge difference not only in lap times but the ability to be on track longer. The one downside to this was that without balancing the rear with more aggressive pads the fronts would cause very extreme weight transfer to the front of the car making the car want to rotate the rear end on very heavy braking. This would not be an issue for most people upgrading just the fronts but with how hard the car is pushed on track it made for some “fun” braking at tracks with high speed heavy braking zones.
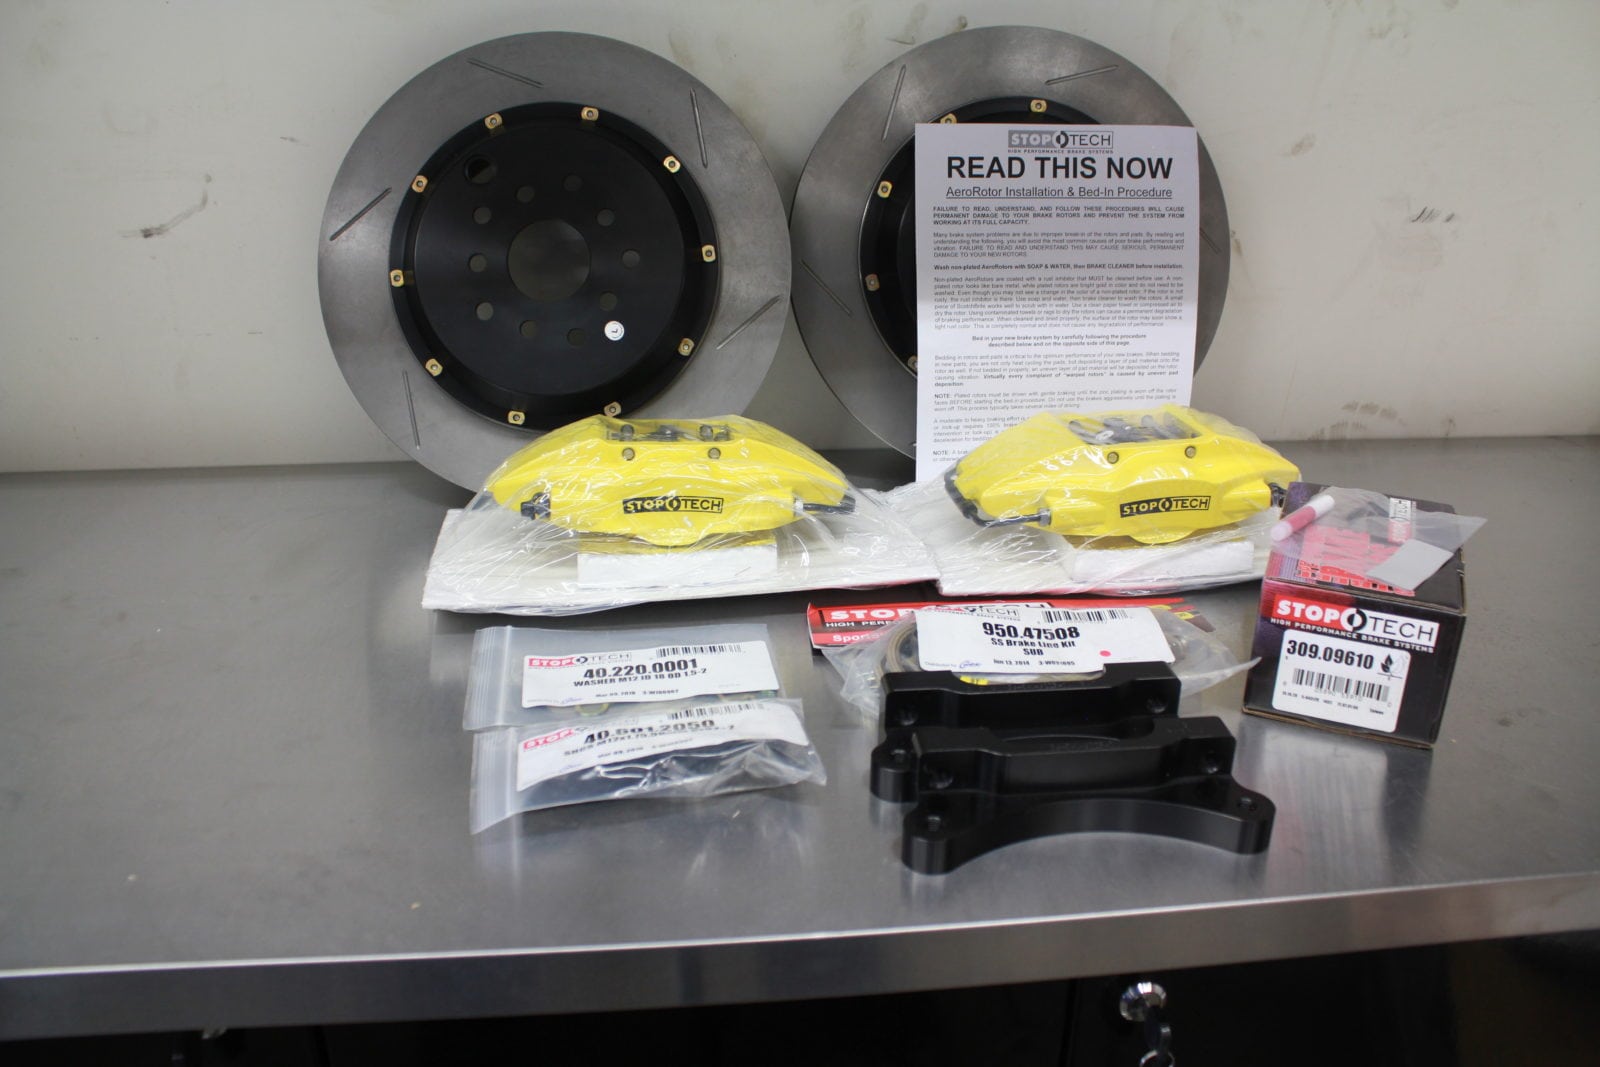
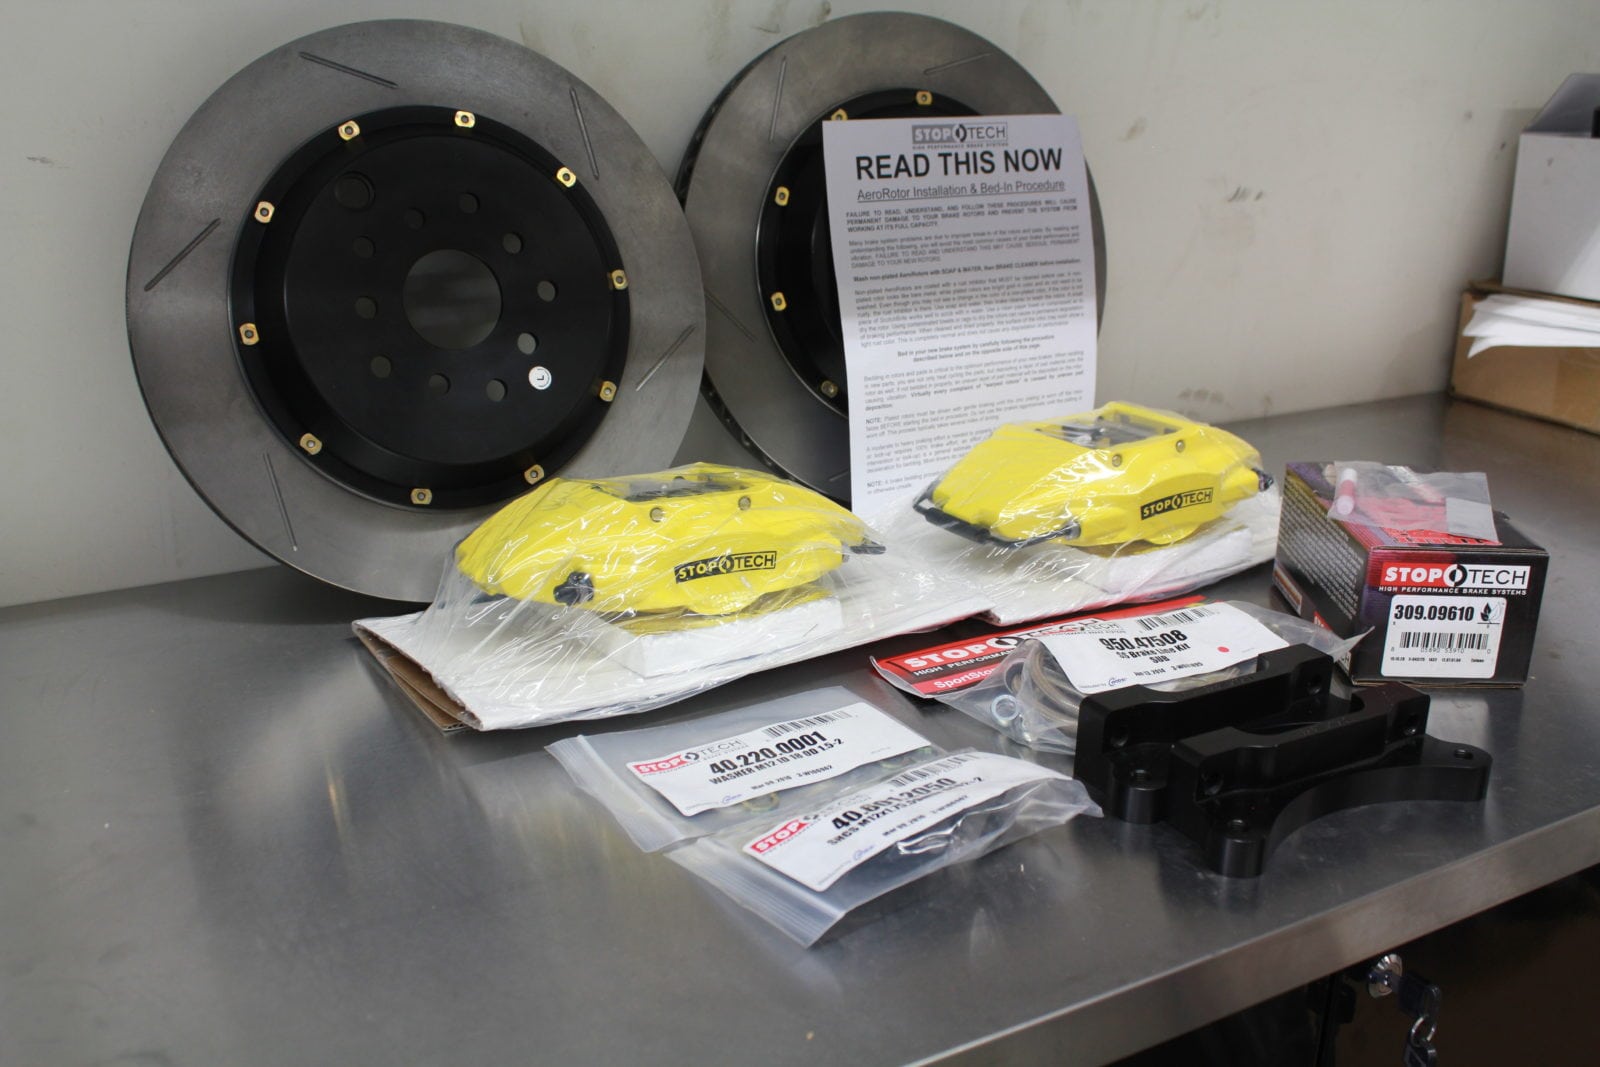
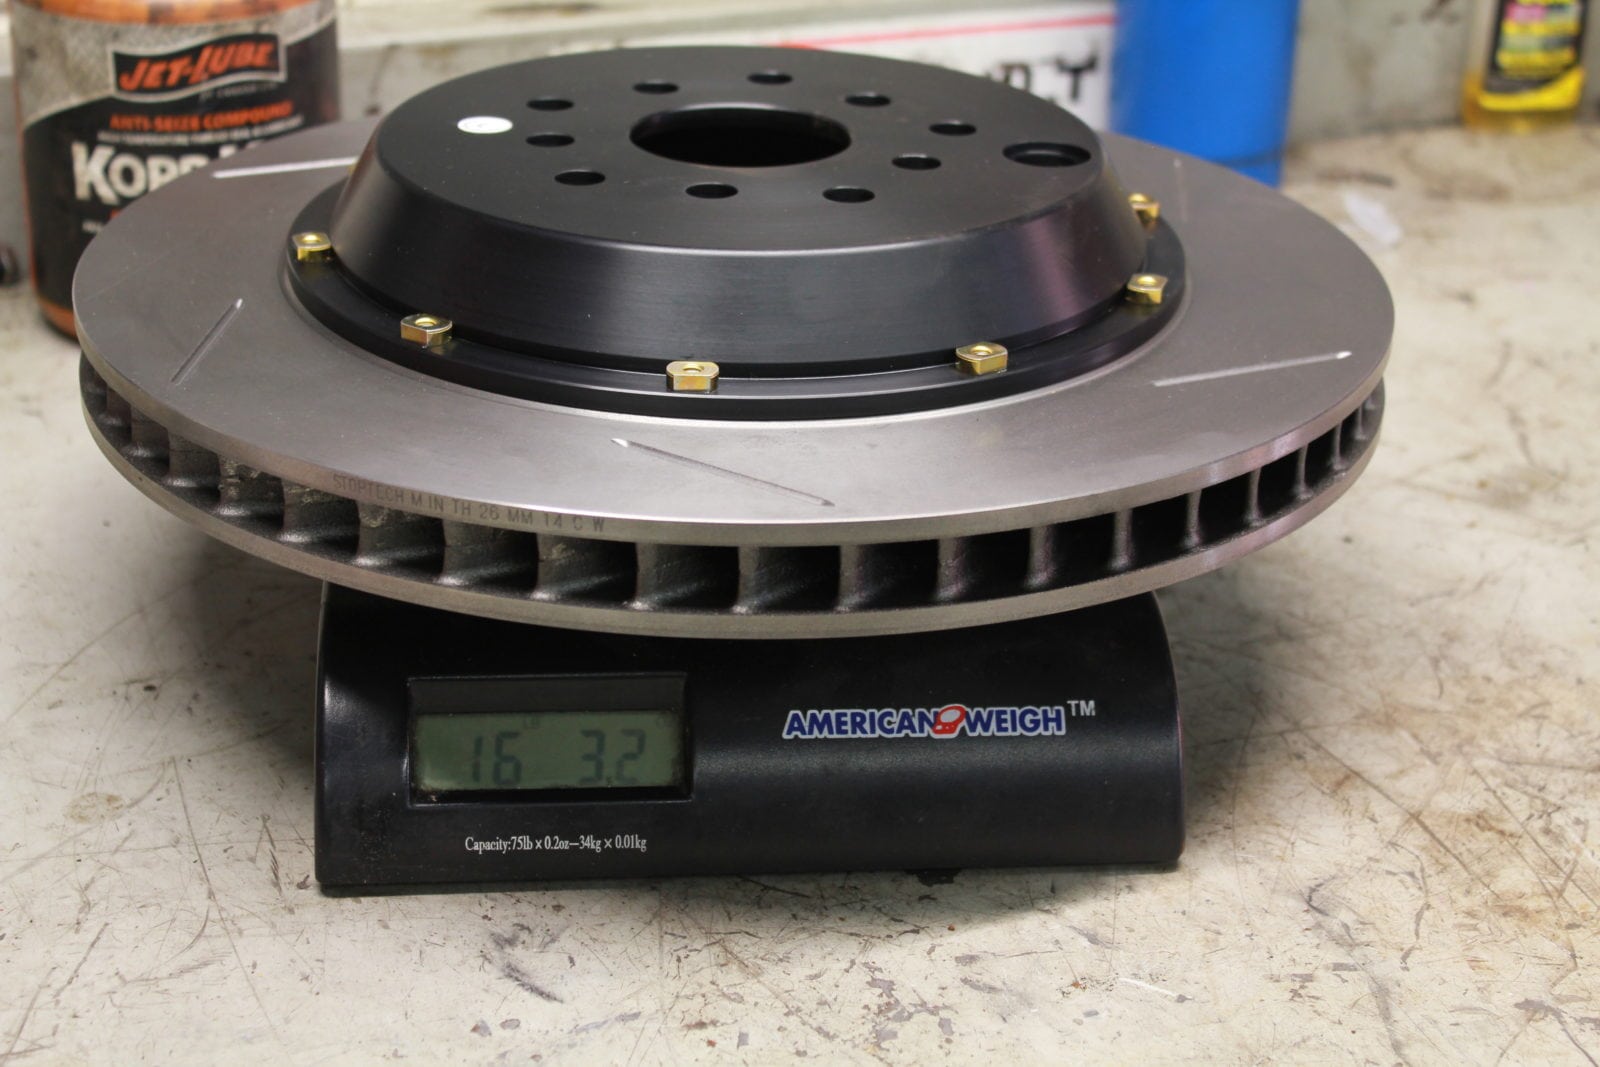
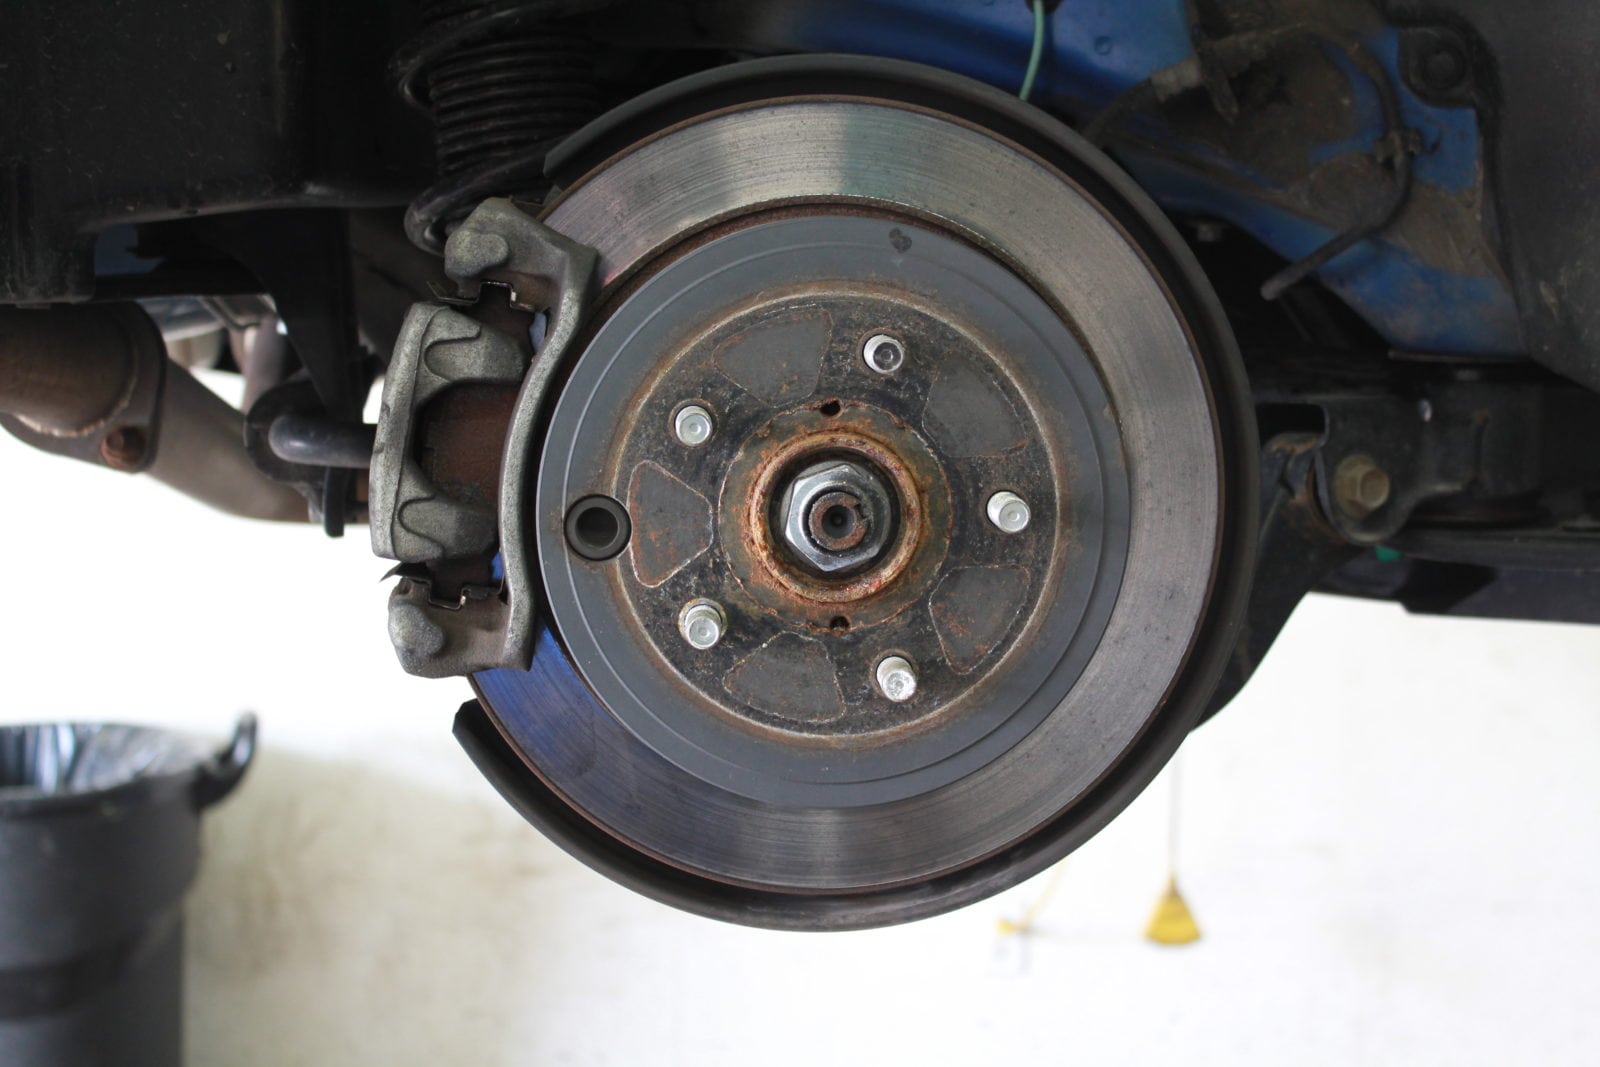
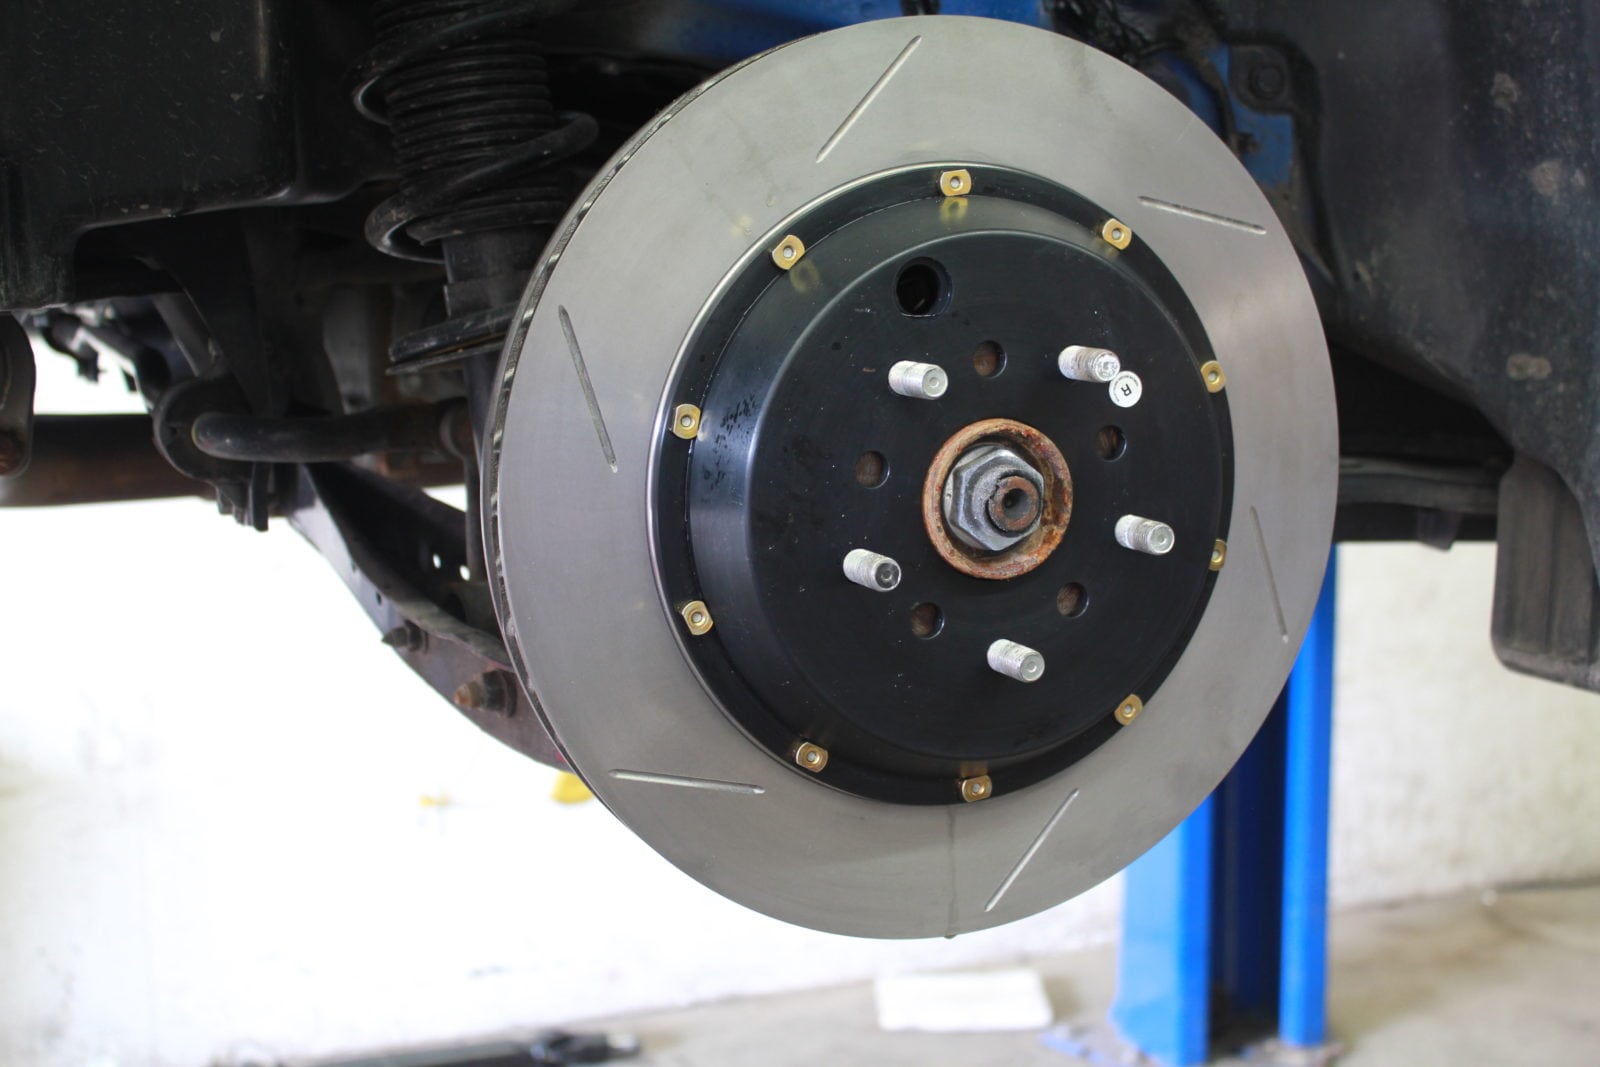
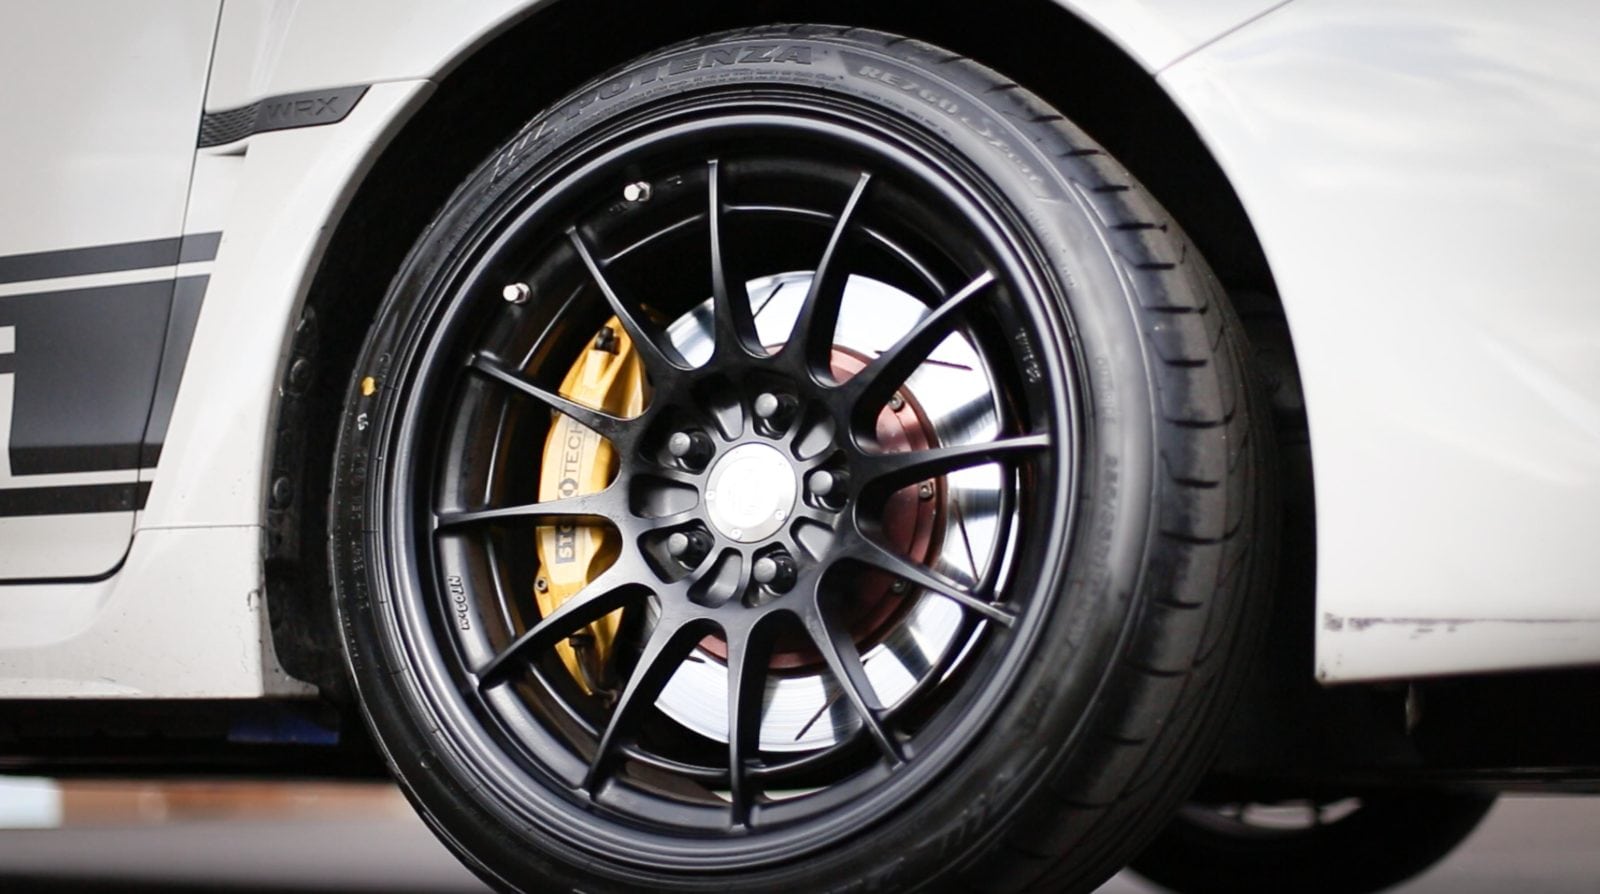
Because of this I had always planned to upgrade the rear calipers to the matching StopTech ST22 Rear Big Brake Kit. Obviously I ordered these in the matching yellow calipers and they come in a 345mm x 28mm Rotor Size. For those keen on details they will notice the rear rotors are actually larger in diameter then the front kit presently on the car by 13mm overall. The main reason is that there’s simply no other size offered for the rear of the car and I was also curious how the larger rear rotor would balance the braking with the front if running the same pads front and rear. Luckily these still clear under my 17″ Team Dynamics that I use for track wheels and we tested to ensure they would fit under the new wheels going on the car at the same time.
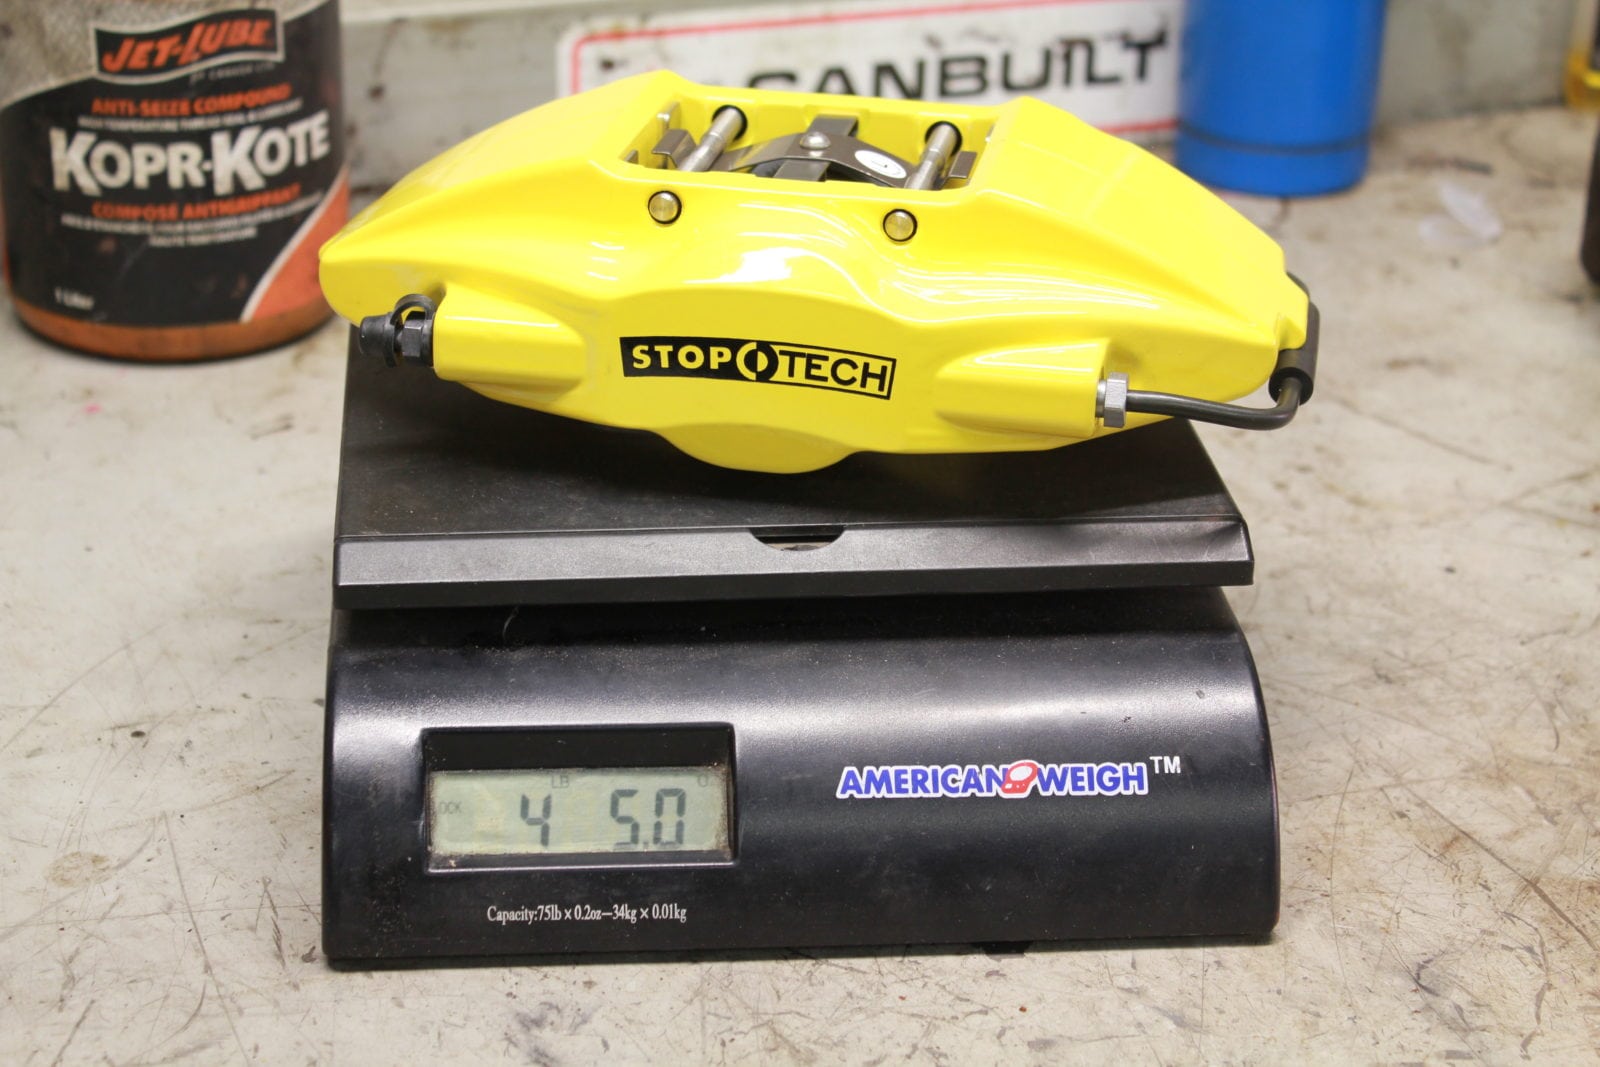
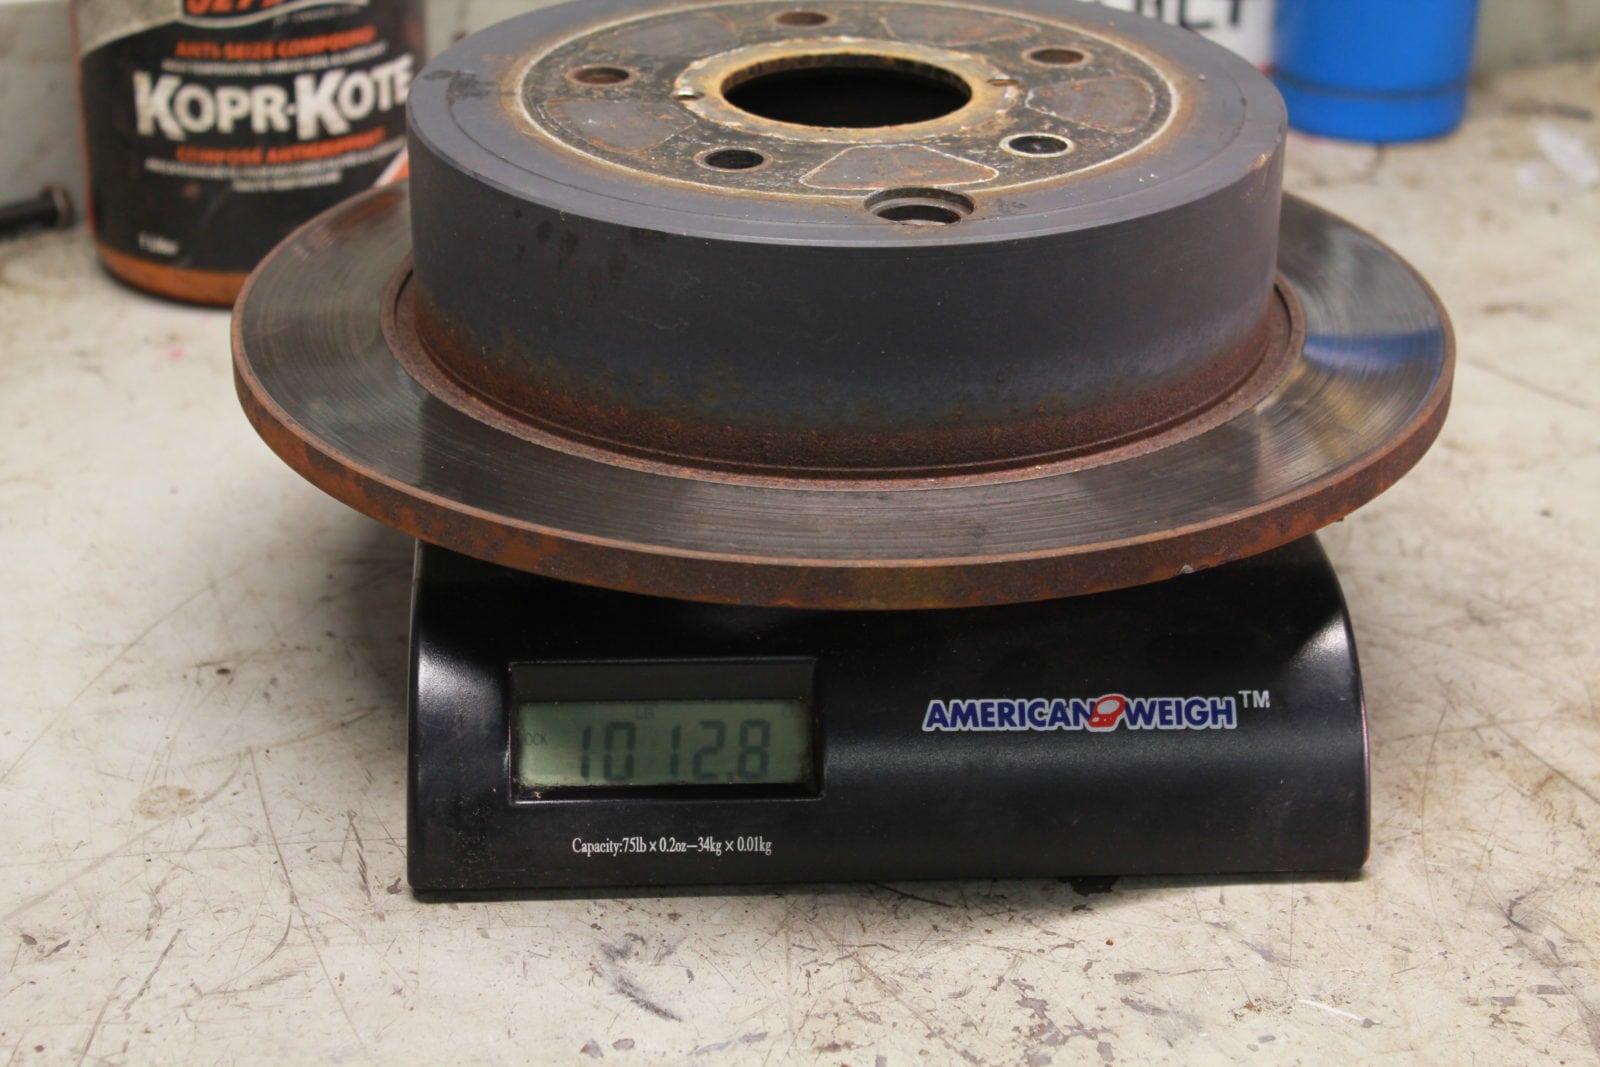
The single piston OEM calipers weigh in at 7lbs 3oz where as the upgraded StopTech 2-piston calipers are only 4lbs 5oz. That alone drops 3lbs per corner which is awesome. The stock rear rotors are 286mm while the new units are 345mm. Weights are 10lbs 12.8oz for the stock rotor and the much larger StopTech 2-piece rotors weigh in at 16lbs 3.2oz. So yes the rear rotors offset the savings of the calipers but when you think of the additional size of the rotor being gained it’s really not a big factor.

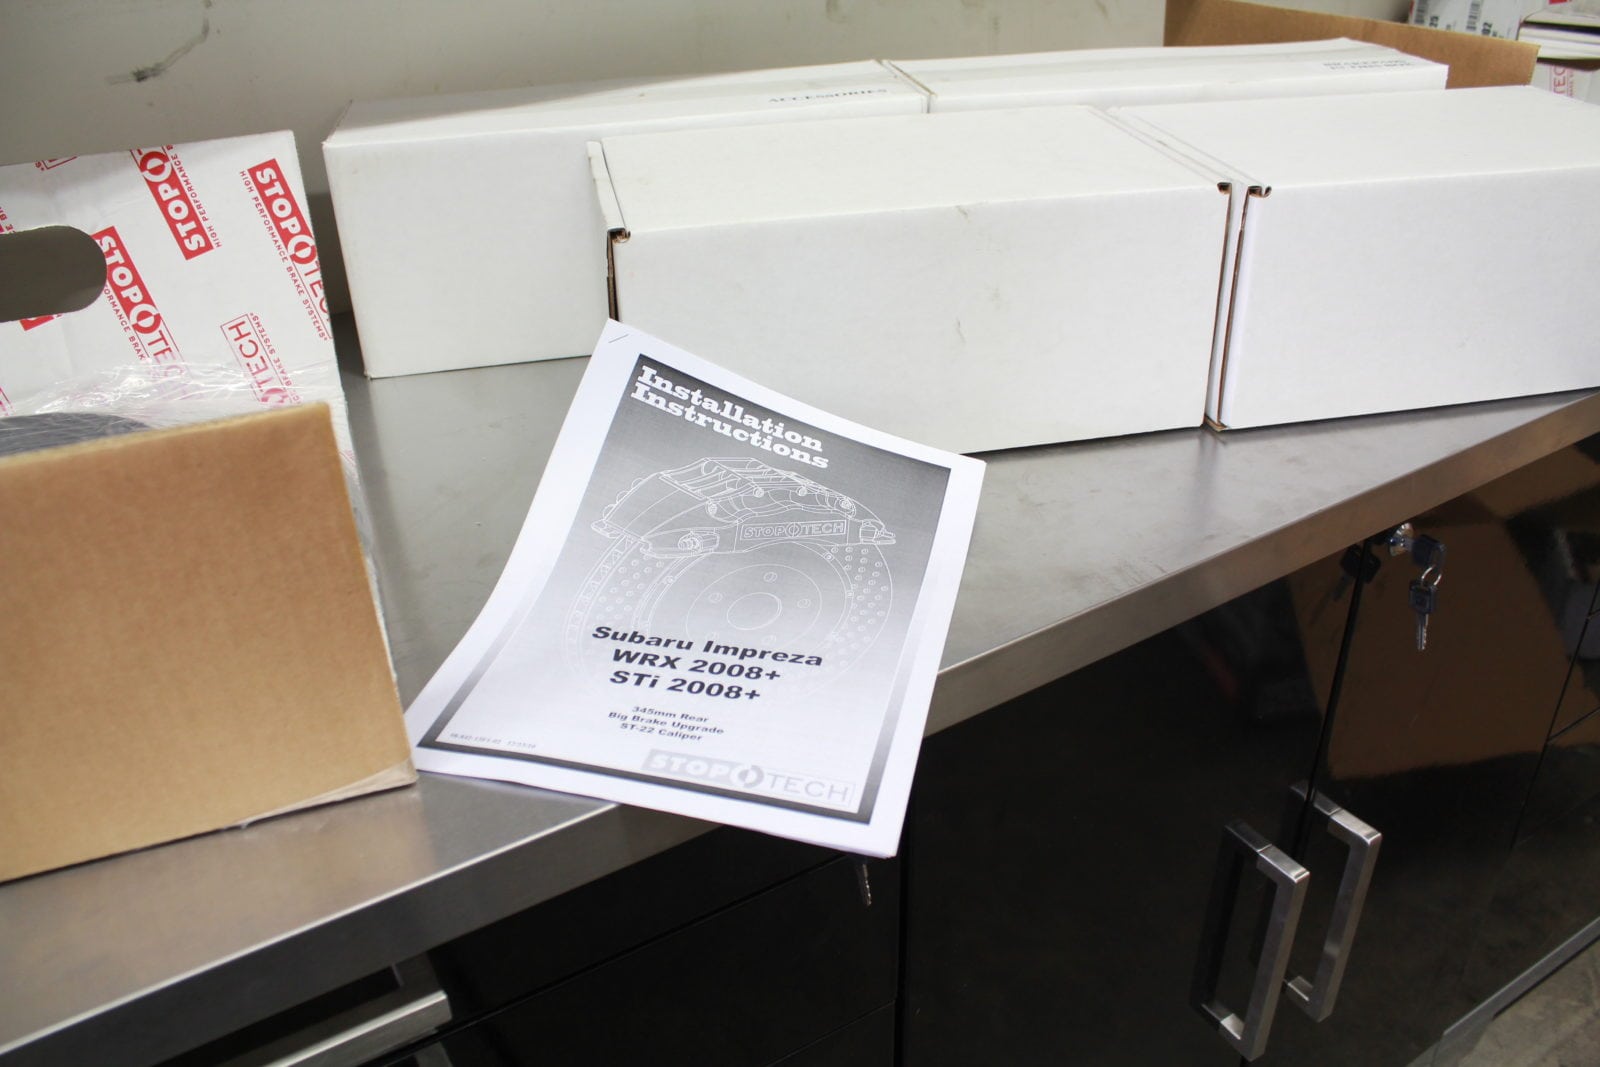
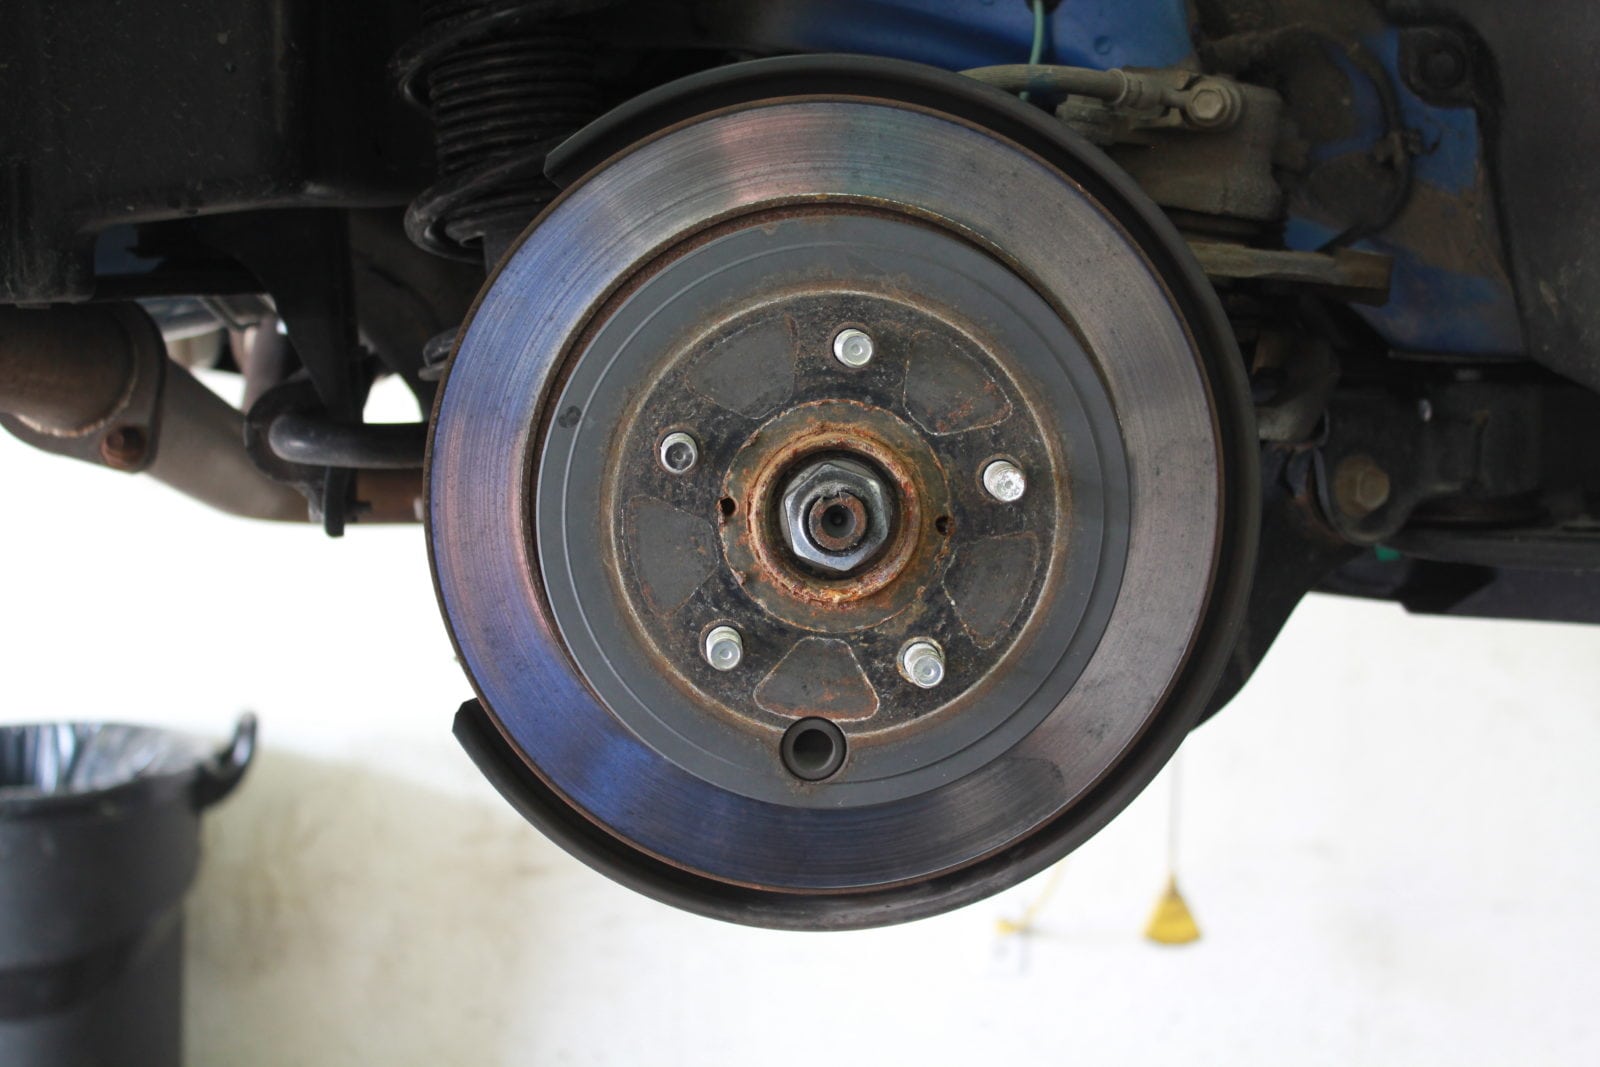
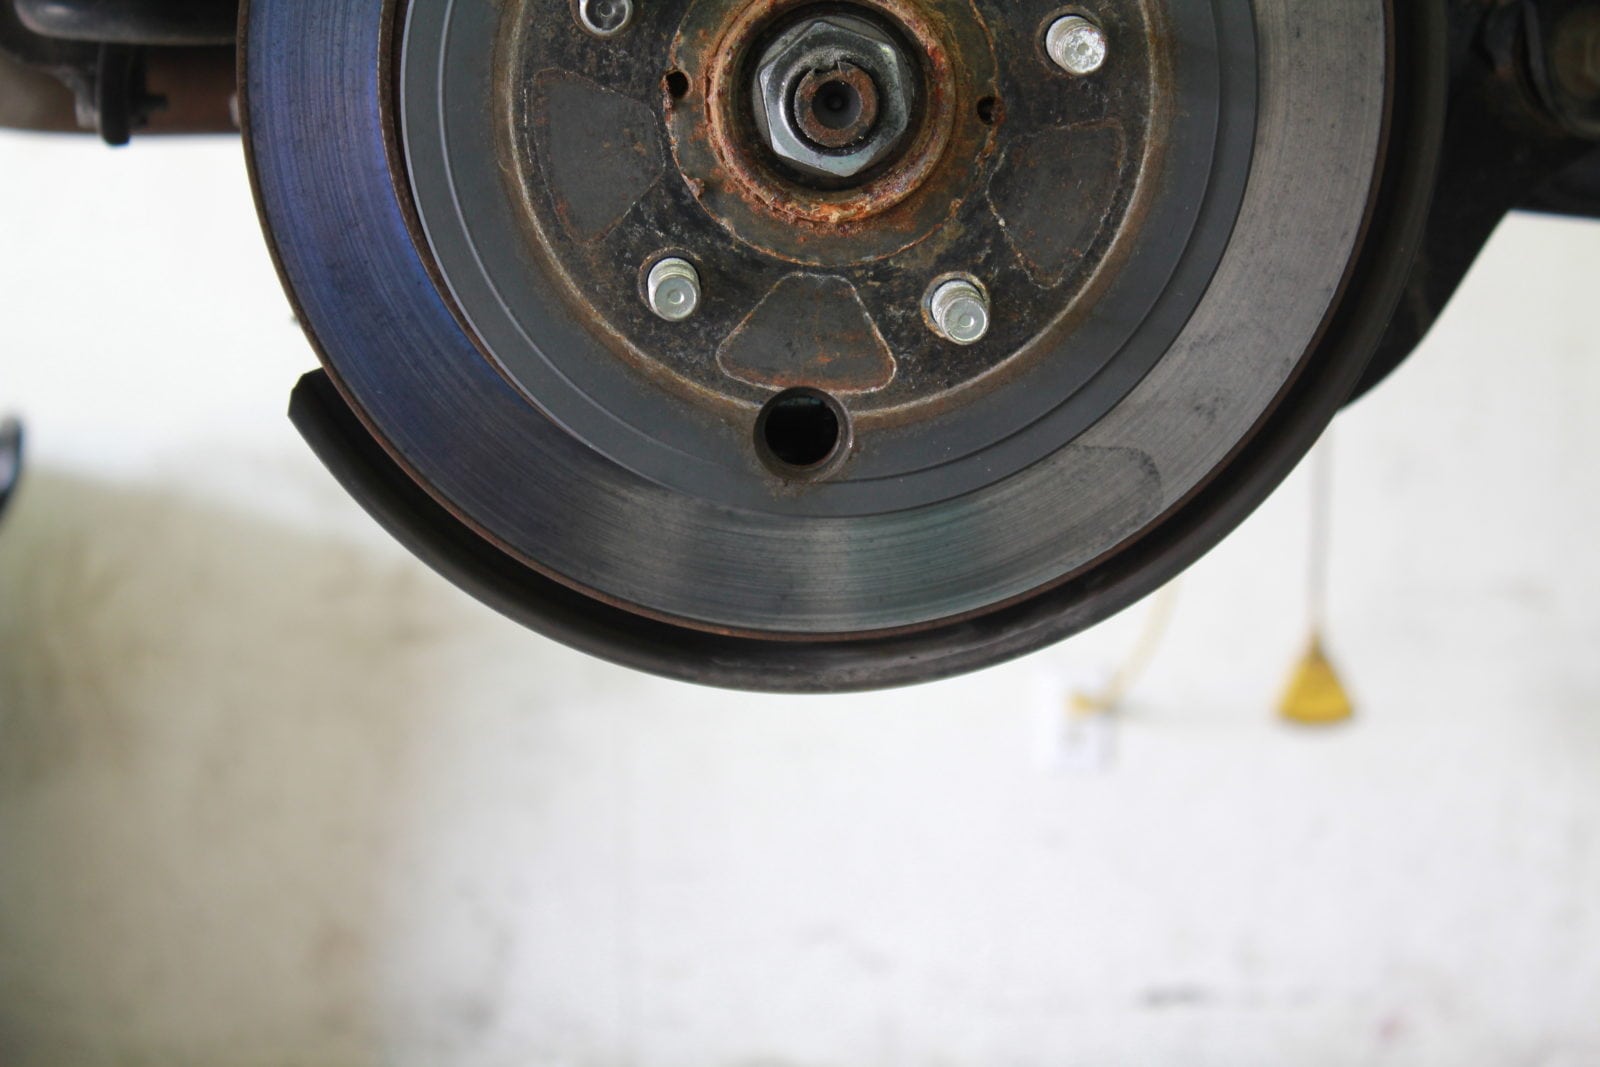
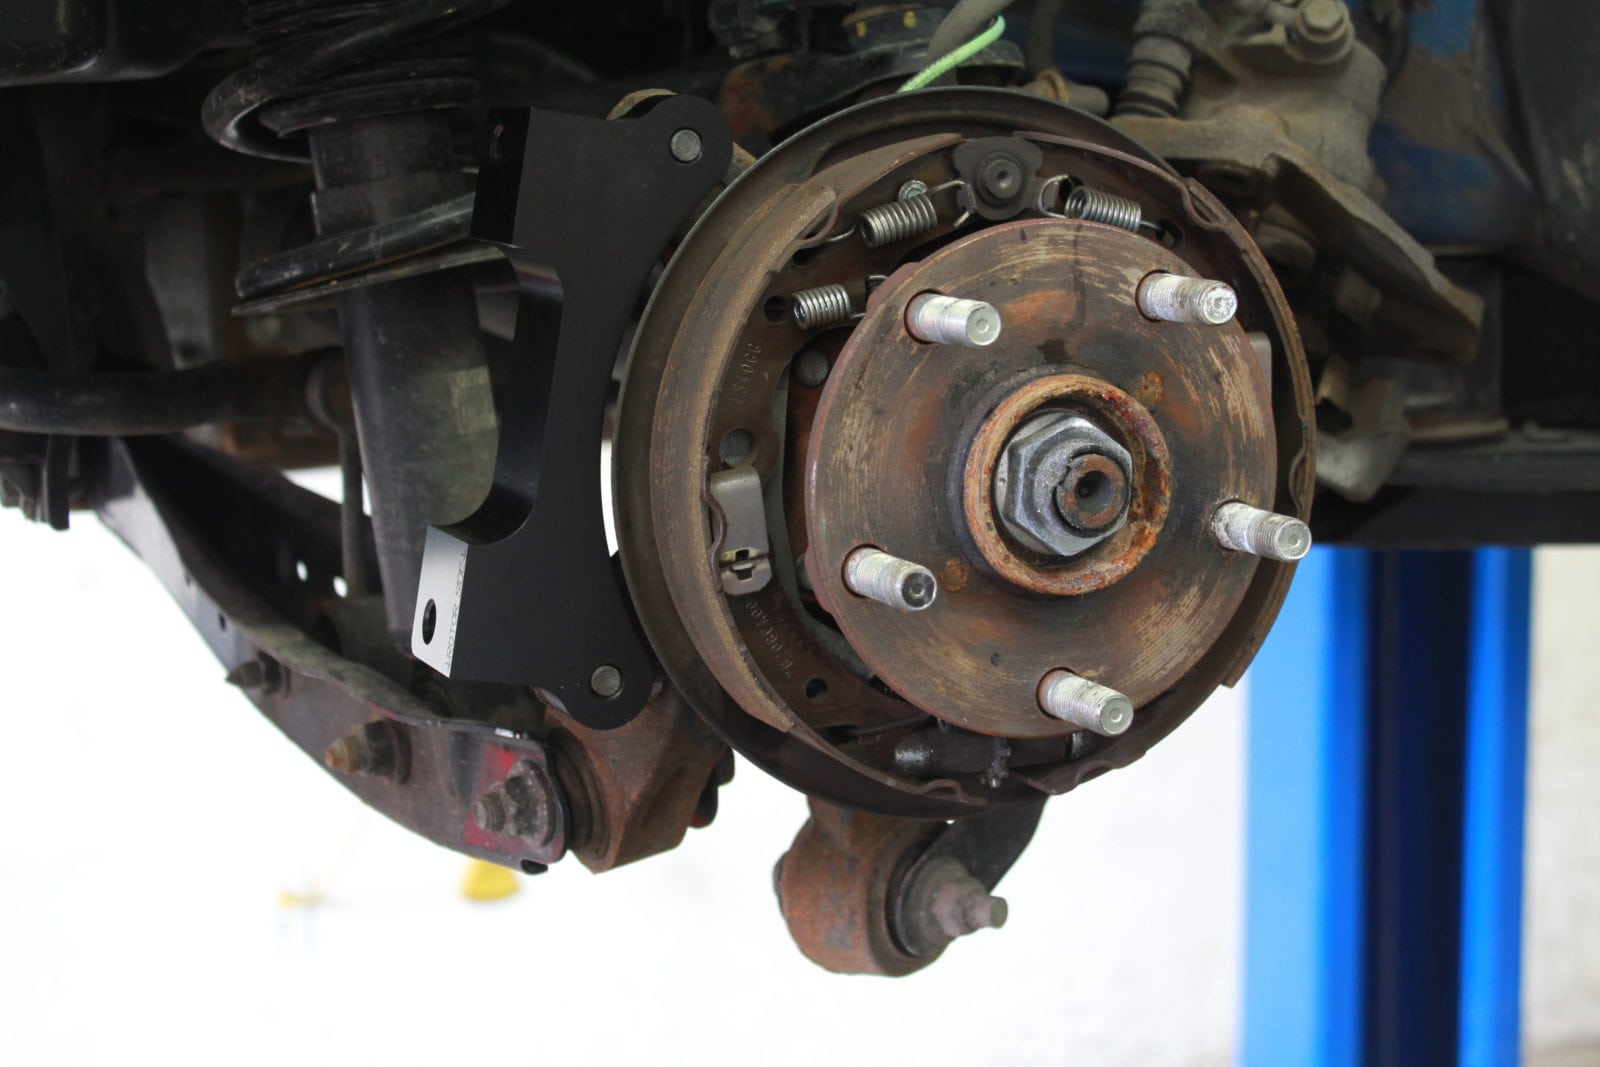
The installation is a little more complicated then the fronts but isn’t too bad, I would say a 5/10. The first order of business is to lift the car up and get the rear wheels off. You also want to make sure the e-brake is not engaged as you’ll need to remove the rotors and doing so with the e-brake engaged is not possible. With the wheels off you remove the 2 bolts holding the caliper to the knuckle and I chose to leave the brake line attached until I was ready to attach the new lines so the brake fluid wasn’t dripping everywhere. The next step is to wind the e-brake shoes in so that the rear rotor comes off easily. If you don’t do this step there’s a chance the shoes will get hung up on the inside of the rotor and make for a much longer install. To wind these in you remove the little rubber plug on the rotor hat and with it positioned at the bottom of it’s rotation you can look inside and see a little wheel with square teeth on it. Using a flat head you wind this down to bring the shoes closer together. It will only go so far but more then enough to get the rotor off by hand. When you can’t spin it anymore remove the rotor from the hub.
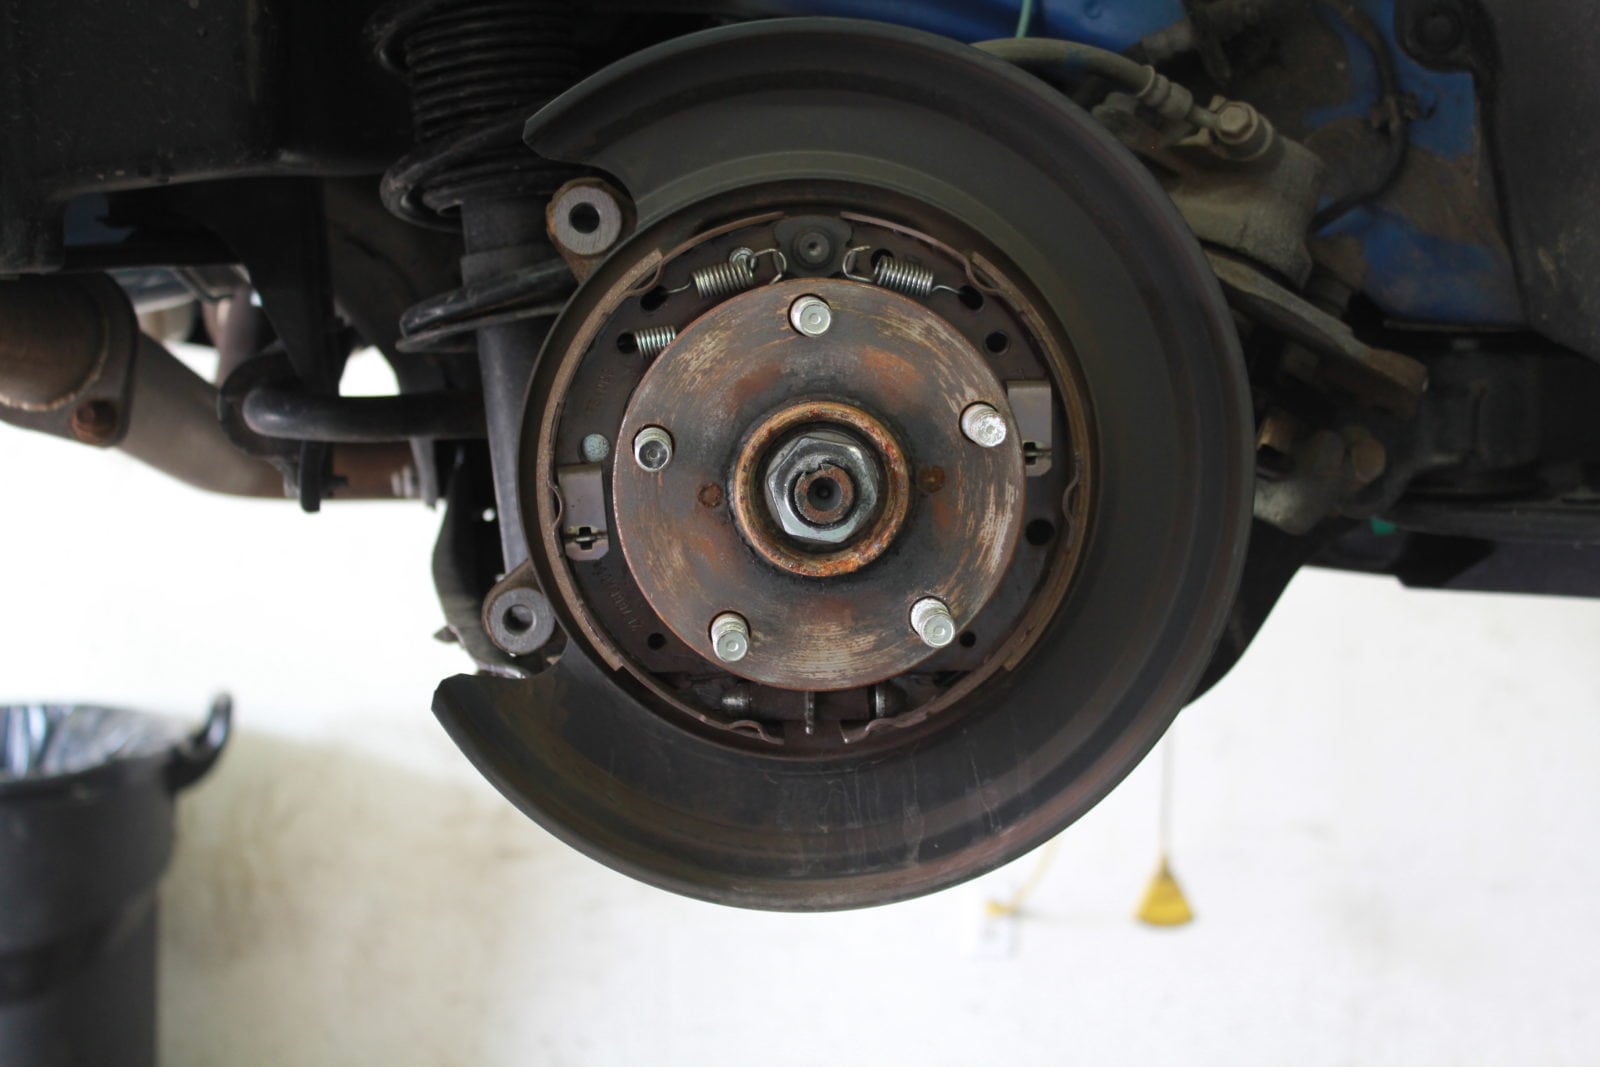
With the rotor removed you’ll see the e-brake assembly in front of you which you don’t really need to touch. The next step is to remove the dust shield on the knuckle assembly. This is held on in about 7-8 locations with a spot weld and rather then cut this with a cutting disc I prefer to use an air hammer or chisel/hammer and break the spot welds free to remove the whole shield and not leave any sharp metal. This should take a few minutes to do and when done just make sure there’s no left over pieces and test fit the rotor and check that it doesn’t contact anything. With the rotor installed you can then adjust the e-brake, you basically want to get this so the shoes touch the inside of the rotor and you can’t spin the rotor by hand. Then back it off until you can spin the rotor without it dragging on the shoes.
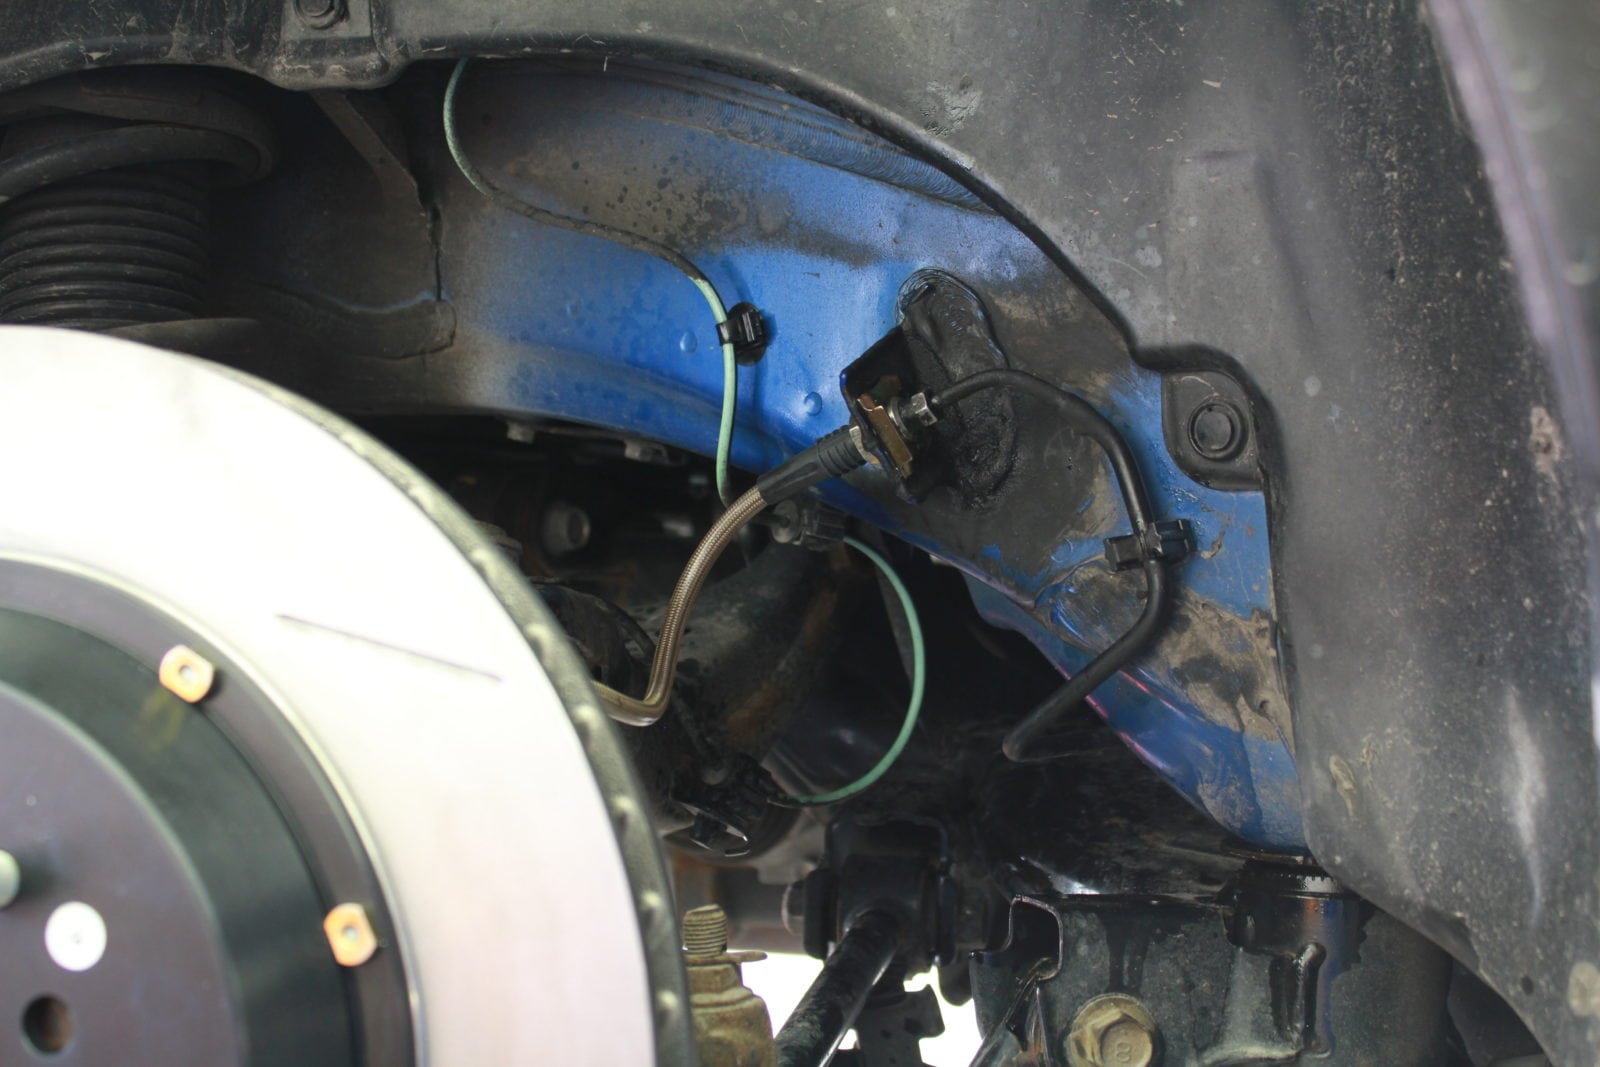
The next step is to install the caliper mounting bracket which uses the factory mounting bolts and torque to 50lb/ft. You can then take the new calipers and mount them to the bracket using the supplied hardware. These bolts are torqued to 40lb/ft. Next I installed the supplied stainless braided brake line to the caliper and secured the mid mounting point to the knuckle. I then quickly undid the factory brake line connection and connected the stainless line to the hard line connection minimizing brake fluid loss which makes bleeding the system much quicker. Lastly you’ll want to install the supplied StopTech Street Performance brake pads which coincidentally are the same pad shape that is used on the STi rear Brembo calipers.
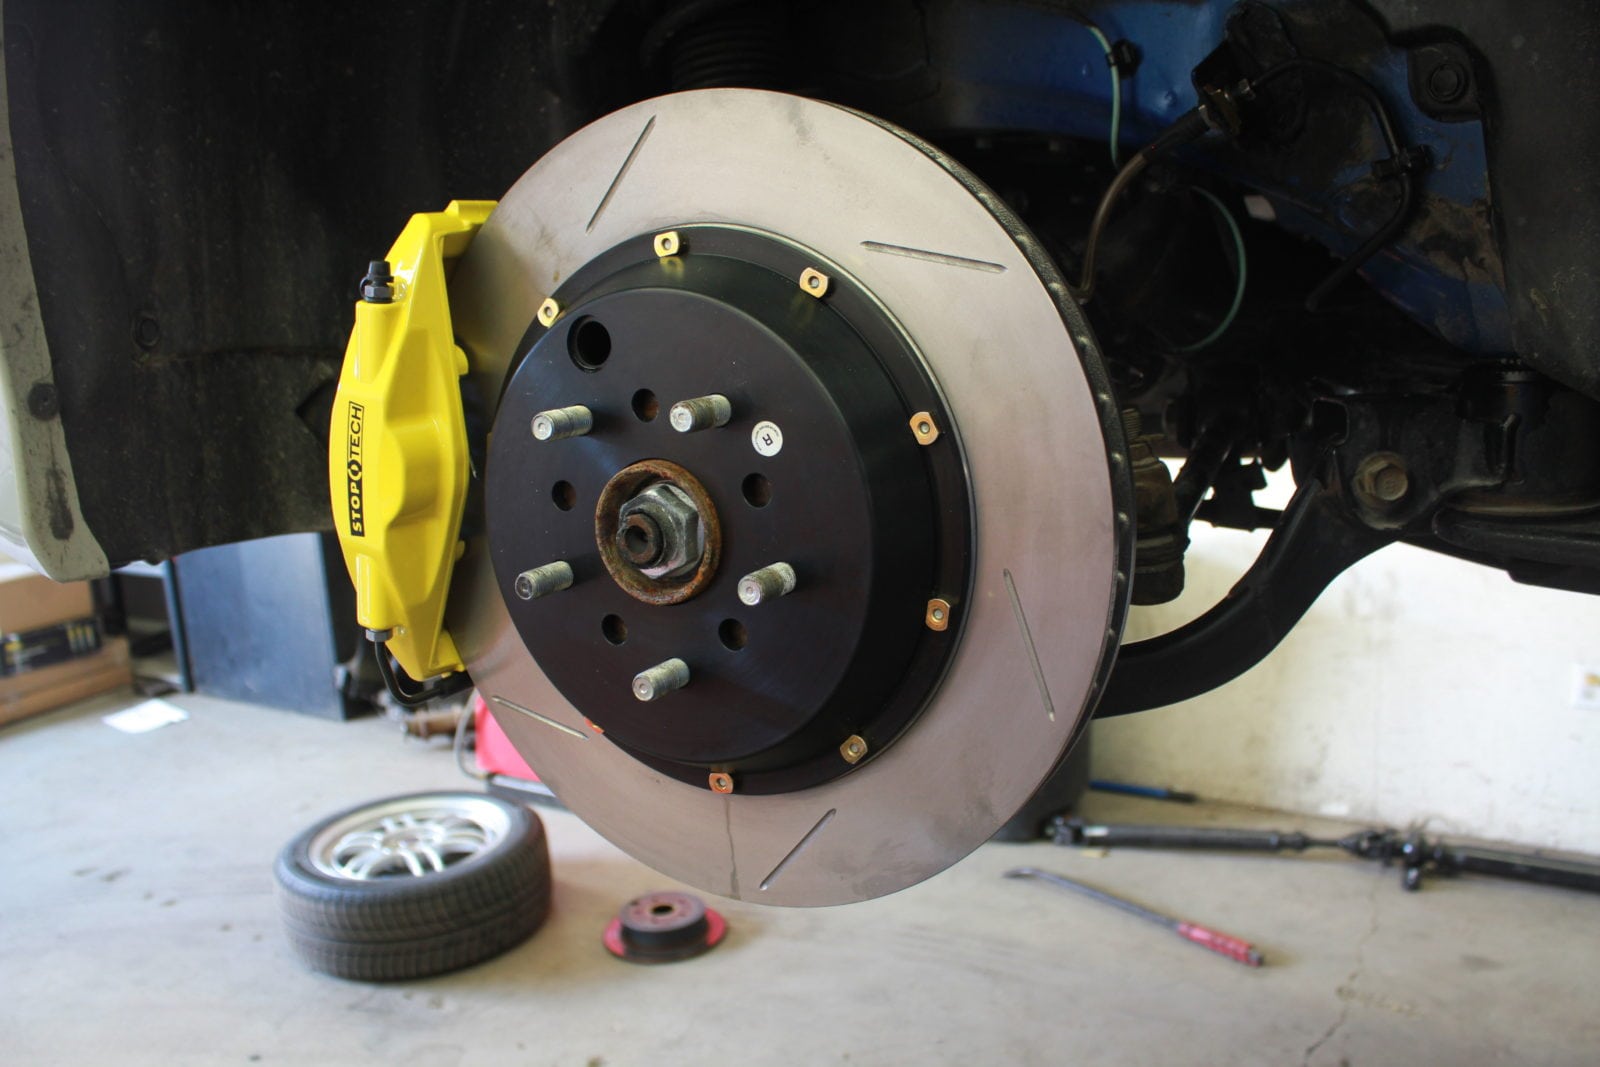

I then bled the system with AP Racing R4 brake fluid with the help of Mike. I first like to do a pressure bleed to get the new fluid to all the bleeders and then we did a manual bleed on each bleeder until no air was present. This pretty much concludes the installation other then putting the wheels back on and bedding the pads in to the rotors. The new brakes look absolutely amazing and I am more then pleased with the final product.
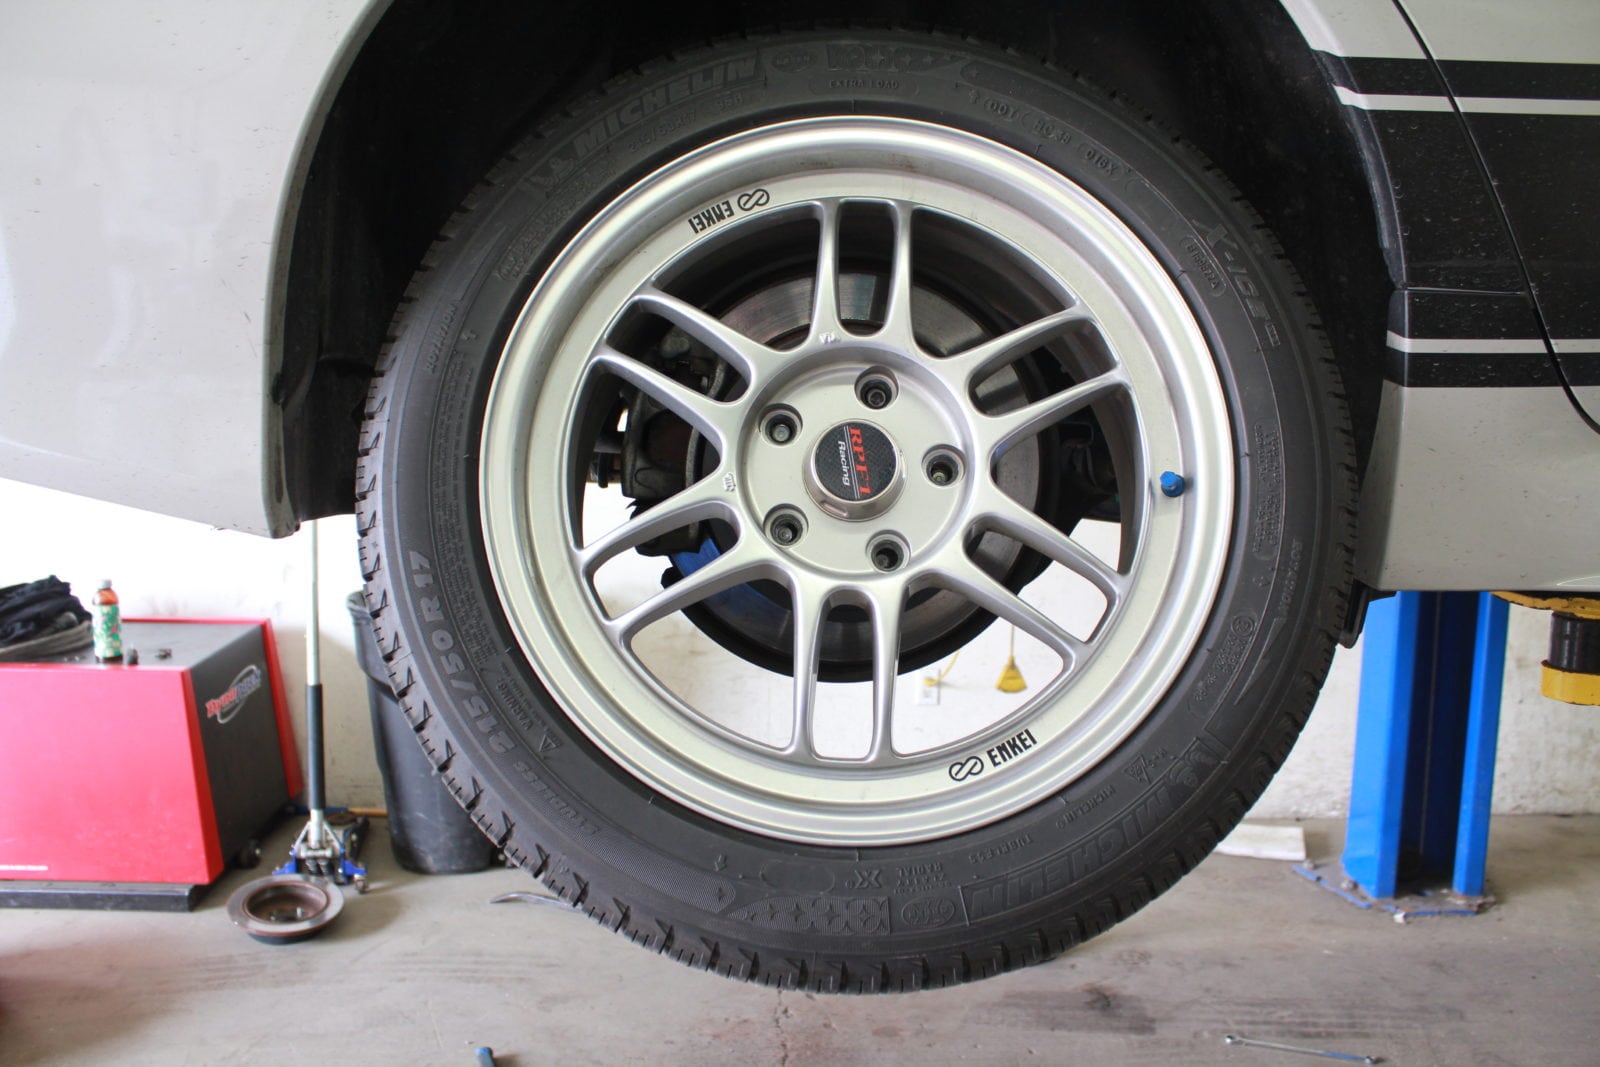
As part of this upgrade I finally had the chance to get my summer wheels powder coated by JP at Stripping Technologies. The wheels I chose were the Enkei NT03+M which I have really wanted for a long time. The thing about these wheels is that some sizes look good with a decently concave face and others, in my opinion, look horrible with a convex face. These also don’t really clear STi brembos very well but luckily the StopTech’s seem to offer better clearance. I went with an 18×9.5 +40 size and I had them powder coated in a Satin/Matte Black to match the graphics, front lip, rear spoiler and badges on the car. I had them wrapped in Bridgestone RE760 tires in a 255/40R18, we installed these same tires on Mikes 2007 STi and we were happy with the performance, road noise and reviews. I went 255/40R18 as I want to be able to drive these to the track and not have to change wheels for a school or casual lapping day without the worry of fender clearance. We’ll find out soon enough as the first Hanson school approaches.
With the new wheels installed the exterior look is pretty much complete for me, the only thing I still would like to do is tint the windows but that will have to come when I have time to stop by Autolinks. Initial impressions of the new brakes are awesome, exactly what I was expecting which was to get rid of the pedal travel that the stock rear calipers were still allowing. With the solid calipers the pedal now feels firm and is much easier to modulate. I would say it is very similar to stock STi brembos with a bit of improvement in terms of brake balance and weight.

To shake the car down before the first time attack event I took the car to Toronto Motorsports Park for an open lapping day. For this year I decided to have some decent track pads rather then struggle with pad fading. I chose to install Ferodo DS2500 pads front and rear before the lapping day which are a good HPDE/Lapping brake pad that is typically not noisy on the street and won’t kill your rotors. I will switch to the StopTech pads for the winter months when the Fereodo’s will not be able to get up to temperature. I didn’t take any lap times for the day as I was running the same RS-3’s I finished last season on which at that time had 9 track outings on them so they were in rough shape. As soon as I got up to speed on track I immediately noticed the difference with the rear brakes. The car now stayed flat with no rotation in the heavy braking zones. It also allowed me to trail brake into corners much more as the brake application is more precise and controllable. I didn’t have any issues at all with brake fade which is likely down to the new pads as well as better brake balance front to rear which is more evenly distributing the weight to the brakes.
So what would I do to a 2015 WRX? Stage 2 and upgrade the brakes!
Thanks to these companies that are helping with this Project
COBB Tuning – COBB AccessPORT and COBB Cat-Back
Mad Graphics – Full Vehicle Vinyl Wrap and Side Graphics
Grimmspeed – License Plate Relocation Kit, Lightweight Crank Pulley
Turn In Concepts – Shifter Bearing and TGV Deletes
Killer B Motorsports – J-Pipe
OnPoint Dyno – Dyno Tuning and Testing
Uni-Body Collision – Paint Work (Emblems, Lip, Trunk Spoiler)
StopTech – Front & Rear Big Brake Kits
IAG Performance – Street Air/Oil Separator
Kartboy – Short Shifter Arm
Stripping Technology – Powder Coating Wheels
Turn 14 Distribution – Front & Rear Big Brake Kits

James
Looks great!
Laszlo TOTH
*drool* *drool* What an amazing improvement for a ’15 WRX. The car’s pretty amazing from the factory with just a Stage 1 protune, and the brakes are probably the weakest item of the package.
Putting a BBK on it that is matched front to back is a stellar improvement to an already outstanding chassis. I want one! 🙂
Charles
Will they fit 18×8.5 +40 rpf1’s ?
ChrisTouge
We would have to measure them with the templates that StopTech provides.
Doug
Did you have to run spaces for the NT03 to clear the st40 bbk?